Update on Rossi RH review and new scabbard
Rossi R92RH Ranch Hand "Mares Leg" Review
Rossi R92RH Ranch Hand "Mares Leg" Review
After much shopping around at local dealers, no one had one in stock or had seen one available as of July 2011. I found this strange since there are so many reviews on line. Next I searched about a dozen on line gun sales sites and again no one had stock. Finally I found one on Gun Broker in 44 Remington Magnum priced at $425, plus $30 shipping. I used a local FFL for transfer adding another $25 for a total price of $480. I waited 6 days to receive it and do the transfer.
First thing out of the box I noticed how dull and washed out the stock finish was compared to the lustrous looking finish on Rossi's website. Next issue was the stock was cracked at the top rear where the butt plate screws into the stock. Since the grain was in such a way that the tip of the stock would eventually crack off completely; this was not acceptable. I cannot believe the dealer on Gun Broker did not notice this and say something about it. Perhaps that is why it was $75 cheaper than other dealers. I called Rossi, and they said they would warranty it by sending a Fedex pick up for the whole gun. I was reluctant to give them the whole gun just for the stock, so I said I would send them just the stocks. They replied they would not pay for shipping unless the whole gun was returned by Fedex. I paid $8.75 for shipping the fore end and butt stocks back to them hoping that they would actually match the grain and color. (Update: After six weeks, I finally received the replacement stock Neither one of them were even close in match so I decided to refinish them myself. I took about an hour of custom fitting the forend to get it to fit right. They are not made to fit universally. Now I know why the wood to metal fit is so poor.)
Next, I disassembled the gun to find it was filled with black sand like grit, and rust starting to form on the magazine tube, hammer spring pivot and rod, and the lower tang. I spent nearly an hour cleaning the gun. Also, when disassembling the gun the cartridge guide screws and feed ramp screws where so loose, they would have fallen out if I had not cleaned and inspected it first.
After reassembly, I fed dummy rounds (snap caps) into the tube. The gate was so tight that I could hardly get the rounds into the magazine tube. I had to loosen the screw just to get it to feed. I cycled the lever and bolt and fed the first round into the breach. Pulling the trigger was not too bad but had some gritty feel to it. The measured pull was 3 1/2 lbs. I cycled the slide extracting the round and loading the next no problem. This time I gently squeezed the trigger and the hammer stopped at half cock position. It did not fall completely and if a live round had been loaded it would not have fired. I continued this procedure for all six dummy rounds. As the last round extracting from the breach, it failed to eject from the gun. Not having a round in the floor feeding up the ramp feed, the round did a stove pipe and sat in the magazine well. Repeat of the process produced the same issues including the hammer stopping on half cock unless the trigger was pulled sharply and held back to full stop. This continues to be a problem unless you pull the trigger hard and hold it down to full travel to prevent the sear from locking into the half cock groove.
I then completely disassembled the gun and did the recommended stoning, buffing and slicking of the parts as outlined by so many reviews. I am not new to this, I do many trigger jobs and slicking on 1911s, and single and double action revolvers as well as other lever action rifles. I reassembled and tested with dummy rounds. Just working the parts and polishing them, I was able to bring the trigger down to a smooth and reasonable 2 1/2 lbs with no spring changes, a reduction of 1 lb from the first test.
I ordered the Lee Gunsmithing Slick Spring kit and installed them in steps it according to the instructions. I found the extractor spring to be nearly impossible to install since it is so much longer than the original. It is supposed to be lighter than the original, but I did not find this to be true. The rounds ejected even harder with the Lee spring. Next, I replaced the trigger spring from the flat factory to the wire Lee Spring. Upon testing at this point, the trigger failed to lock up to the hammer sear properly and was so light, it was not safe. Yes, it was installed with the curvature down as instructed. I removed it and replaced the factory.
Next was the hammer spring, the same problem was found. It did not have sufficient force to cycle the hammer and caused the half cock problem to be more prevalent.
I replaced the lever lock up spring and found no noticeable difference in the function. In my opinion, the Slick Spring kit is a complete waste of money. If you simply take the time to clean the gun properly and dress and polish the required parts, you can make this gun function safely and just fine.
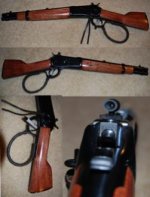
The very last thing I did was order a peep sight from Steve's Gunz to replace the useless safety. Upon fitting it per instructions I found again a very poor wobbly fit. Steve from Steve's Gunz said it was Rossi's fault because they do not hold specs in drilling the hole for the safety. I was able to rotate the ferrule bushing on the peep sight and file a smaller groove for the retaining pin to fit tightly into. This did fix the problem of the wobbling peep sight. However, another problem is that the peep sight hole is so small that it is almost impossible to see the front sight in any but the brightest light. You could remove the threaded insert from the peep sight post and have a bigger hole or I just may drill out the insert slightly larger to give a better view without getting too big. Also the dove tail blank he sells to fill the slot from the removed ramp sight was so loose it fell out when the gun was rotated sideways. I had to put considerable shims under it to fix this problem. Per Steve's Gunz, again it was Rossi's lack of tolerance to specifications. He suggested I peen the metal from around the dove tail groove to fix the problem, but I was not keen to make the gun fit an aftermarket part that would prevent later installation of the original part. The shims were a better option and retain the original condition of the gun. I did replace the plastic magazine follower with a stainless steel follower, it works fine.
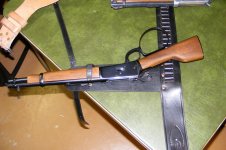
Overall, I was excited to get the gun and shoot it. It is an esthetically cool gun and brings attention at the range. It is just plain fun to shoot. That being said, it has its faults in poor workmanship and poor wood to metal match up. Most of these problems can be corrected if you know what you are doing, but for the average Joe shooter, it probably is not desirable to need to do so much work to get a NIB gun to function properly. I refinished the stock using Danish Oil and wet sanding ten coats in with 600 grit wet sand paper. I finished off with three coats of sprayed polyurethane satin finish. Some leather shoe laces made a nice finish to dress out the loop handle.
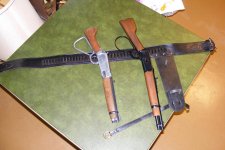
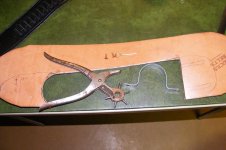
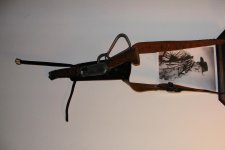
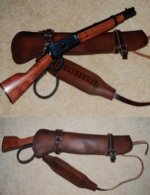
After much debate on a holster or scabbard, I found Cochise Leather out of Arizona. He has very nice leather at more than reasonable prices ($165) compared to the other stuff out there. I ordered online and spoke to David LaFlair in person (he returned my call the same day), it was delivered two weeks later. A very nice and functional piece of leather. I highly recommend David LaFlair and Cochise Leather products. Pictures below.


