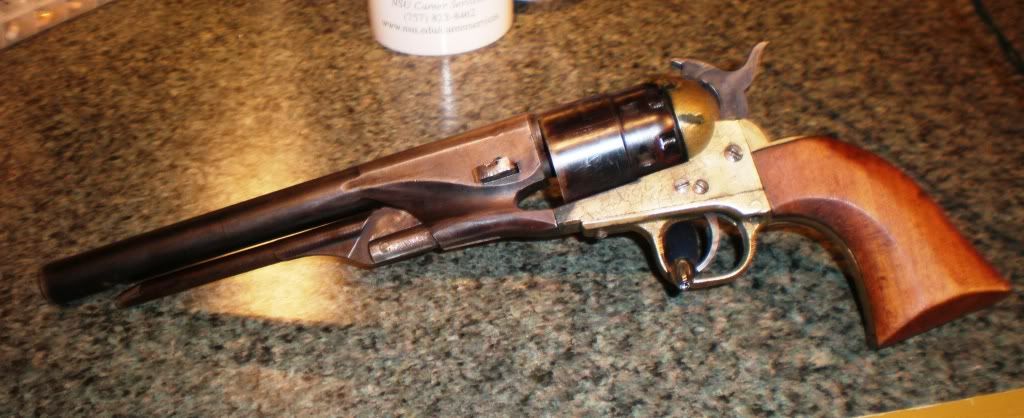
Doc Hoy, where are the pictures?

Some lessons I learned

I am learning a lot about trigger pull working on this revolver.

I have also determined that I like testing trigger pull buy simply removing the nipples. I think Mykeal recommended that technique.
 
Nice work Doc! What kind of bluing process did you do? I have an old Pietta 1860 that I have been thinking about re-finishing just for fun. The gun looks OK but, I like metal finishing and rust bluing. I thought about trying to CCH the receiver if I can find an economical furnace.
 
MRAPPE

I used Van's Bluing. It provides a color which is very much like the blue on the Colt second and third generation pistols. It is a deep shiney transparent grey rather than the black that you find on some of the replicas.

This means that surface prep is very important since the blueing hides absolutely nothing.

As far as CCH, that is in my future but I think I will use charcoal and bone with air blown in to raise the temp. I have a lot of research to do on that topic before I start and it will be on a piece of scrap rather than on a good steel frame.

Thanks for the compliment and the continuing conversation
 
I recommend....

...not buying the whole kit. The citrus degreaser doesn't work as well as acetone.

I like the oil but can't compare its performance to simple gun oil. I may have more to say on that later.

I found that I almost had to work the finish in with real fine steel wool. The first application looked so uneven I was about to write a nasty letter. But working the finish in with repeated application and then smoothing with fine steel wool while the bluing is drying makes the finish more even.
 
Well I bought a barrel catch from DGW....

...but the more I looked at the barrel, the more I realized that the original owner had taken a file to the dovetail on the bottom of the barrel. There was no dovetail left, only 90 degree walls. I don't know how the guy intended to put the barrel catch into the barrel.

There is no way a standard barrel catch will work because the base of the dovetail (what is left of it) is wider than the base of a barrel catch. Consequently I had to make a barrel catch with an oversized base. I also had to go to town on the barrel with a file to put angles in the barrel to catch the dovetail of the barrel catch.

I started with a piece of 3/4 inch round stock and milled it down to the right profile to catch the dovetail I filed in the barrel.

Barrelcatch1.jpg


Next I releaved the catch to allow for the length of the loading lever.

BarrelCatch3.jpg


I smoothed the contour of the catch on a belt sander. (Steel gets hot pretty quick and it is hard to hold onto the piece of steel which is roughly 3/8 by 3/8 by 1/2 with ungloved fingers.)

I drove the catch into the barrel .

BarrelCatch6.jpg


Notice that the catch has not been finish to accept the lever latch, because I don't yet know where it is going to need to be filed.

BarrelCatch4.jpg


I also mate a sight for the pistol. Here it is with both parts in place.

SightandCatch1.jpg
 
Last edited:
It's looking good, Doc. I envy your tooling capabilities. I'm pretty much limited to hammers and bigger hammers. :)
 
The only measurement I took for this part was...

...the dimension of the base from angle to angle. The rest was done with just a comparison of a workable catch.

The fit was good and I had to go to a bigger hammer to drive it in place.

So I am a "bigger hammer" guy too.

If I had it to do over again, I would make it wider so as to cover more of the width (from side to side). Maybe I will try again. One thing for sure, an OEM catch is out of the question.
 
Made the plunger today

I have a plunger on order from DGW. But since the part is so simple in design, I decided to make one. (Always good to have an extra plunger laying around)

Turned it down from 3/4 inch round stock. Milled the slot and drilled and tapped the hole for the screw.

Plunger4.jpg


Plunger2.jpg


Plunger1.jpg


Plunger3.jpg


It works pretty good.
 
JM1

It did/does have a plunger but the plunger had been worked on using a coarse file. In addition the screw was removed and replaced with a poorly fitting pin.

Since I load with a press almost all of the time the loading lever is really for looks only. But this one seems to be every bit as functional as the original. As I said, I have a plunger on order but just wanted to try making this one.

When working with a mill and small pieces I am learning that there is a strategy in to sequence of steps involved. Both with the lever catch and the plunger, the parts were almost completely finished before I removed them from the waste stock This gave me something to hold onto, gave strength to the piece while I was working it and actually resulted in less scrap.
 
Doc, I don't mean to derail your thread, but do you think that the kind of work that you're doing could be done with a drill press and the appropriate bits? I've got a 15" Delta floor drill press and I've always wondered if I could do stuff like that if I had an end mill set and the proper table. What do you think?
 
Back
Top