Maggs,
I think your understanding of the fit is correct.
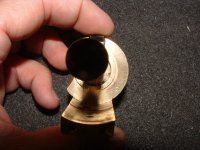
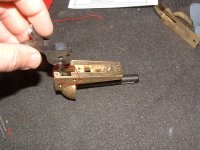
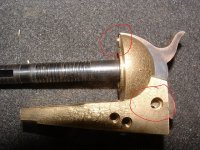
Hawg's photo is very helpful.
In your photo the geometry of the hammer and frame appear to be correct.
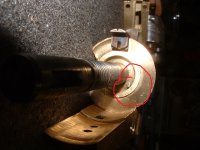
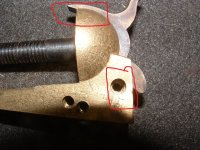
You might try fitting the cylinder on the arbor, and the hammer (without the hand) together to verify the alignment. The top of the hammer comes to rest substantially above the top arch of the frame in order to keep (what I call) the "palm" of the hammer properly in contact with the cap on the nipple.
When the gunsmith talked about a "lot of fitting", he was referencing the parts fit on handguns he is accustomed to dealing with on a routine basis. That would be cartridge handguns, manufactured to exacting standards. As regards blackpowder revolvers, the precision technology is 150 years old. So what is "a lot of fitting" to a present day gunsmith is more or less common to persons who deal with BP revolvers. I think you might start with steps in the following order:
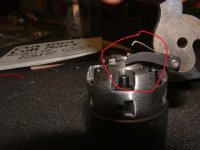
1. Put the cylinder on the arbor and verify that it spins easily. A little lube on the arbor is appropriate at this point.
2. Put the hammer (without the hand) into the frame and slide the hammer screw in place but don't tighten it.
3. With the hammer screw still loose, verify that a) the hammer moves easily and b) that the hammer comes to rest in such a way that thee palm of the hammer is even with the hole in the nipple. There may be some "scratchiness" in the movement of the hammer but this is okay. You'll clean that up later.
4. Lightly tighten the screw and verify that the hammer still moves easily.
Once these steps are complete with satisfactory results, you can start to worry about the hand. The Pettifogger articles will be helpful in understanding how the hand should engage the cylinder ratchet and what should be the position of the cylinder as the hammer is drawn back. (Indexing)
The hand should be hardened at the factory and thus it is not likely that you will have to do much filing on the hand, (Too easy to get below the hardened part of the metal.)

") If you get hung up, don't be afraid to ask on here as there are a lot of good folks who can help you out. Doc Hoy is sort of akin to a "wizard" when it comes to some of the things he's tackled and done and a lot of others are just as knowledgeable. I hope you'll keep us posted on your progress and don't forget . . . we all love pictures! Good luck to you on your project - I'msure it will be very nice when you are finished. And welcome again!
If you get hung up, don't be afraid to ask on here as there are a lot of good folks who can help you out. Doc Hoy is sort of akin to a "wizard" when it comes to some of the things he's tackled and done and a lot of others are just as knowledgeable. I hope you'll keep us posted on your progress and don't forget . . . we all love pictures! Good luck to you on your project - I'msure it will be very nice when you are finished. And welcome again!