Baby's getting new clothes

Slow going now

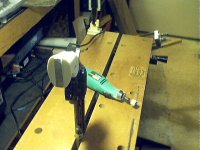
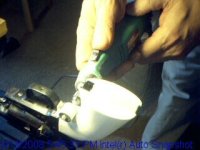
At this stage its all pretty much hand work now. After knocking the excess edges back to just above the tape line with the power drum, its now sand, sand, sand. I use a big magnifier to check progress but I still have to rely on feel......how the edges feel.

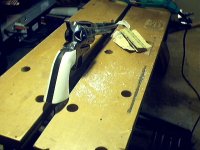
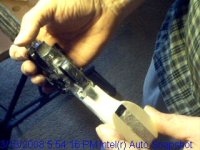
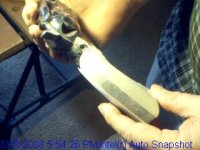
Here's the backside. It's not finished but I want to knock down the front next. After that it will be adjusting the overall feel of the "hogleg"......
 

Attachments

  • getting ready.JPG
    getting ready.JPG
    160.5 KB · Views: 18
  • backstrap.JPG
    backstrap.JPG
    141.9 KB · Views: 17
Just a thought..... can you turn the gun 180 degrees so that it is hanging off the bench so you have good access for the underside work you need to do? Pardon me if this is something you already are going to do.
 
I have thoughts along that vein. The table top is split and screw adjustable like vise jaws, but.......to do just the opposite of last night's work, I would have to clamp the gun so it would be under the table......not particularly practical.....except I could sit on the floor! :D

The jaws are V grooved along the inside length of each side (approx three feet long or so) but I'm afraid I won't get sufficient pressure to hang a few pounds away from the end of the device to keep it steady and secure! The scew mechanisms are mounted about three or four inches in from the end effectively putting the other clamping mech. a few feet away from where I need the pressure.

What I may try is clamping my moto tool in the jaws again so I can manipulate the grip assembly with both hands, drum sanding it down to a manageable point and finishing it by hand........that's all I can think of right now.
 
I took a chance......and it worked

I hung the Bad Boy out there by the tip of his snoot and it worked!

Just a small series of pics doing the last of the power sanding........now its all hand work.....:barf:

(The pics are a smaller format....the largest on Auto Snapshot)
 

Attachments

  • 1  really out there.jpg
    1 really out there.jpg
    31.6 KB · Views: 19
  • 3  thiswonthurtabit.jpg
    3 thiswonthurtabit.jpg
    24.9 KB · Views: 19
  • 4 aaaaaahhh!.jpg
    4 aaaaaahhh!.jpg
    26 KB · Views: 25
And the last three I'll bore you with tonite......

;)
 

Attachments

  • 6  snow, snow, snow.jpg
    6 snow, snow, snow.jpg
    24.4 KB · Views: 23
  • 8.jpg
    8.jpg
    33.3 KB · Views: 21
  • 9.jpg
    9.jpg
    31.3 KB · Views: 22
Fini'

It cleaned up pretty well........eh!!???:D

It makes a world of difference. The finish on the gun looks even better contrasted with the white as opposed to the oiled grips. It should look even cooler as the grips age into a yellow hue.

*Total time = about 8 hours (I'd never done anything like this before).

*Problems - the filler block moved when fastening the first panel. When the whole thing was put together, the grip assembly wiggled a little. Two strips of masking tape in the back strap groove and a very thin shim (1/16) took up the slack.

* Hints - make sure your hands and work area are clean! I got a light, oily smudge on one grip. Thank goodness it came out in the process of sanding.

Would I do it again :confused:...........Yeah :D I might do my 1851 Navy.
 

Attachments

  • fl2.JPG
    fl2.JPG
    123.5 KB · Views: 26
Thanks for the compliments

I appreciate your compliments. :)

I didn't use anything heavier duty than 150 grit to take off material. I used 400 wet/dry afterwards, which got it to a satin like look and feel........though not "shiny" like they came. Larry the Gripmaker told me I could take it to 600-800 and then go over it with Birchwood Tru-Oil (anyone with experience with this?) or Johnson's Paste Wax. I'm leaning towards leaving it satin-like and just waxing it....sounds like it would look more "natural"........what do youall think?

Once again.....thanks.........:o
 
Wow awesome job. Very Very good. As soon as work slows down. im going to give it a shot at making them from scratch. Not too sure what kind of wood to use yet.
 
Back
Top