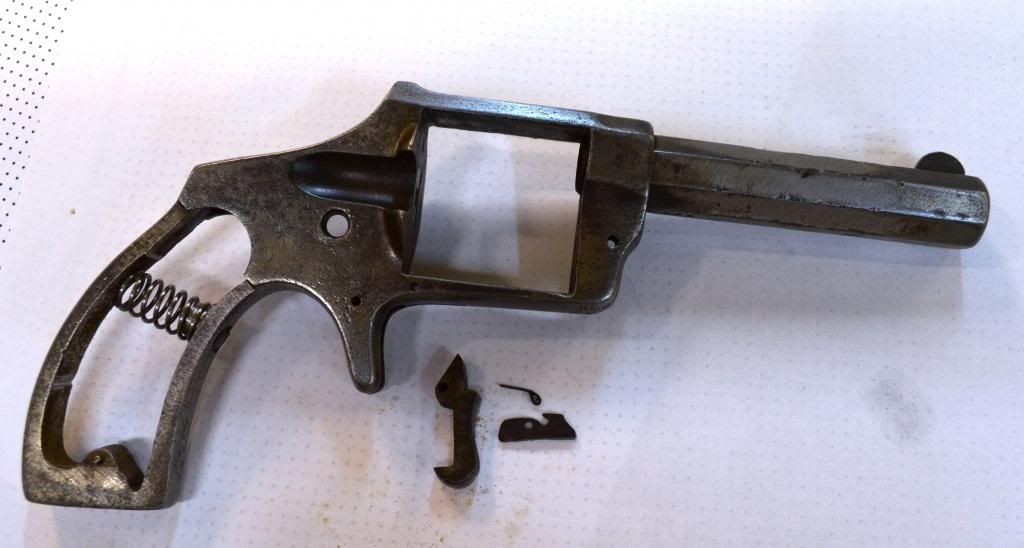
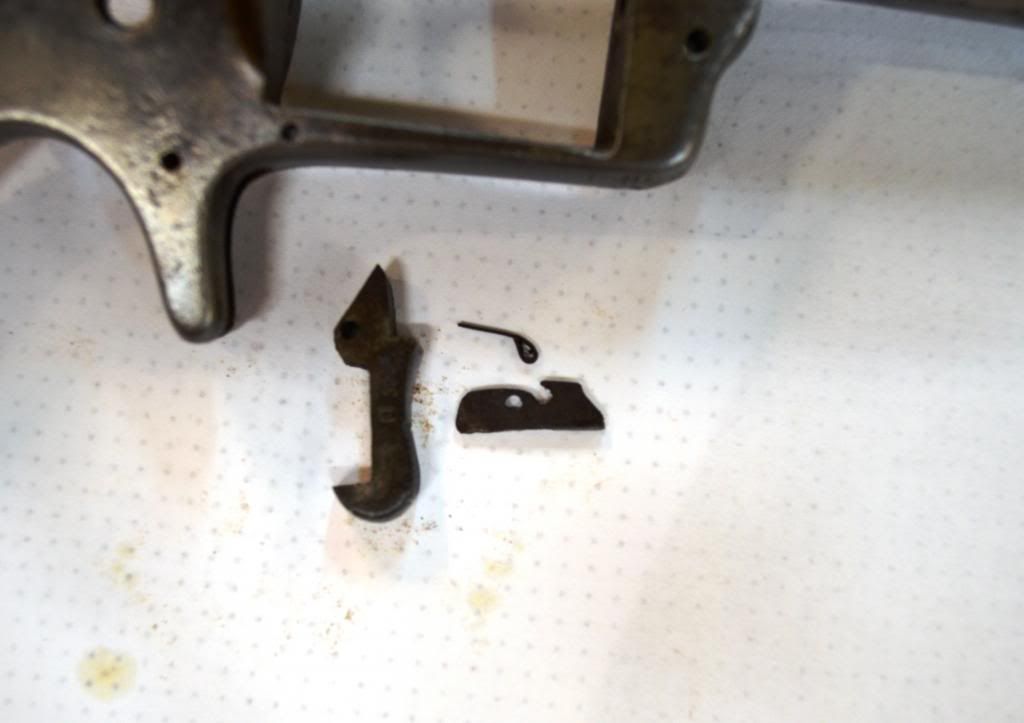
Made some progress on this revolver.
In my last posts I talked about recontouring the hammer. I did this and wound up with the hammer looking better.
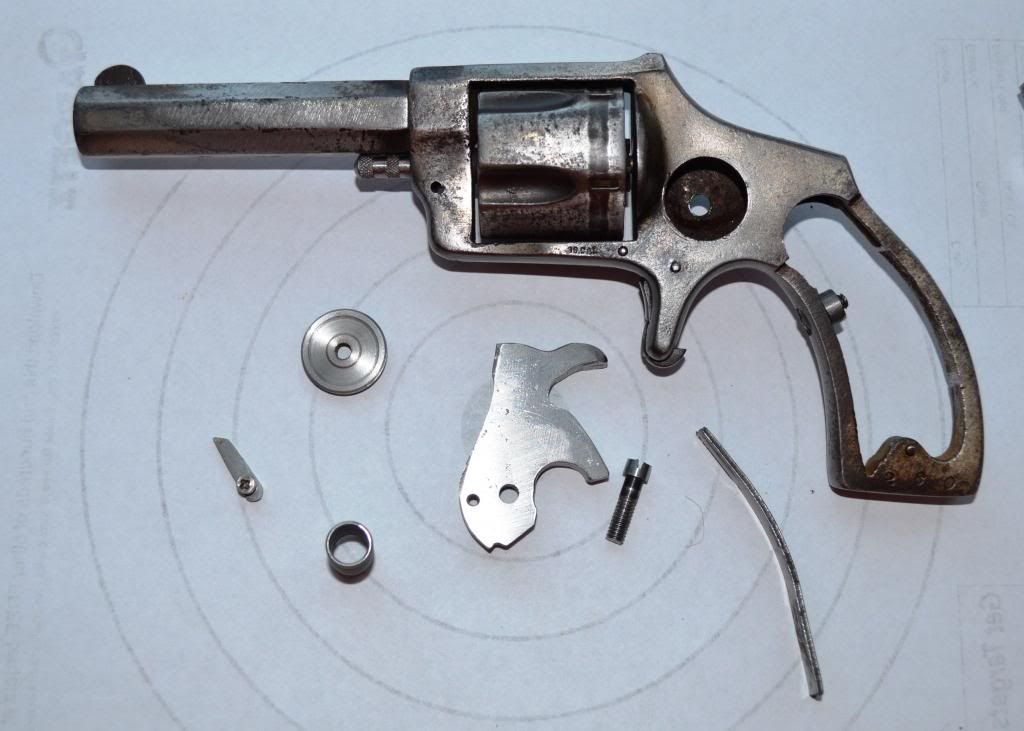
The design of the hammer spring required taking some metal out of the heel of the hammer. So that was done too.
The frame of the revolver was damaged requiring a different approach to the hammer spring. That meant using a coil spring rather than a leaf spring including drilling through the frame and making a pad for the coil spring to be held in place. The screw that holds the pad and coil spring in place is not real noticeable.
Next step was the hand which had to be very small so as to be able to fit in the revolver without interfering with a bunch of stuff.
The port in the frame that the hand goes through is positioned such that I did not need to mill the hammer to accept the hand. Line up is perfect.
It took a coupla hours to calculate the length of the hand, the distance from the hammer pivot point to the location of the screw hole for the hand.
I fine tuned hand operation by reshaping the hammer to control the arch through which it travels. It now picks up the cylinder ratchet properly and also seems to index the cylinder fairly well.
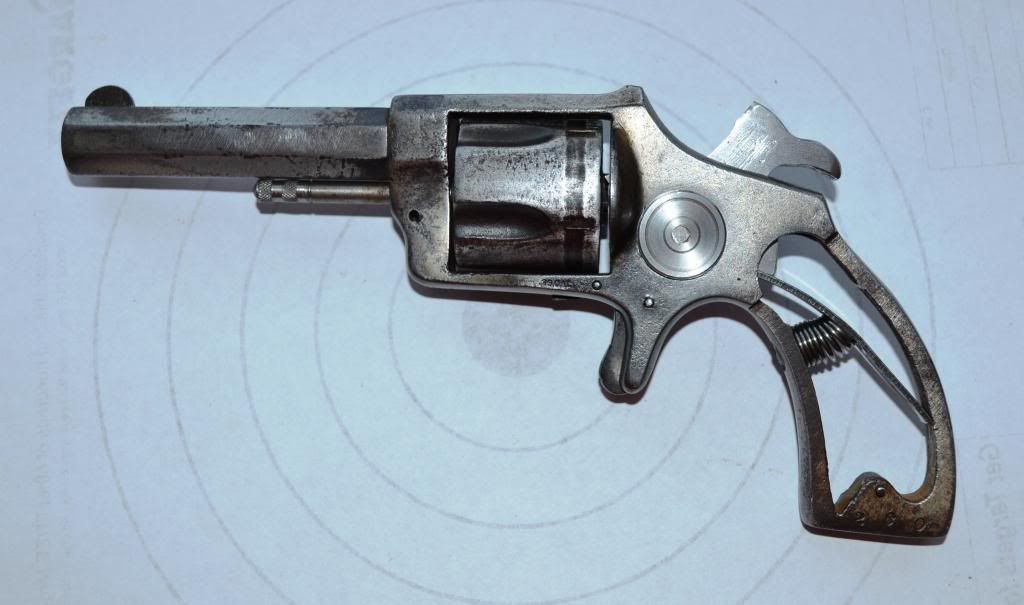
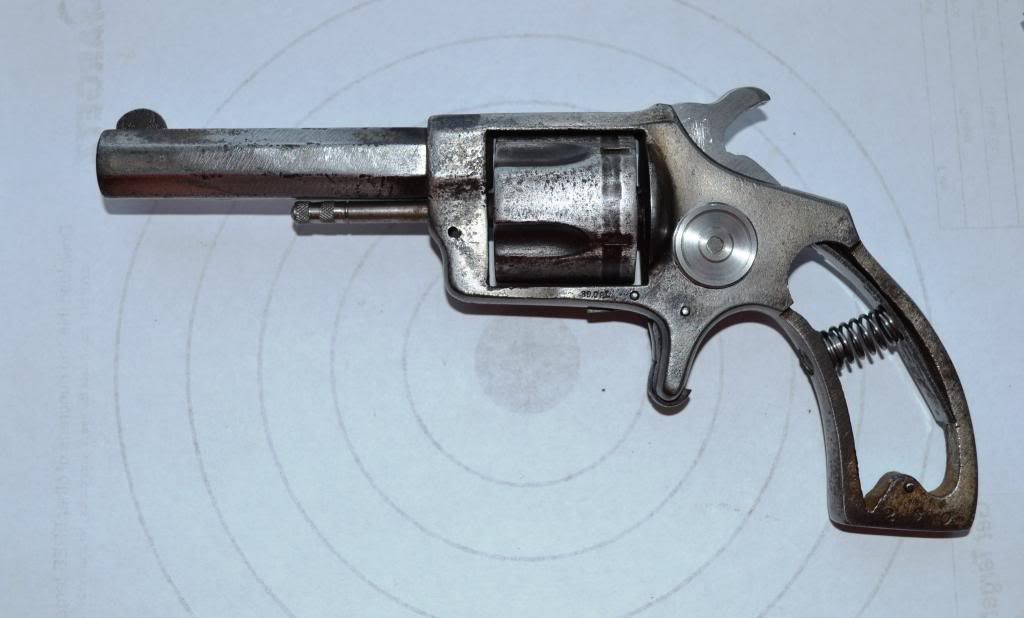
The hand spring is next, followed by driving out the pins for the trigger and bolt. Both of those have broken springs which need to be worked out and the bolt needs to be remanufactured.
Then it is grips and smooth up the surfaces.
Anyone who can advise as to case hardening the hammer and hand, don't hesitate to give me some advice. I am looking into doing it with charcoal in a cast iron pot with a vacuum cleaner discharge blowing air into the pot to raise the temp. I am thinking about getting some bones from the butcher department in Farm Fresh.
Anyone with advice, your comments are welcome.
In my last posts I talked about recontouring the hammer. I did this and wound up with the hammer looking better.

The design of the hammer spring required taking some metal out of the heel of the hammer. So that was done too.
The frame of the revolver was damaged requiring a different approach to the hammer spring. That meant using a coil spring rather than a leaf spring including drilling through the frame and making a pad for the coil spring to be held in place. The screw that holds the pad and coil spring in place is not real noticeable.
Next step was the hand which had to be very small so as to be able to fit in the revolver without interfering with a bunch of stuff.
The port in the frame that the hand goes through is positioned such that I did not need to mill the hammer to accept the hand. Line up is perfect.
It took a coupla hours to calculate the length of the hand, the distance from the hammer pivot point to the location of the screw hole for the hand.
I fine tuned hand operation by reshaping the hammer to control the arch through which it travels. It now picks up the cylinder ratchet properly and also seems to index the cylinder fairly well.


The hand spring is next, followed by driving out the pins for the trigger and bolt. Both of those have broken springs which need to be worked out and the bolt needs to be remanufactured.
Then it is grips and smooth up the surfaces.
Anyone who can advise as to case hardening the hammer and hand, don't hesitate to give me some advice. I am looking into doing it with charcoal in a cast iron pot with a vacuum cleaner discharge blowing air into the pot to raise the temp. I am thinking about getting some bones from the butcher department in Farm Fresh.
Anyone with advice, your comments are welcome.

