You are using an out of date browser. It may not display this or other websites correctly.
You should upgrade or use an alternative browser.
You should upgrade or use an alternative browser.
Ruger 77/357 Volquartsen Trigger Mod
- Thread starter fshfindr
- Start date
mxsailor803
New member
I don't own a 77/357 yet, wife wants one for hogs. I'm going to have to keep a eye on this thread.
tahunua001
New member
I haven't but I will tell you that it's a waste of time given the limitations of the 357 cartridge. depending on whether you're shooting 38 specials to save money, or 357 +p for hunting, you can see as much as 3 feet point of impact change at 100 yards. the variance from round to round, unless you are trickle loading your own, is just too great to consider the 357 a precision cartridge and even then anything past 100 yards is seriously pushing the capabilities of the cartridge for any practical purpose. doing a trigger job on a pistol cal carbine is a little bit like giving MR T a boob job, it's a hard working practical rifle but it's never going to look pretty on paper.
dieselbeef
New member
i have one..haven't shot it a lot since I had a lot of trouble with the mags and the feed..which I think ive got sorted. the trigger to me seems better than a lot of em. not sure what an aftermarket trigger is like tho.
im in on this to find out more...
my range is 250 yds so hopefully I can stretch it out some. I scoped it and haven't been out with it since.
I have 3 dif grns to choose from so we will see if its a 100 yd gun or not
im in on this to find out more...
my range is 250 yds so hopefully I can stretch it out some. I scoped it and haven't been out with it since.
I have 3 dif grns to choose from so we will see if its a 100 yd gun or not
I installed the VQ sear in my 77/357 and I love the results. The trigger is very light at 2.5lbs, and it breaks clean with no creep at all. You will need to do some filing to fit the safety, but it's no big deal. For the money its a great upgrade. I'll post about my boyds stock when it comes in.
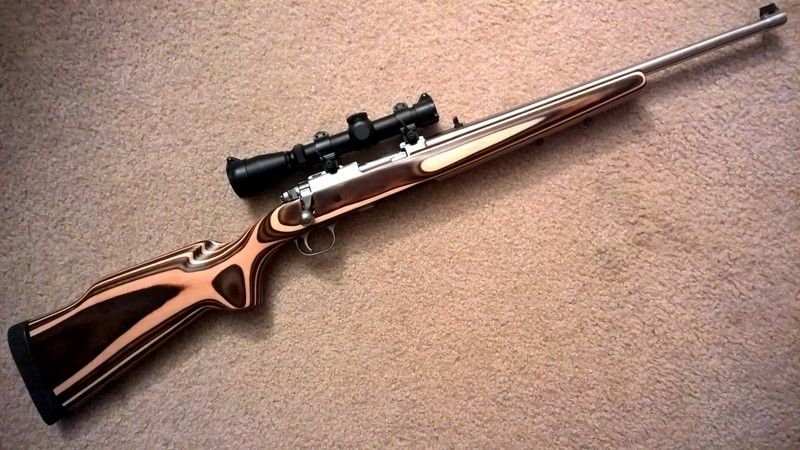
Stock came today, I like it a lot. Adds a bit of weight to the rifle, but I like the lines, it raises the comb enough that the scope sight picture is more natural, and it just feels solid as a rock, something I found wanting in the factory plastic. The inletting is well done with a snug drop-in fit. I will be glass bedding the action and freefloating the barrel a little later in the week, then time for accuracy testing.
dieselbeef
New member
wow...if it shoots as good as it looks that's gonna be a sweet rifle..man that's cool.
whats the name of the supplier
whats the name of the supplier
It's a Boyds stock, the rimfire hunter in coyote laminate. http://www.boydsgunstocks.com/
For my 77/357 I just pulled out the factory trigger spring and replaced it with a spring from a pen. it was not a perfect fit but it worked well and dropped the trigger weight to just over 2.5 LBS. Before you invest in a whole new trigger I suggest you try this 50 cent fix. There is a little creep but not much.
If I wasnt happy I would have gotten a better trigger but I am plenty happy with the results. So far it has help up fine too after about 1.5K (30 boxes) rounds.
If I wasnt happy I would have gotten a better trigger but I am plenty happy with the results. So far it has help up fine too after about 1.5K (30 boxes) rounds.
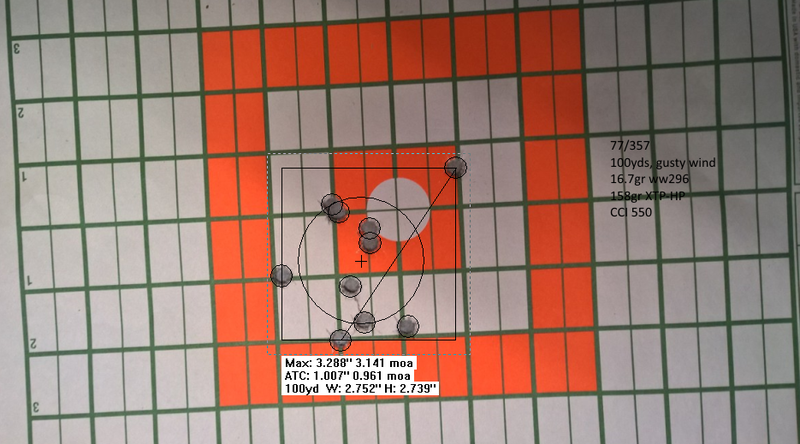
A solid stock and some bedding on the tang, rear of the magwell, and under the front action screw did wonders for this rifle. Today I sighted it in with a hunting load I threw together last minute at 100yds in gusty winds, and fired a 10 round group to finish out the day. After deer season I will get back to playing with cast bullets and see what it can do there.
COMB3366, I installed the VQ ssear and spring and I think it is great. Tell us more about bedding the stock before I zero it again. What material did you use and how and where did you put it? I am not able to measure the trigger pull, but I'd say less than 2 lbs. No work nec. on the sear.
I used epoxy and release agent from a Miles Gilbert bedding kit, though I think acraglas gel would have been better for this particular application. I applied a thick glob on the sides of and behind the tang, and a thin skim under the tang up the the trigger. I applied a skim coat on the back of the magazine well, extending out to the sides, I did this because this action does not have a dedicated recoil lug, and the tang and back of the magwell take the brunt of recoil forces. I also applied a thick skim coat under the front action bolt, though you've got to be careful not to use too much, because a mechanical lock is a possibility if the epoxy oozes over the cantilever that the front action bolt screws into, though you do want a bit on the side to eliminate movement and play. Here is a picture I found on realguns.com that I doctored up to show where I applied epoxy. I would take a picture of my own stock, but I did not apply dye, so it is hard to differentiate the bedding agent from the stock itself.
