Proper Timing in Uberti 1851 Navy London with Kirst Gated Conversion Cylinder

Head Tomcat

New member
Guys,

Now that the Kirst gated conversion is properly installed on my Uberti 1851 Navy London pistol and the arbor is the correct length (again, thanks 45 Dragoon…you were correct!!!), it is coming up to tune the action for correct timing.

Right now I have deburred all necessary areas of the pistol and installed Lee gunslinger springs for the bolt and hammer. The action feels very smooth and easy to handle. The question I have is with regard to the timing of the “clicks” so I get this:

• Click 1 – Safety notch
• Click 2 – Bolt dropping onto the cylinder the wide of one notch away
• Clicks 3 and 4 (simultaneously, or darn close) – trigger into its notch and bolt into its cylinder slot…also, hammer hits hard stop just as it as the two simultaneous clicks occur

Right now the Uberti is doing this:

• Click 1 – Safety notch
• Click 2 – Bolt dropping on the cylinder (right now it is dropping 1 ½ notch-widths away from its proper slot)
• Click 3 – Trigger drops into is notch
• Click 4 – Bolt drops into its cylinder slot

Clicks 3 and 4 are close together but you can hear the trigger dropping into its notch while the bolt is still about half of a notch-width away from dropping. Close, but not close enough.

Also, the hammer goes another ¼ inch past Click 4 before it comes to a hard stop.

What is recommended to get Clicks 3 and 4 to be simultaneous (or darn close) and also the hammer to hit a hard stop just as these final two clicks take place?

Whew…and thanks!

Head Tomcat
 
First of all, the first click is half cock ('51 Navys don't have a safety notch), second click is bolt drop and third click is full cock /cyl lock simultaneously.
The hand will be rather short (probably) but full cock/lockup is the first step. After that is established, you can "dial in" the other clicks. Stretching the hand is needed because your "six shooter" is being asked to be a "five shooter ". That is why the cyl.notches have have an "approach" (normal bolt "lead" cut) and a "departure" (for lack of a better word!) cut. Stretching is done with the handspring removed and the hand heated (red) and hit with a hammer to "pinch" the hand which in turn "lengthens" the hand. Reinstall the spring (or drill the frame and add a "Ruger type" coil spring and plunger . . . my norm) and check the length. Repeat until you have simultaneous full cock/ lockup (reheat and oil quinch (to harden) when correct length or slightly longer is established).
We can talk about "bolt drop" next.

Mike
 
Last edited:
Now that makes sense!

Mike,

There are several things I learned from your post:

  • Sequence of tuning...I figured to start with timing the bolt drop first and then go to sorting out having the hammer reach full cock/hard lockup. Turns out to establish the "limits of movement" first and then going to bolt timing is the correct sequence.
  • Length of hand for conversions....I had not thought of this one at all. The question I have is if the Kirst gated converter cylinder has six holes - and the Uberti C&B cylinder also has six holes - would this require a lengthening of the hand? If both cylinders have six holes and have to travel through 360 degrees of movement it seems that hand length would be the same for each.
Now, for my specific Uberti 1851 Navy it does seem the hand needs to be lengthened a bit as the full cock/bolt lockup takes place and then the hammer continues to go a 1/4 inch further before it hits a hard stop.

I have already ordered the Ruger plunger/spring assembly to do the coil spring conversion and it should hopefully arrive later this week. Once that is done, I will do the heating and beating of the hand.

For this hand lengthening, I have seen in another posting from Pettifogger how he uses a piece of drill rod laid at an angle across the bolt and then hits it with a hammer to force the extension. As I have a 20-ton hydraulic press would this be a better way to go after heating the hand until it is red and using the press head against the drill rod? Or, does the sudden hard impact of the hammer against the drill rod achieve a better job?

Whew...the saga continues!

Head Tomcat (learning a lot of very neat things)
 
Last edited:
You are very perceptive HT !!
First of all, I forgot you were working with a .36 cal. which means it will still be a 6 shooter !! So, forget what I said about "6 becoming 5" ( I'm used to setting up 44's to 45C).
The hand may still need to be stretched (your post suggests it is a little short) and I did say a "hammer" in my post ^, but, using a drill bit shank or screw driver shaft is better than "beating " the hand!! You don't want to thin the hand (overall) just "pinch" it in 2 or 3 places. You can straighten it lightly with a hammer after the "pinching". File or sand the back and outside side (left side) of the hand and function test. You want a smooth surface on the side because the hand rides that side of the channel and the back will be a bearing surface for the plunger.
When the hand is long enough or slightly too long , re-harden it and polish the back, side ,top and front or " contact surface " to the ratchet. Obviously, if it's too long, now you can "fit it" and re-polish. Maintain the angle of the top of the hand. Keep in mind that if you decide to install a bolt block, do it before finalizing the hand length. If not, you'll probably need to stretch it again. Stabilizing the bolt removes so much slop that hand length is almost always an issue.

When you get the hand length done, you will have the "3rd" click (simultaneous full cock/ cyl lockup)! The 1st click is half cock (obviously programed already!) so you're 2/3s "there"!!!
Next will be bolt drop timing.

Mike

www.goonsgunworks.com
Follow me on Instagram @ goonsgunworks
 
Last edited:
Current Status...and Bolt Block

Mike,

Last night I drilled the Ruger plunger/coil spring hole into the hand channel and that went quite well. Starting with a #2 center drill to get the hole precisely located, while keeping the receiver firmly square on the mill table, and finishing the hole with a #42 drill was not hard. A bit lip-biting at times (first time I have done this) but once it was done and using a hand file to clean up the channel of any burrs it looked pretty good.

Order went in for the Ruger plunger/coil spring assembly so hopefully that shows up late this week and I can continue with getting the hand sorted out and a good final lockup.

Now, for the bolt block, is this what is described in Kuhnhausen on pages 244-245 which he also calls a "bolt guide"? I had already been wondering about how to get the bolt to operate more efficiently instead of just sliding about on its screw while it went into battery.

Looks like I might be making one this week while the order comes in for the plunger/spring.

As always...many thanks for your wonderful advice!

Head Tomcat
 
I did the bolt block (described in Kuhnhausen) per Mike's suggestion. He also adds an action stop and a cap rake with these mods these are 100% dependable and "race ready".
 
Hey Dave!!! (Give me a buzz sometime and we'll talk about Remington's!!) Anyway, HT, yes, the guide mentioned in the book is what we all call a bolt block. It should be a close fit but never impede bolt's locking (up and down) movement. In our case, it is a support device to inhibit lateral movement.
Since I coil spring the trigger, the trigger spring side of the combination spring (though shortened) is what I use as a "keeper" for the block. If you are going to use the combination spring for the bolt and trigger, make the block per the instructions in the book. You may be amazed at the sound of "lockup" when cycling fast (sounds like a hammer !!!).
Next , bolt drop.

Mike

www.goonsgunworks.com
Follow me on Instagram @ goonsgunworks
 
Will Do!

Mike,

I will be sure to follow your instructions and when the plunger/spring arrive late this week I will install them...and get hold of you via this msg thread on bolt lockup.

Many, MANY thanks!

Head Tomcat who is perking up
 
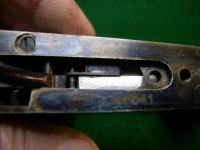
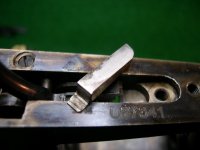
Bolt block in a Uberti Cattleman
 

Attachments

  • DSCN5660 - Copy (Small).JPG
    DSCN5660 - Copy (Small).JPG
    59.6 KB · Views: 38
  • DSCN5661 - Copy (Small).JPG
    DSCN5661 - Copy (Small).JPG
    55.4 KB · Views: 35
Great Photos!

Dave,

Thanks for the detailed photos as I now see exactly what the bolt block should look and function like!

Head Tomcat
 
Parts Arrived....Back on the Uberti Colt Navy Project

Guys,

I received the parts this weekend and drilled the hole for the Ruger coil spring/plunger assembly – and it came out quite well. I had already started the effort by drilling with a #42 (.093”) bit as that is what Pettifogger had written…but it was a bit small for the parts which arrived…so I used a #35 (.110”) bit to slightly enlarge the hole since the Ruger parts measured .107”. This ended up perfect since the larger bit simply followed the existing hole. A close viewing of where the Ruger plunger contacts the hand showed it was dead on the centerline. The hole was deburred with a hand file and all debris cleaned out.

Speaking of the hand…I also “stretched” it a bit too.

The original Uberti Colt Navy hand measured .948” in total length from its tip to the base. After two presses with a 1/8” drill bit in my 20-ton press the longer hand now came in at .988”. So, the stretching gained me .04” in length…which is quite noticeable, too! I carefully cleaned up the hand so it was smooth on all sides and did not remove any material which would decrease its width.

Also, to be sure that everything is “as new” I went to Taylor’s & Co which is near my house and bought a new bolt and trigger.

Bottom line is I now have this setup all put together in my Uberti Navy London with the Kirst gated conversion cylinder:

• Ruger plunger/coil spring assembly
• New Uberti bolt
• New Uberti trigger
• Stretched Uberti hand

Now that it is all assembled, I clearly need to do some tuning as the timing is completely out of spec.

When I pull back the hammer, the bolt does not seem to drop/unlock soon enough as the cylinder does not rotate any and the hammer gets a bit “stiff” as I continue pulling back. If I slightly rotate the cylinder with my fingers the stiffness is overcome (well before the half-cock position) and the bolt drops while the cylinder continues to rotate. As the hammer continues to be pulled back, the trigger goes to full-cock almost simultaneously with the bolt dropping into its cylinder notch. The hammer continues to go back a fraction of an inch before hitting a hard stop.

So, it seems to me the following is happening:

• The bolt is not dropping soon enough as the cylinder rotation is lightly locking up until I give the cylinder a slight assist with my fingers
• The bolt is dropping very late in the process as the trigger comes to full cock just a very, very tiny fraction of a second before the bolt drops into its cylinder notch. If you did not do this very slowly you would almost think they were simultaneous
• The hammer then continues to go back another fraction of an inch before hitting a hard stop

This has me really confused!

I can understand the bolt timing as it seems to be very late and this can be adjusted by carefully filing the leg riding on the hammer cam. What stumps me is the stretched hand is still apparently not long enough as the trigger hits full-cock and the hammer continues going back. If timing the hammer to hit a hard stop is the first thing to be done in tuning the action, what must I now do to get a full-cock and hard stop at the same time?

Thanks!

Head Tomcat moving forward…I hope
 
Ok, I'm slightly confused as I read your post but I "think" I may can give some direction.

It sounds to me like what you're describing is the hand isn't acting on the correct ratchet tooth. It may not have needed much stretching (if any . . . remember, I realized yours is staying a 6 shooter) so, it's probably too long to slip under the correct tooth. The timing shouldn't be significantly different from the cap cyl. I say shorten the hand and install the original bolt. Save the new parts as they will need to be fitted. The new trigger may define a slightly longer or shorter cycle (the trigger and full cock notch define the cycle length , changing either will probably change the cycle).
The hammer coming to a "hard stop" would need the hand pushing against the ratchet tooth of a locked cylinder, or if you had installed an adjustable stop.

The "bolt drop" is what happens when the bolt arm falls off the hammer cam which allows you to hear the bolt head dropping onto the cylinder (2nd click ). Bolt "pickup" is the hammer cam lifting the bolt arm ( which lowers the bolt head and unlocks the cyl).

So, we still can't "time" the bolt until we can get simultaneous full cock/ cylinder lockup.

If you're going to install a bolt block, now would be a good time.

Mike
 
Guys,

I am going to skip the bolt block this time in order to focus on the work needed to do the actual timing of the action. Now...next time for an 1860 Army I will make a bolt block!

I just installed the original bolt and trigger back in so now my configuration is this:

  • Kirst gated conversion cylinder
  • Original Uberti bolt which had previously been "semi-timed" (ie, some filing done on the leg moving against the trigger cam)
  • Original Uberti trigger which has had no work at all
  • Ruger plunger/spring assembly

Now, I very, very slowly pulled back the hammer and can feel the bolt is now picking up correctly and unlocking the cylinder fairly quickly. However, there is still the noticeable resistance from the stretched hand to stop this cylinder rotation. When I rotate the cylinder with moderate pressure from my fingers it overcomes this resistance and the cylinder cycles normally. The feeling is as Mike says...the extended hand is not on the correct ratchet tooth and me assisting the cylinder rotation a bit is allowing the tip of the hand to snap to the correct tooth.

Further pulling back on the hammer goes in this sequence:

  • Half-cock
  • Bolt drop
  • Hammer hits full-cock
  • Bolt lock (bolt locks maybe .001-002" after the hammer hits full-cock)

I think the key to focus on is the stretched hand and deal with the initial resistance I get from it after the bolt picks up. When I shorten it a bit, where exactly does the material get removed from? Does it come from the small flat on the top of the hand; or, does it come from the very forward end of hand? I ask because looking at the hand, it appears the inside/front of the hand is what actually contacts the ratchet teeth and this seems to infer both surfaces (top flat and end tip) both have material removed.

Wow...getting deeper into this!

Head Tomcat

PS: 44...that action stop could be part of the final answer once everything gets timed.
 
While we are talking timing.
Thank you Mike for the coaching.
Every now and then I just have to fan one of my '51 Navies (cap & ball) just to enjoy an open top that works perfectly.
 
If the hand is too long and the bolt is working correctly the bolt will lock in before the hammer gets to full cock and it will not allow the hammer to go to full cock
 
HT, I'm thinking your cylinder is binding against the barrel. Or it could be that the Ruger handspring plunger is too short and is binding against the hand (one reason I make my own). Hawg is right, if the hand is too long, you wouldn't be able to reach full cock. There are several things that could be going on but without having the gun in hand, or at least a video, . . .
You can do function tests with the backstrap and trigger guard off. That way you can actually see what's going on.

The action shouldn't be too far off if it was working correctly with the cap cyl installed. Rather than "messing up" the Kirst cyl, you probably should get the action "right " with the cap cyl first, then you can "adjust" as needed for the Kirst. This is a fairly involved setup if it's your first time. So many variables at play.

Dave!! You know you're not 'sposed ta fan don't cha ?!!! (Yes, it is rather fun !!! Lol!!!)

Mike
 
Goon, Dave and Hawg,

I spent almost five hours yesterday working on this Uberti 1851 Navy with the Kirst gated conversion cylinder and ended up with....frustration. So I took a break and starting changing out the rear wheel bearings on a motorcycle - and managed to whack my left hand twice with a hammer when drifting them out.

So back to the Uberti...and even more frustration.

Bottom line was the extended hand did not seem to work and achieve hard lockup when the trigger hit full cock. The bolt timing could not be adjusted to get proper drop. At this point I put OEM new parts in...and not much improvement.

I did notice the Kirst cylinder was being pushing fully against the barrel the entire time all this was going on. I then measured Kirst cylinder endshake and found it to be a (to my mind) pretty large .020". The assembly just rattles back and forth. Endshake with the original C&B cylinder is only .009".

Seems that Goon's advice to work on the original cylinder and get that correct is the best way to go as the Kirst conversion may be introducing more variables in this than my current skill level can account for.

Fanning???!!! I thought that was utterly forbidden!

Head Tomcat who is rather dejected

PS: Is it possible the Kirst endshake and constant rubbing against the barrel is too much for an extended hand to address? In other words, even with an extended hand, the distance it is having to move and operate against the ratchet - and also with the cylinder binding on the barrel, there is simply not enough leverage to do the job?
 
Back
Top