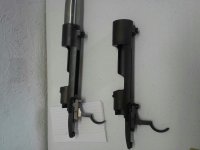
Mauser barrel is STUCK!!

I was processing more than 50 Mausers once [5 per carton from Century], and guys would come over and I would have them pull the rusty old barrels.

I would have them sit on the cheater bar while I hit the action wrench with a 20 pound weight. No movement.

Then I would put some Kroil into the thread joint.
Wait 10 minutes.
I would then have them push on the cheater bar again... and it comes off with half the force that had not worked 10 minutes earlier.

All the guys I subjected to this magic trick went out and bought Kroil.
 
My gunsmith told me once that old British .303 barrels were the worst. He'd lock the barrel down in a vice and use an 8 ft. cheater on the action wrench.:eek:
 
wpsdlrg,

It’s OK, I doubt your are hard on yourself, but, just in case you are, don’t be. The OP said this is his first build, I tried to prepare him for his first build ‘IF IT WAS A CHILEAN MAUSER’ so? Someone needs to ask him what receiver he is trying to build.

Then the link, the one you knew Clark knew did not apply to this thread. Going straight to the 700 foot pounds of torque. The shank of the barrel is to short to apply those kind of numbers, even if it was solid. Then there was your editorial on “CRUSH” and “DON’T' YOU BELIEVE IT”. I will not give you the benefit of knowing, the Masuser barrel face bottoms out on the C-ring torque surface in the receiver. After making contact the two surfaces do get closer, the surfaces can gall, slack between the threads can be removed but the two mating surfaces do not get closer. That brings up the shoulder at the end of the threads, I secure the barrel then measure the gap between the front of the receiver and shoulder at the end of the shank, I want the shoulder on the barrel to make contact with the front receiver ring after the barrel face makes contact with the C-ring.

After the barrel face makes contact with the C-ring I want .003” gap between the front of the receiver and shoulder at the end of the threads. I use the most humble and modest of all tools, I use the feeler gage, also know as the thickness gage. Same for the M1917 and the Springfield 03 type rifles.

The Mauser (98 type) barrel bottoms out, back to the link that has little to nothing to do this thread is about. A bolt being torqued was never designed to be torqued when bottomed out, the best way to shear a bolt with torque is to bottom it out then mindlessly continue to torque.

Then there are the other barrels like the Springfield and the Enfield M1917, the barrel seats against the front receiver ring and shoulder at the end of the threads. Difference? Yes, the big difference is square threads, when it comes to thread design there is nothing stronger than square threads, after square there is acme, then there is that story about Eddystone using steam at the rail yards to secure barrels, again, once the two mating surfaces makes contact there is not much chance the two surfaces are going to get closer, that leaves pulling threads and creating stress on the receiver. I have Eddystone receivers, I have one that is cracked/split. Back to two surfaces getting closer, if the Eddystone was indexed and the builder knew how to deterring the distance the barrel had to be torqued to align, the amount of barrel rotation to torque would not have required steam power. When they built the M1917 no consideration was given to removing the barrels, we needed the rifles, we knew the slack was not going to be taken up by Springfield.

F. Guffey
 
The barrel finally broke free.

After some modification to the threads, they tighten all the way to the c-ring and shoulder meets front of receiver at the same time. Had to sand the threads on the barrel down to 55 deg.
 
mwells72774, some of these guys would pass out if I claimed to have cut the threads down on a M1917 barrel, the sank was straight but the threads were cut on a tapper, good to hear back from you. Now? Comes the part were you determine the length of the chamber from the shoulder to the bolt face (everyone else calls it head space).

F. Guffey
 
Well good. With a short-chambered barrel, as you said, you'll have to finish ream anyway. So, the next thing to do is to determine if you need to remove any material from the barrel shoulder (at the end of the threads), or the receiver face, so that you can safely torque the barrel to 75 lbs/ft or so, without damaging the threads. I assume that you do not need to index the barrel for iron sights, or a "safety breech", so that is not an issue.

One question. Since you had to "modify" the threads.... is the barrel shank loose against the receiver threads, when partially screwed in ? By that, I mean, will the barrel rattle about, when only partially screwed in ? If so, this is not good. The barrel should thread into the receiver with no excess movement, indicating that the threads (of both) are compatible. Hopefully, the fit is good.

I agree with F.Guffey, for what it's worth, that 0.003" will be about right, give or take, for a gap between the receiver ring and barrel shoulder - BEFORE final torquing of the barrel. You can cut back the receiver face....or the barrel shoulder....either will do, to produce the gap needed. Starting with that sort of gap, then torquing the barrel to 75 - 80 lbs/ft, you should have no gap, in the end. That will snug everything up and produce support for the barrel in two places (the barrel face and barrel shoulder), which is desirable. But, it will not cause damage to the threads.
 
Terrific ! You are "in business". Once you have the gap you need, you can go ahead and install the new barrel.....and torque it down. Thread dope is optional, of course. You can just lightly oil the threads....or you can apply NON-permanent thread locker, if you wish. I like to use a bit of thread dope, simply to protect the threads from future corrosion. Your call.


You also have a set of headspace gauges, right ? You will need them, of course.

If you've never reamed a chamber.... a word about that. Be sure to follow the directions EXACTLY. It is very easy to damage a reamer by improper use. Ream only a VERY small amount at a time, then check the headspace. We are talking about not too many thousands of an inch between minimum acceptable headspace and excessive headspace. You obviously can ream more, if needed....but once you've gone too far, you can't get it back.
 
Pull through reamer? The pull through reamer is a done deal, it is advertised as nothing can go wrong, when using the pull through reamer the chamber is reamed/finished when the bolt closes.

I would not have recommended the pull through reamer for the first build, I measure the length of the short chamber first by transferring the dimensions to the receiver, I cut the chamber in the barrel first then install the barrel to finish if necessary.

Once the case head protrusion is known the person cutting the chamber should know how far the chamber must be reamed to finish. Go slow and easy and use an approved fluid.

Then the ‘out of curiosity’ question, are you a reloader.

F. Guffey
 
The reason I want to go with a pull through reamer is so I dont have the added cost of gauges.

Yes, I do load. Traded into 300 165gr hornady SST's
 
You'll have to have a go gauge. The go gauge lets you know when the reamer is deep enough, as you ream the chamber, until the bolt closes on the go gauge.
 
You may be all right, but I always check with a set of Clymer gauges, both go and no go. Of course, when I get to the finish, the bolt closes snug on a go gauge, so it kind of makes a no go no use, but I really like to check that any reamer is correct. I have seen a few instances of them being off.
 
"Pull through reamer? The pull through reamer is a done deal, it is advertised as nothing can go wrong, when using the pull through reamer the chamber is reamed/finished when the bolt closes"

Correct, when the bolt closes the chamber is done. I do not shoot gages, I shoot loaded ammo, because my presses and my dies have threads I can adjust the length of my cases from the shoulder of the case to the head of the case. My cases have a case that off sets head space. to determine head space I measure the length of the chamber from the shoulder/datum to the bolt face. My cases do not have head space, my cases have a length, the length of my case is measured from the datum to the head of the case.

Then there are other bolts, to determine 'other bolts' and their uses would require an Internet search..

F. Guffey
 
The thread in the receiver probably was 55*. I don't know about foreign contract Mausers, but Germany was still using the Whitworth configuration (English 55*) prior to and during WWII. For years everybody has been jamming 60* threaded barrels into Mauser actions and the average customer (And Gunsmith) never knew the difference. No big deal.

Square threads stronger? I doubt that. There is not even a small fillet at the base of a square thread.
 
When I want to use a barrel stub as a "Power screw" I will keep that info in mind. Buttress threads are pretty much used in applications where you want to "Lock" but not "Lock up". Takedown gun barrels, cannon breeches, adjustable wrenches, ect. Technology? If you follow military gun production over the years it is easy to see that the screws and threads became finer and finer. The truth is early shops had a hard time with thread making. Early machine screws on guns are so course they look like wood screws.
 
Last edited:
Gunplummer;

I thought about cannon breeches too, but didn't mention them. You are correct, in that the threads are used if you want to make something easily removable. Military rifles are meant to be torn down, by armorers, and fixed, or new barrels re-fitted, and that may happen several times during their tenure with the military. I would say that was the original thought at the time, but later, everybody standardized on the V thread. A long time back, in the 1920's and before, there were a whole slew of threads being used that we never see today.
 
Back
Top