Homemade target stand, anybody have a good design

gearchecker

New member
I'm trying to figure out a good design for a portable range stand.
I usually practice on Forest Service land so it is not a formal range that has stands already. Where we shoot is more like a 200 yd. deep swath, cut into the forrest.

Does anybody have a design for a portable target stand that will last for at least a couple of shooting seasons. I tried a PVC tube design, but we end up shooting it to peices out at the 50 yd. mark when using our pistols. One hit with a 357 mag or my 45 and the PVC just shatters. At 100 yds I can't even imagine the damage we could cause.
I've though about ABS, but after the shattered PVC I'm not sure I want to go to the expense of destroying another stand in vain.
I hate the idea of leaving behind any trash when we leave so it needs to survive pretty well.

I would like something that's light enough to haul around and easy to replace parts if something bad happens.
Can any of you help me out?
 
My bro n law had a pvc base with a tee on each side that turned up for an upright. Instead of running a pvc pipe for the upright he just left the open tee. Then he took two 2x2s & shaved the ends down a bit to fit them in the pvc. Bring a staple gun to attach cardboard to the 2x2. They will take a few more stray hits.
"JJ"
 
I use PVC pipe 1" dia. 18" of pipe 4 T fittings and 6 90 deg elbows 4 end caps.

I cut 6 2' sections 4 1' sections 4 6" sections.

Make a 2x2 square using 2 elbows and 2 t's attach 2 2' sections to the t's.

Attach the 1' section to the other 2 t's attach elbows at the end of each 1' section and then add the 6' with caps. You can shorten the 6" pieces to 3" if you want.

I glue mine but you don't have to.

108_2790.jpg


108_2792.jpg


108_2791.jpg
 
Portable Target Stand.

Portable Target Stand
2- 1/2 "galvanized tees
4- 1/2 x 12" pipe nipples
2- 1/2 x 6" pipe nipples
1- 3/8" x 10' length of steel re-bar
4- 1 1/4" heavy duty binder paper clips

Office Depot Binder Clips 1 14 Compare
Quick View
Office Depot® Binder Clips, 1 1/4", Black, Pack Of 144 (12 Boxes Of 12 Clips)
Item # 825190

1- 2' x 4' piece of cardboard
1- roll of string

Screw 2-12" nipples into tee & then screw in 6" nipple to the right angle joint of the fitting. This will be the foot of target holder.
Assemble the second tee same way.

Bend the 3/8" re-bar 90 degrees at the 3 & 1/2 foot mark from one end. Do the same thing from the other end to form a "U" shape. This should give you about a 2' span between the up rights.

Use the binder clips to hold your cardboard on the four corners and tie the clips to the frame.

Slip the frame into the 6" nipples on the tees.

There you have an easy to assemble portable target stand.
Hope these instructions are easy to under stand...
 
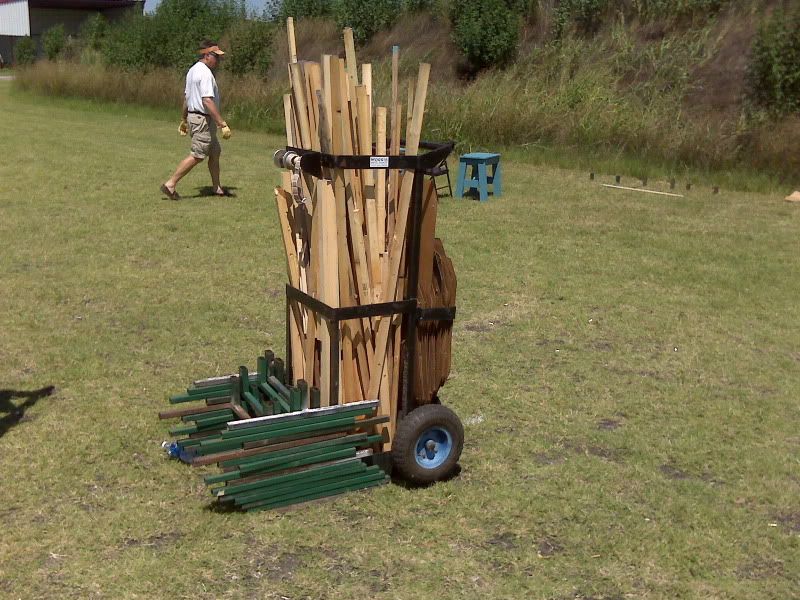
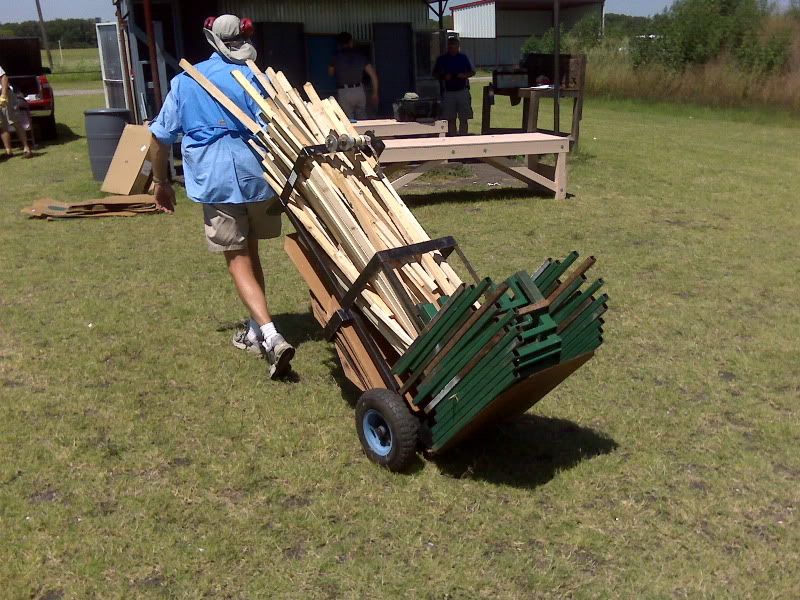
1x1 box tube to build an H 1x2 box to hold 1x2 wood stakes. If you move the 1x2 inboard they stack well too.

IMG00144.jpg


IMG00146.jpg
 
my dad has an old carboard box, get to the BLM land with shovel and box in hand, fills lower 1/3 or so with dirt to hold the box steady, staple targets to box. when done, tip box over to remove dirt, take box home. if it needs patching, a little duct tape goes along way. when all shot up, get another box and repeat.

uses range finder to set proper distance.
 
Do you have a friend that is a Realtor? If so, ask them for an old yard sign frame. They are easy to carry, fit nicely in most vehicles and are very easy to set up and take down. You can place cardboard in the belly of the frame and attach your target to the cardboard. If you were here in Massachusetts I would give you one. They work great! Also, they are cheap if you want to buy a new one. But I would call a Realtor and get one if you can.
 
I have used real estate signs for years and they are perfect. They are made to be stuck in the ground and are very portable. When a realtor leaves a company, his signs are usually tossed. So as retiredcoasty suggests, check with a real estate office for old signs.
 
I raid political and advertising signs,,,

If a sign says garage sale on saturday,,,
Then on Monday the sign is mine.

You know the plastic corrugated kind,,,
With the two heavy wires to stick in the ground.

Every week I see a new batch of them,,,
"Bridal Fair at the Fairgrounds" on Saturday and Sunday,,,
Monday morning on the way to work I start collecting them up.

I haven't bought a target stand in years,,,
Print my own targets on the printer at work as well,,,
My boss is a shooter too so he doesn't care as long as I don't go crazy.
 
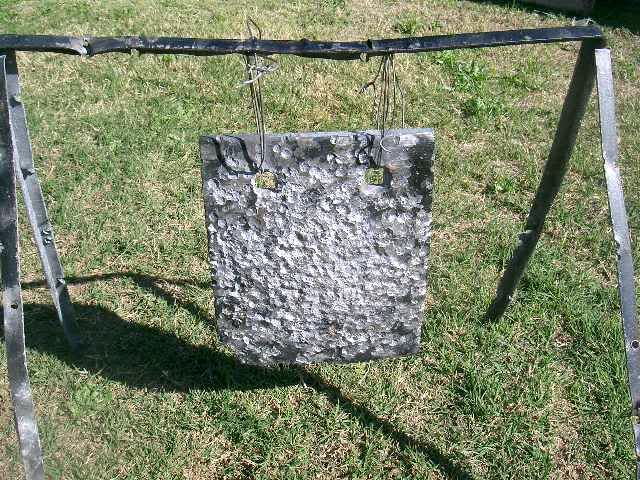
I took a few pieces of all-thread and made a stand a few months ago. The same could be done with lengths of small angle iron...

Cut two 36" lengths
Then tack-weld the tops to form an upside down "V" at about a 35 degree angle
Repeat
Cut whatever length you desire (I recommend 48")
Tack weld to the top of the two sets of legs, leaving a couple inches over hanging each end.
Fully weld together
Cut out a few 6" steel circles and hang them using cyclone fence-type wire.

Go shoot!

(The finished product will look very similar to demigod's target in the photo above)
 
I use 2x4s, and make an H shape with them, held together by screws. Heres
how I do it:
2 = 2x4s @ 36" (sides of base)
2 = 2x4s @ 24" (middle connecting bar)
2 = 2x4s @ 20 7/8" (keeps uprights seperated)
2 = 4" Corner brackets to keep uprights in place
4 = 3 1/2" x 1/4 SS machine bolts with wing nuts (hold brackets to base)
14 = 3" exterior wood screws (hold all H pieces together)
3 = 2 1/2" exterior wood screws (for the 20 7/8" pieces)
4 = 2" x 1/4 SS machine bolts with wing nuts (hold uprights to brackets)
16 = 1/4 flat washers

Step 1
On the two sides (36" Pieces) measure from each end 14 3/4" inward
Draw a line with a speed square around the 2x4s from each end (should have 2 lines 14 3/4" in from each end on each 36" piece)
Step 2
take the 2 24" pieces, place edges of the 2x4s on the lines on the 36" pieces (make sure the 2x4s are on the inside of the 2 lines) and screw them into the 36" pieces using the 3" exterior screws, two on each 24" board on each end for a total of 8 screws.
Step 3
Using the 2 1/2" exterior wood screws (3 screws needed), screw the 20 7/8" pieces together making sure they flush from end to end and squared off on the edges.
Step 4
Take some 2x4 uprights and place them flat on their side against the inside of the H frame between the 24" pices, this will give you the spacing you need to place the 20 7/8" pieces.
Step 5
Using the 3" exterior wood screws,(6 total, 3 on each side) screw the 20 7/8" pieces(flat side up) to the 24" boards once you have your spacing from the uprights. You should have enough room that the uprights can be easily placed in and removed with very little effort. Make sure the flat side of the 20 7/8" pieces are flush with the 24" pieces before you screw them together.
Step 6 (if you feel Necessary)
Place brackets on ends of 20 7/8" pieces facing the 36" pieces, mark your screw holes from brackets, remove brackets and drill your 4 holes for your brackets straight and all the way through both 20 7/8" pieces.
Step 7
Mount brackets onto frame using the 3 1/2" ss machine bolts (4) with flat washers (8) and wing nuts (2). Place a flat washer on each end of the bolt and screw on the wing nut
Step 8 (If Applicable)
Place uprights into frame, mark & drill holes for brackets, attach uprights using 2" long x 1/4 ss machine bolt. 4 bolts, 8 washers 4 wing nuts.

I use 3/8 plywood or cardboard for my backing, the uprights are 2x4s cut to what ever height you want, and you can use screws or staples depending on your backing. Everything is easily replaced and is inexpensive to make. It takes about 30 minute max to make, and can be stacked ontop one another. You'll need a Chop Saw or circular saw, a Drill Press and or a Cordless Drill, drill bit, and a screw bit. There are a couple different ways to anchor them, sand bags, eye screws or bolts for use of tent spikes. They are very portable and easy to store and set up/take down...

DD
 
I have a friend that uses an old realtor sign holder. He just sticks it in the ground where he wants it and changes the thin plywood he put in it when needed.
It was one of the two leg models.
Works for him.
Might not be good for 1000 yd, but should be large enough out to 300 yds.
A BFH ( big friggen hammer ) to knock it in the ground helps if the ground is hard is good to have along.
Cost was free from a realator friend except for a thin piece of plywood, free if you have scrap plywood.
You could check for a free damaged sign holder and use the BFH to streighten it out. It's made of angle iron.

John K
 
I build a couple of the one found on this site. http://www.theboxotruth.com/docs/edu24.htm

Very cheap to build. With the wood uprights, hitting the pvc hasn't been a problem for me. My wife did let one fly and hit one of the pvc elbows with a .22 but it just took a little chunk out of it. It would be easy to repair. I glued everything but the uprights so that it would still fit in the trunk of my wife's car.
 
DSCF4203.jpg


I use this set up. Got it off of TFL. I cut my cardboard to size and carry a staple gun to attach it at the range or wherever I go to shoot.
 
Made a couple of stands out of black iron pipe, self standing, and I hang steel from it.
The problem I've had with pvc, one stray shot and its destroyed. Long range shots can be subject to wind! ;)

Now I've taken some one foot sections of 2" abs pipe and buried them 4 feet apart. No bottoms on them (like 2" caps), I leave them open for drainage. Then I purchase the 1 1/2" X 1 1/2" X 8' boards, and screw thick cardboard between them, supported by fender washers. 1/4" holes, 1 1/2" diameter.

With that set up, you don't need crossbars, and they will survive heavy rains for a long long time. Cardboard is cheap too, and plentiful.

Good Luck.
 
Back
Top