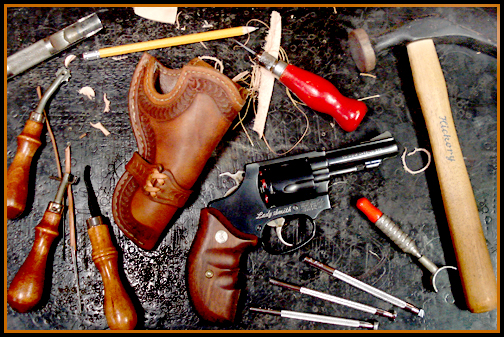
Holster making for a hobby ??? show off your work... offer suggestions to a newbie...

Hey MWM,,,

Nice job re-lacing that holster,,,
'twasn't anywhere near as hard as you imagined.

I do a lot of dye work on my rigs,,,
Mostly, I prefer using the Fiebings Oil Dyes.

Saddle Tan is my favorite color by far,,,
Black is a good contrast for dying background areas.

I use Light Brown as well,,,
Dark brown as the background contrast color.

Medium Brown is just,,,
Well, too medium.

I really miss the "Buckskin" color they used to make,,,
That was the richest "yellow without being yellow" there ever was.

That Laura Croft rig was given an overall coat of Saddle Tan,,,
Then I used a fine brush and dyed the silhouette carving with Black oil dye.

The main thing to remember is this,,,
You must give the lighter color oil dye at least a day (48 hours is better) to dry.
If you apply the black dye before the lighter dye has had time to "travel" through the leather grain and settle completely,,,
You will get a lot of bleed into the lighter dye color area.

Tandy makes a water-based stain in several colors,,,
It provides a good light to dark contrast,,,
But it must be coated with a finish,,,
I hate this for holsters,,,
Doesn't oil well.

This isn't so much of a problem with alcohol or water based dyes,,,
They literally dry in a matter of hours,,,
But their colors aren't as strong.

The EPA is killing all the good penetrating leather dyes,,,
Seems the best stuff for the leather working craft,,,
Is a real nightmare for the environment.

About that strap,,,
You really can't "carve" leather after it's been dyed,,,
The most you can do to it is try and stamp it,,,
But it won't stamp very deep or crisp.
 
"that" strap is just a scrap that was black, & had the right sized hole, that I cut off a donar holster...

... I'm looking at buying some 1/2" strapping... so I need to buy "natural", then stamp it, then dye it, then buff / finish the strap ???

still haven't got any reference materials yet

can you buff / polish the strap edges or does this make them more prone to cracking... seems most of my "box o holsters" have straps with visible fuzz ( can't spell "sweade" ) on the back side & no finish on the edges...

I also want to do some work yet on the bottom of that Heiser, where it was damaged... I assume there is some product I can apply, that can buff out the worn spot to help hide it a bit ???
 
leather,,, confusin' stuff it is,,,

For tooling and all holster applications you want Vegetable Tanned Leather,,,
That is leather that will absorb water and accept deep tooling,,,
It's also called Oak Tanned by some folk.

The smooth side of leather is called the Grain side,,,
It's often referred to as the Top Grain side
The fuzzy side is called the Flesh side.

Suede leather is leather that has had the Grain side sanded,,,
Do not confuse true Suede with a Split of leather.

Suede leather is also almost always tanned using a chromium salt solution,,,
Don't even think about lining a holster with anything other than vegetable tanned leather,,,
The chromium salts in suede leather may (not always but more often than not) react badly with blued steel.

Leather comes off of a cow up to 3/8's or 1/2 inch thick in some places,,,
It is run through a "splitter" that shaves en even thickness of grain side.

That's where you get the terminology of Leather Weight,,,
8-9 ounce leather, 4-5 ounce leather, and so on,,,
That means one square foot of leather,,,
Will weigh 8-9 ounce, and so on.

Anyways, true suede is grain leather that has simply been sanded to give it the rough nap,,,
A split is the flesh side of leather left over after the Grain side has been shaved off,,,
Split leather (or splits as Tandy calls them) are not strong at all,,,
They are basically only good for kid camp crafts and such.

Anyways, leather suitable for holsters is always top vegetable tan Grain leather,,,
Some people say that 8-9 ounce is good, some go heavier to 9-10 or 10-11 ounce.

I like the heavier holsters but also like to line holsters,,,
If I am making a holster for a big pistol I want it to end up around 10-11 ounces,,,
I use an 8-9 ounce leather and line it with 2-3 ounce pigskin or calf skin,,,
That ends up to be around 10-12 ounce total thickness,,,
Lined holsters are also much stiffer than un-lined.

If I'm making for a smaller gun I will start with 6-7 ounce leather plus lining,,,
Or even two layers of 4-5 ounce leather.

I like Double Shoulders as I feel they have a more consistent thickness than a Side of leather,,,
There is less waste in that the Butt and Belly of a side are useless to me.

Do you have a belt sander?
On small pieces I have thinned heavy leather to thinner straps by sanding the flesh side,,,
It doesn't hurt he leather a bit and even though it's not traditional,,,
Every shoe/boot maker has an entire bank of sanders,,,
It ain't cheating, it's labor saving.

I'm going to recommend a book for you,,,
It's not a leathercraft book,,,
It's a book on leather tools.

I learned a tremendous amount about how to work leather from this $9.95 book,,,
My thinking is that this book shows you every leather tool known to man,,,
It also shows you "WHAT" the tool is used for in leatherwork,,,
If you know something can be done and why it's done,,,
You will figure out when to do it in your projects.
It's called the "Leather Craft Tool Book"

After you read this book and learn about "what" can be done to leather with the proper tools,,,
Then everything in this "How To Make Holsters" book will make more sense.

The tools book shows you what can be done with and to leather,,,
If you know what can be done,,, you will understand (or figure out) when to do it in your projects.

One $9.95 book will save you hundreds of hours in wasted materials and frustration induced errors.
 
Thanks again my freind...

one thing I noticed is the "jock strap" ( the strap that goes around the holster ) on several of my cheaper holsters, this strap is 2 pieces, with a snap in the front... on that Heiser, it's a one piece loop, that has the 2 ends tapered where they are joined, on the back side, making the strap an even thickness all the way around... I was trying to figure out the best way to taper the thickness on my new strap
 
Tapering is called Skiving,,,

It rhymes with driving.

You can do it with a very sharp knife,,,
Or a belt sander if you have one.

I would never have though a sander was appropriate for leatherwork,,,
Until I attended the Shoe, Boot, and Saddle program at OSU Okmulgee.

In the shoe repair section and the boot making section,,,
Each room had an entire bank of belt, drum, and disk sanders.

I purchased a cheap 24" belt/disk sander from Harbor Freight,,,
Best $69.00 I ever spent besides my 1000 grit sharpening grinder.

Or you can lay a handheld belt sander on it's side,,,
It's somewhat clumsy but works well enough.

What used to take an hour with a round knife,,,
Now takes 5 minutes with a power sander.
 
BBQ

AAROND: Beautiful stuff. I really like the small smith rig. I need something like that for my Colt Hammerless BBQ gun. GO COWBOYS!!! I'm in Ponca.
 
Then we should talk,,,

Ponca City ain't that far from Stillwater,,,
We could meet at Joseppi's, my favorite watering hole,,,
Designing a BBQ rig over a beer (or three) is one of my favorite things.

biggrin.gif
 
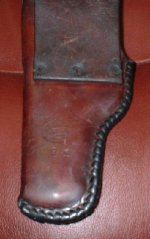
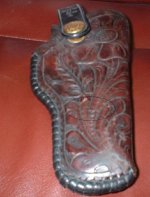
had this old Heiser holster sitting on my desk at work all week... & right now, I'm leaning towards not replcing the strap that goes across the tooling, & using the 3 existing rivet holes in the back, for 3 - 1/4" solid brass "chicago screws" ... which seems pretty easy to do... then I'd like to dye the "dotted" background sections of the tooling with a fine brush, & the black Feiblings prefessional die I have right now... there are several of these back ground sections ( like on the radius opposite of the lacing, as well as on the very bottom of the holster ), that have worn smooth... I can still see the cut outline of each section, but I think by dyeing those sections black, it'll help define the old tooling on the holster, & by not replacing "that" old cross strap, will allow more of the tooling to show... this is what the back side looks like...
attachment.php

I'd think that 3 screws in the existing rivet holes would be plenty strong & secure, & using the brass screws should protct the guns finish from wear ???

...that leaves the gun retention strap that will hold the old embossed Heiser snap... so I'm looking at 3/4" vegi tanned strips, & maybe trying to tool either a braided rope pattern, a vine with some leaves, or perhaps leave it plain, but put a grooved border similar to the scrap I have the snap on in the previous picture...

I have 3-4 tiny light spots in the tooling, that look like scrapes I thought if I stripped that area, & touched up the dye with brown, then refinished the top coat.. unfortunately, I'm not sure in this would be closer to medium or dark brown in it's antiquated state ???... I'm thinking dark brown

... I'm also wondering what to use to polish up that worn area at the bottom of the holster, to make it blend in better... I'm thinking using this...

http://www.zackwhite.com/product.php?productid=18124&cat=746&page=1

then buffing up the whole area after the spots are spot dyed ???

Thoughts ???
 

Attachments

  • Guns 330.jpg
    Guns 330.jpg
    52.8 KB · Views: 433
Last edited:
I don't like Resolene,,,

It's a top coat and will seal the leather.

Is it a rough spot because of friction wear?
If so you can try burnishing it smooth.

Try dampening the leather very lightly with tap water,,,
And then rubbing it vigorously with something smooth like a plastic spoon.

What you are trying to do is to burnish it smooth,,,
If you use the Resolene you will seal the leather and nothing can happen.

Tandy Super Sheen and Resolene are basically the same stuff,,,
It's a clear acrylic coat and is like varnishing wood.

It looks good on craftwork but actually hampers burnishing and conditioning.
 
maybe it can be burnished ??? hard to take that kind of pic with my old camera, but here is the best I can do... I work in a dusty environment so the leather doesn't look freshly polished... ( spots in the circle ) worn area appears lighter & duller at the bottom of the pic

notice the highly worn spot at the bottom of the holster appears the same color, evn though it doesn't have the "shine" of the rest of the tooling, but that "scrape" seems like it scraped the dye off to a lighter color, even though they aren't really deep enough to feel them ???

attachment.php
 

Attachments

  • Guns 332.jpg
    Guns 332.jpg
    69.3 KB · Views: 423
It's not badly scratched,,,

At this point I think all I would do is lightly condition it and then wax it with either Carnuba Cream or Tandy's Leather Balm with Atom Wax.

Scratches and worn spots are part of old leather items,,,
They are like the wrinkles around our eyes,,,
They give us character.

At least that's what I keep telling the young ladies I flirt with. :D

If you have gotten the leather softened with Dr. Jacksons,,,
Now it's just a matter of a coat of Carnuba wax and some buffing,,,
Then the leather will glow a bit and show some depth to the old patina.

I almost forgot,,,
If you are going to dye the background for contrast,,,
Definitely do that before you apply any type of wax coating.
 
Last edited:
Hey good to see an informative thread on Holster Making!

Eugene and Aarond, the quality of your work is amazing. Thanks for all of the great tips and links.

Dave, I'm seriously digging the artwork on your leather. I just recently bought a basic tooling set but haven't had time to figure it out yet. Your designs are very cool!

Keep up the good work fellas :)
 
I recommend this book Sixer,,,

It's available from tandy for 12.99,,,
It's called Inverted Leather Carving.

But the section you will like is on silhouette Carving.

I use silhouette carving a lot because it is fast,,,
It's the technique Dave Cole used on that skull and flame rig I like so much.

I find silhouette patterns by searching for tattoo patterns on the web,,,
That's where I got the dragon pattern I used on the Lara Croft rig.

Much more flexible than traditional floral carving,,,
And it really only requires a few sizes of two stamp tools,,,
You just need a swivel knife, a few sizes of Beveler, and a few sizes of Backgrounder.

The book explains the technique very thoroughly.

Keep on makin',,,
And post the Python Skin rig here,,,
It's a lovely design and you should show it off here.
 
Thanks for all the kind words.Your doing a fine job on that holster MWM, listen to Aarond, I agree with what he has said.
Aarond,did you get my e-mail about the exotics I use?
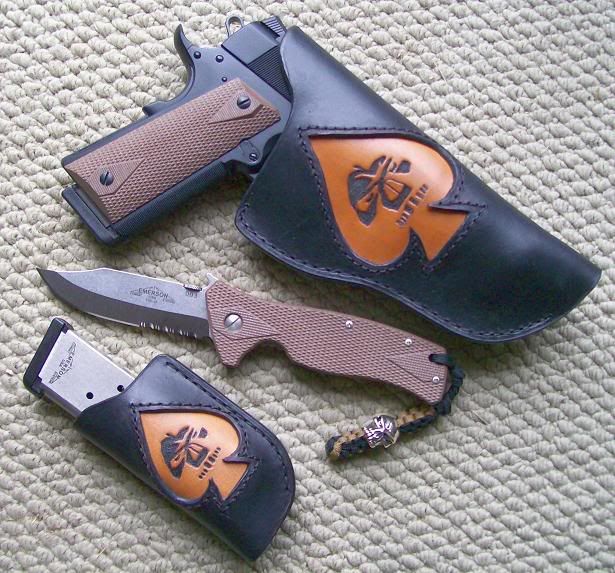
Sixer, I was trained to use few tools and alot of imagination.And yes I like that kind of carving and yes its faster and more flexible.Tatoo flash is good for images but many logo's or other images can be done as well.The computer is your friend for this stuff.My wife usually takes the images and sizes them to fit whatever holster or sheath I need and then prints it out,instant pattern.I then dampen the leather and lay the pattern on top and trace the lines with a fine ball tip stylus or ballpoint pen.Cut your linnes in with a swivel knife, and then start beveling and backgrounding.Dave:)

These two pieces were done with an Emerson logo( with his permission of course) for and Emerson/Les Baer 1911 using different size patterns.

user605_pic30031_1261291968.jpg


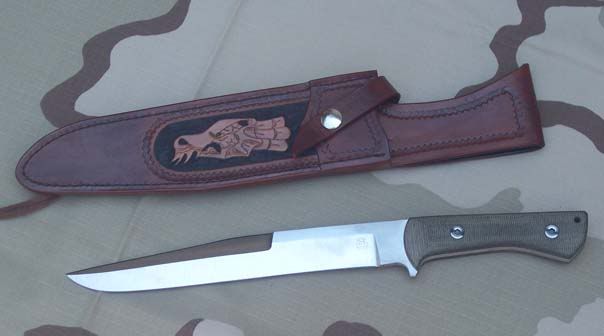
This sheath was carved using a customer supplied logo of his and coverted to a pattern.( not one of my knives, it was made by Angus Trim, I just did the sheath).

dragon3.jpg
 
I got the e-mail Dave,,,

I replied and thanked ya whole-heartedly,,,
Many makers are stingy with their leather sources

I haven't contacted the people as yet but I am definitely going to,,,
I really want to get more frog skins for my small projects.

Yes, the computer is your friend when making tooling patterns,,,
I use PowerPoint a lot to layout drawings and images,,,
It's very easy to scan, insert, and resize images.

Then I print it out on transparency film,,,
It's thick but still transfers with a ball point stylus,,,
That eliminates one intermediate tracing step from the process.
 
Here's what I did on saturday,,,

I made a holster for Mina,,,
I really like the pseudo old-west style.

I deviated on one thing,,,
I usually make my holsters with medium leather lined with light leather,,,
This time I decided to use up a nice scrap of saddle weight leather with no lining.

The stitching around the top of the holster body is purely for decoration,,,
I might replace the body strap with one using a small buckle,,,
That way I can use it with a minimal buscadero rig.

leathersmith.jpg
 
Frog Skin and Manta Skin holsters,,,

A while back I promised MagnumWheelMan a free holster,,,
Then he mentioned his Lady, Mrs Magnum,,,
So I decided he needed two holsters.

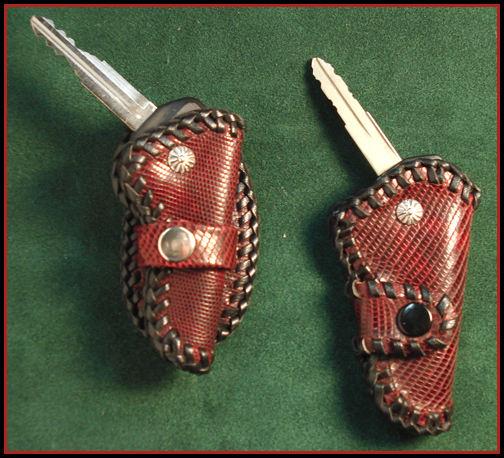
Here are the two Manta Skin holsters I made for them,,,
They are called: The Key-Slingers.
slinger-manta.jpg


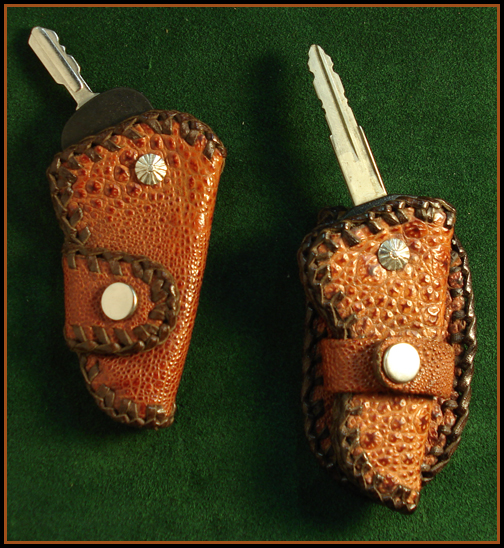
I use one for my Motorcycle and one for my gun cabinet,,,
Mine are many years old and are made of Frog Skin.
slinger-frog.jpg


P.S. As much as I would like to take credit for the design of these patterns,,,
They are from an old Tandy Leather pattern book.
 
Back
Top