You are using an out of date browser. It may not display this or other websites correctly.
You should upgrade or use an alternative browser.
You should upgrade or use an alternative browser.
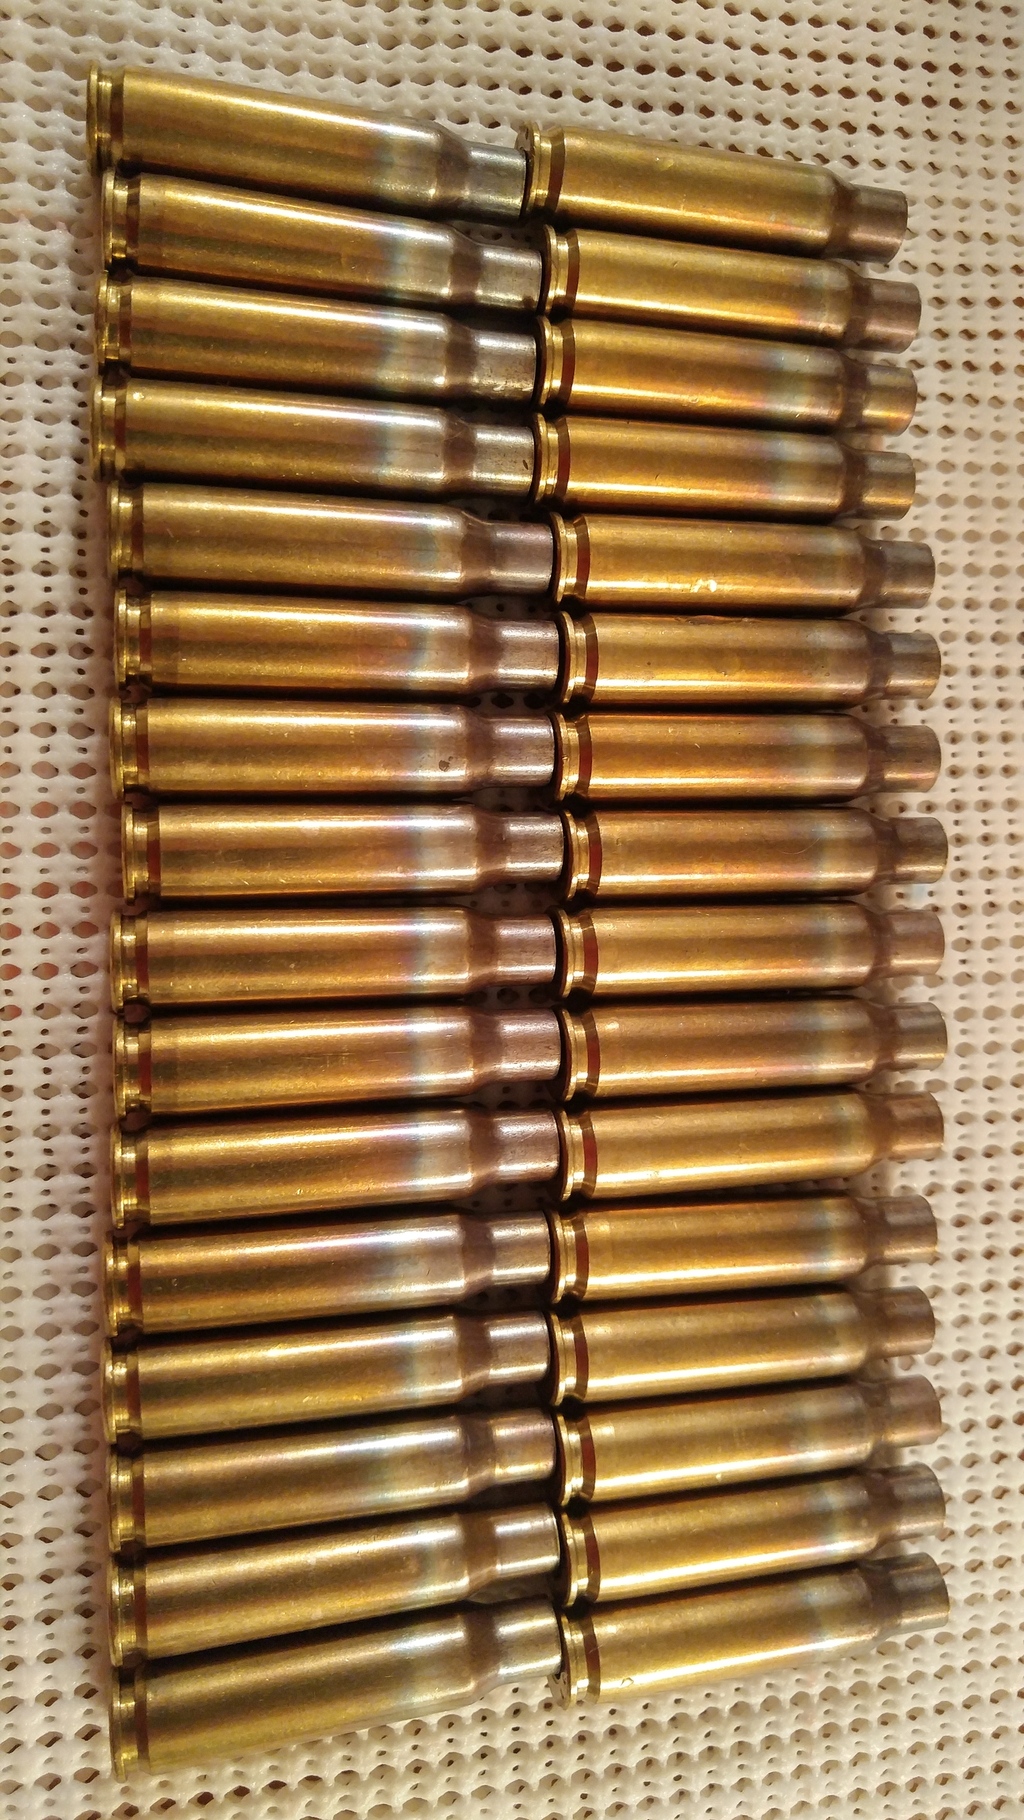
First attempt at annealing
- Thread starter Riry
- Start date
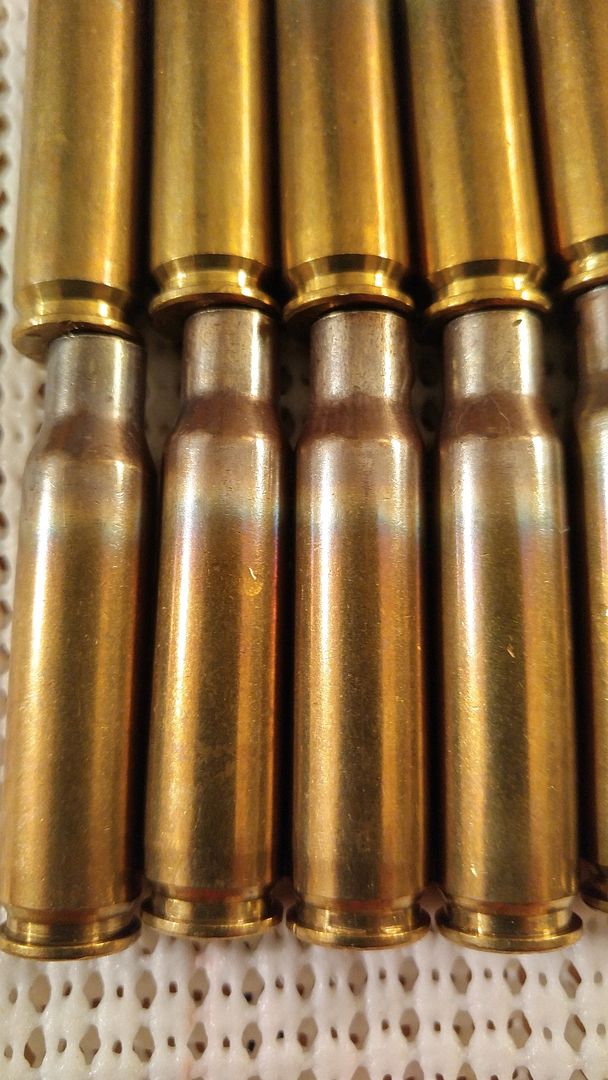
8 sec with MAPP gas likely got it way to hot , That's about the same time I use propane for . I ran some test a couple years ago testing a bunch of different ways to anneal 308 cases with propane and MAPP gas . I used tempilaq on every case both inside the neck and below the shoulders . I found MAPP gas was to aggressive/fast to control the temp of the case .
I have many pictures at different stages of the process . I'll post them up if you'd like . It just a rather large project to do on the first post of a annealing thread if not needed .
here's a couple examples
This shows how the temp indicator was applied to the cases 450* below the shoulder , 750* inside the necks
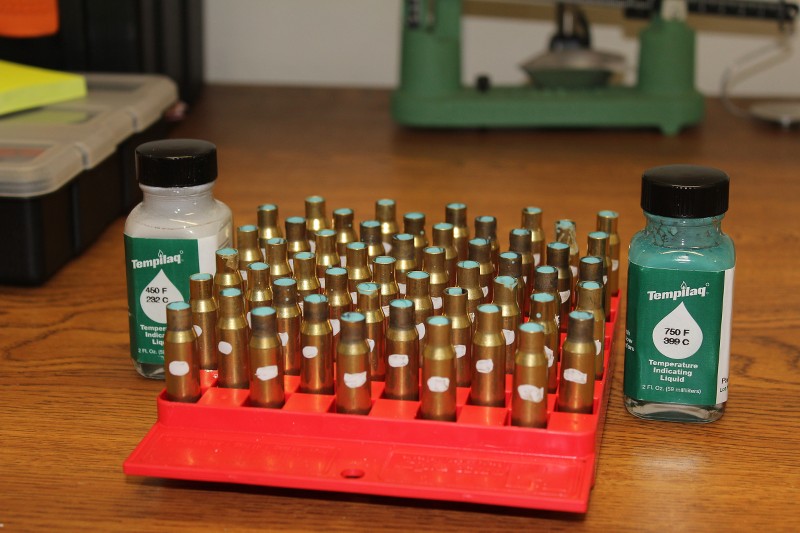
As you can see this pic show the Tempilaq just starting to melt and yet no anneal marks . I have found what the cases look like depends a lot on how/where the flame is applied as well as how hot it is .
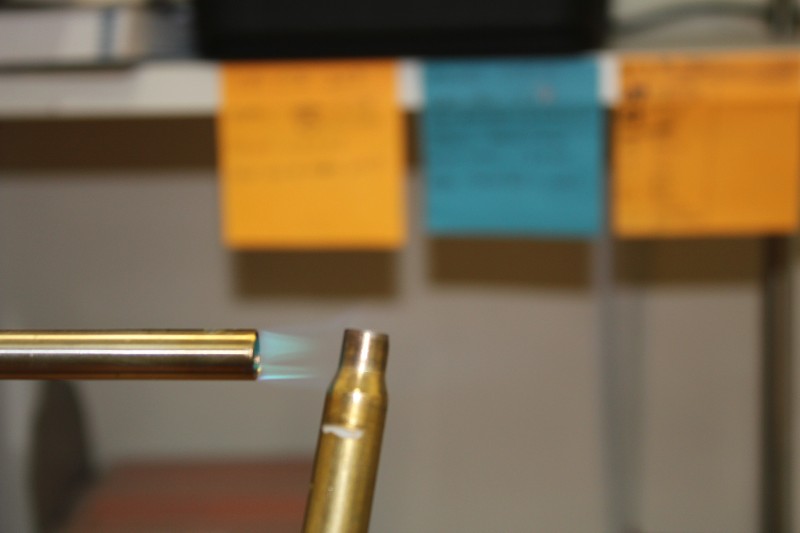
This is my MAPP gas torch I use for work
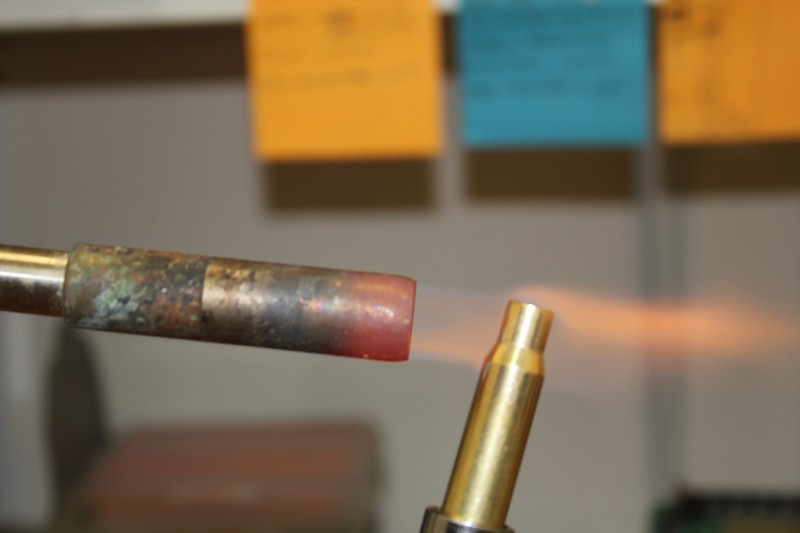
I have many pictures at different stages of the process . I'll post them up if you'd like . It just a rather large project to do on the first post of a annealing thread if not needed .
here's a couple examples
This shows how the temp indicator was applied to the cases 450* below the shoulder , 750* inside the necks

As you can see this pic show the Tempilaq just starting to melt and yet no anneal marks . I have found what the cases look like depends a lot on how/where the flame is applied as well as how hot it is .

This is my MAPP gas torch I use for work

Last edited:
Gigantic pictures aside(1024 x 1820 is too big) and assuming you did not heat to red hot(way too hot), looks fine.
You do not need any magic liquids or anything else to anneal correctly. However you don't need or want too much heat. Visible changing of colour of the brass is enough.
Difference between MAPP and propane is 43C degrees. Probably not enough to matter.
You do not need any magic liquids or anything else to anneal correctly. However you don't need or want too much heat. Visible changing of colour of the brass is enough.
Difference between MAPP and propane is 43C degrees. Probably not enough to matter.
T. O'Heir said:You do not need any magic liquids or anything else to anneal correctly
T. O'Heir : with all do respect can you explain how you have come to this conclusion ? I have run multiple test and have come to the exact opposite conclusions .
Maybe it's you and I differ on the definition of correctly . If you were to leave out the word correctly and just said "You do not need any magic liquids or anything else to anneal" full stop . Then I'd agree with you . I've tested , read about and talked with many people about this subject . I have found many have different wants/expectations when it comes to annealing there brass . They then give advice on how to anneal based on what they're willing to except as correct .
IMHO one does not need to use a temp indicator to anneal . One does need a temp indicator to anneal correctly though . Just annealing a case to me is to heat the case to a temperature between 600* to 750* to relieve the brass and extend case life . Correctly to me how ever means every case will reach very close to the same temperature 700* or 750* resulting in consistent bullet hold and release from case to case . This also can effect FL case sizing as well .
I really could go on and on about what I've observed while using Tempilaq . I was looking for a pic I have of 3 cases that were all heated to the same temp but the flame was held in different spots on the case resulting in very different annealing marks . Ranging from none present to very visible . Unfortunately when Imageshak went down a few months ago that pic appears to be one of the few that was lost . I'll try to find it again on my computer and re-upload it for reference .
Anyways I'd like to know how you came to believe no temp indicator is needed ?
Last edited:
The cases never got red, however I could see the blue/grey creep down the neck as i heated it. About the same angle as the pic shown, but maybe a little higher. And not as deep in the flame. My torch isn't as precise, and I can't adjust it. On or off. I can depress the button less or more, but figured it wasn't add consistent as fully on and me holding the brass towards the end of the flame. I never held it long enough to see red flames come of the case, and if I did, I tossed the case in the trash.
Yes, you do.You do not need any magic liquids or anything else to anneal correctly...
Either that, or don't do it.
(Yes, I'm being blunt
Agree- you need a scientific method to determine the correct temperature. I annealed some .223 without Tempilaq, watching for color change. Happened at 12 seconds with propane. With 650 degree Tempilaq just below the shoulder (so I knew the neck was into the proper range just when it started to melt), it took 7 seconds. No real color change except for a slight orange tint after it cooled. That extra 5 seconds can make a big difference in what happens to your brass.
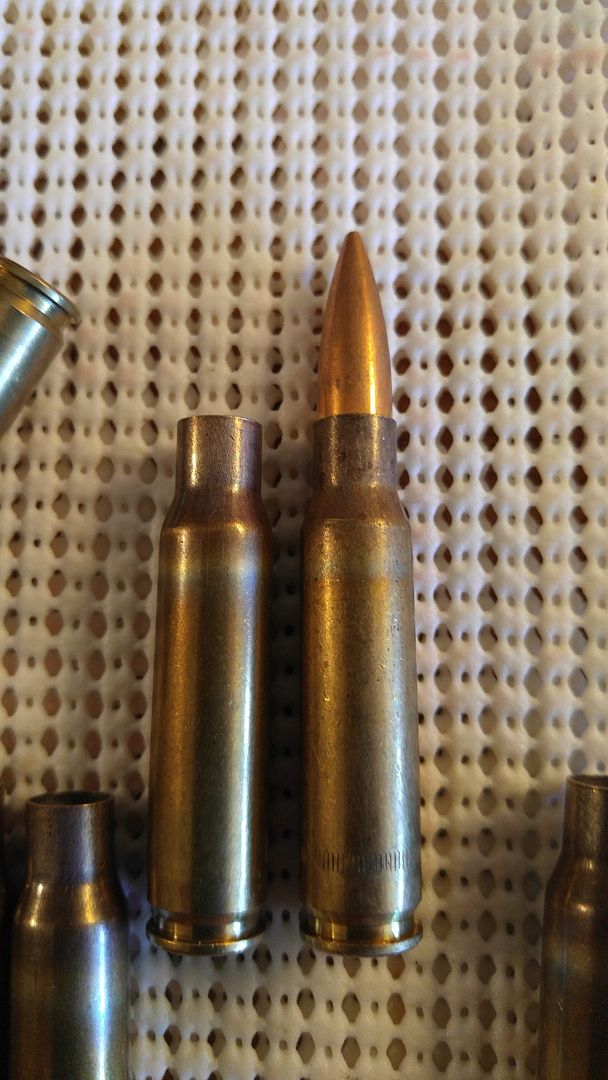
That's really up to you . In the tests I conducted I did one test ( really 10 tests , five 308 case and five 223 cases ) to see how much heat/time the flame would need to stay on the neck and shoulder to heat the web/head over 450* . Long story short , If the flame is applied correctly it's almost impossible to over heat the head . Now I say that because my test showed the flame was on the neck and shoulder so long 12+ sec that the neck and shoulder were glowing bright red before the 450* tempilaq melted at the head . So that means the case would be trashed anyways regardless as to what temp the head ever reached .
These are a few of the cases I ran that test on, the temp indicators were 750* just below the shoulder and 450 at the web/head
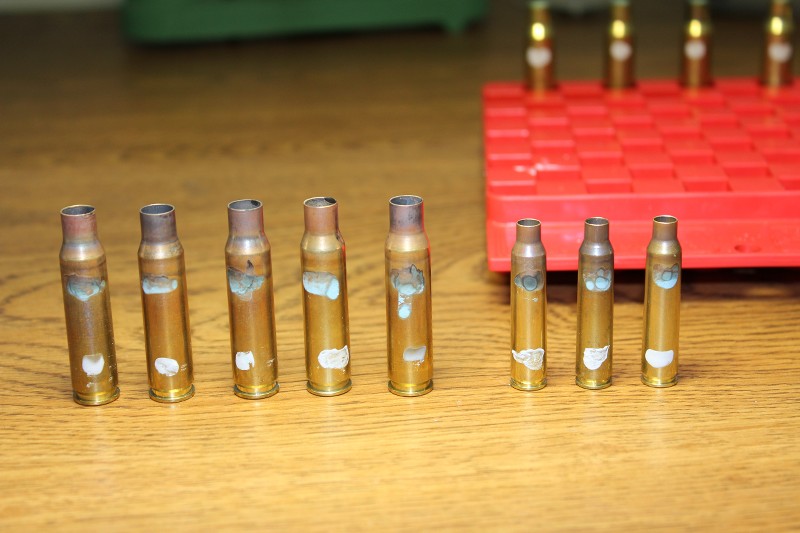
My point is with out actually seeing exactly what you did I don't know if your brass is safe to shoot . IMO it's not likely you heated the case at the head to cause a danger but again I was not there to observe the annealing it self . If it were me and It was not many cases and this was new to me . I'd trash them all .
On the other hand what you could do is size a few and seat a couple bullets ( no powder or primer ) and compare the bullet hold to once fired and FL sized cases . This may tell you if the necks are over annealed or to soft to hold the bullet well enough
Not many have a bullet puller that gauges the lbs per square inch it takes to pull the bullet but there are a few non scientific ways to check . Seat a few in your sized annealed cases and a few in your once fired cases . It's best if all are of the same head stamp . Now try to force the bullet deeper into the case by pressing the tip/nose of the bullet into your bench by hand . You should not be able to force either any deeper by hand . The other way is to use a hammer type bullet puller . While using the same force see if the annealed bullets dislodge much easier then the once fired do . Now they should be a little easier but if they pop out with less the half the force it takes the other . That may not be a good sign and could indicate the necks got to soft .
If the annealed cases fail those test . I would differ to Unclenick here at TFL as to if that soft of neck was still safe ?
I did save most of these case for future testing like bullet hold and other things . I marked and separated them and some day and not likely soon I'll finish those test .
If you have the time , the thread below is why I ran my test and all the results are in the thread . It's a 4 page thread but I like to link it because there is real debate through out the thread and I feel by the end It appears pretty clear what works and what may not depending on what you are looking to achieve . I have not looked at the thread for awhile so If any of my pics are missing let me know and I'll try to upload them here for reference .
http://thefiringline.com/forums/showthread.php?t=545128&highlight=my+take+on+annealing
These are a few of the cases I ran that test on, the temp indicators were 750* just below the shoulder and 450 at the web/head

My point is with out actually seeing exactly what you did I don't know if your brass is safe to shoot . IMO it's not likely you heated the case at the head to cause a danger but again I was not there to observe the annealing it self . If it were me and It was not many cases and this was new to me . I'd trash them all .
On the other hand what you could do is size a few and seat a couple bullets ( no powder or primer ) and compare the bullet hold to once fired and FL sized cases . This may tell you if the necks are over annealed or to soft to hold the bullet well enough
Not many have a bullet puller that gauges the lbs per square inch it takes to pull the bullet but there are a few non scientific ways to check . Seat a few in your sized annealed cases and a few in your once fired cases . It's best if all are of the same head stamp . Now try to force the bullet deeper into the case by pressing the tip/nose of the bullet into your bench by hand . You should not be able to force either any deeper by hand . The other way is to use a hammer type bullet puller . While using the same force see if the annealed bullets dislodge much easier then the once fired do . Now they should be a little easier but if they pop out with less the half the force it takes the other . That may not be a good sign and could indicate the necks got to soft .
If the annealed cases fail those test . I would differ to Unclenick here at TFL as to if that soft of neck was still safe ?
I did save most of these case for future testing like bullet hold and other things . I marked and separated them and some day and not likely soon I'll finish those test .
If you have the time , the thread below is why I ran my test and all the results are in the thread . It's a 4 page thread but I like to link it because there is real debate through out the thread and I feel by the end It appears pretty clear what works and what may not depending on what you are looking to achieve . I have not looked at the thread for awhile so If any of my pics are missing let me know and I'll try to upload them here for reference .
http://thefiringline.com/forums/showthread.php?t=545128&highlight=my+take+on+annealing
Last edited:
See also
http://thefiringline.com/forums/showpost.php?p=4147934&postcount=8 for bottleneck cases.
For big straightwall cases (like the 45's) I go direct to 750 Tempilaq inside the neck.
http://thefiringline.com/forums/showpost.php?p=4147934&postcount=8 for bottleneck cases.
For big straightwall cases (like the 45's) I go direct to 750 Tempilaq inside the neck.
Thanks fort the replies. So before I decided to anneal my cases, I had a batch of brass that when I would seat it, a ring would form towards the top of the projectile where the seater would make contact with the bullet. I could hear a slight crunching noise when seating the bullet. This was after full length sizing.
I went and pulled some of the bullets with a hammer type bullet puller. It took roughly 16 really really hard bangs to pull the round, and actually I still have few I never could get out.
To fix that I bought a seater specifically for hornady amax and started annealing. Fast forward to to yesterday, I seated a round in an empty case that I annealed and checked oal (2.810)
I put a lot of my weight on the round tip top down. Like...tried to push the bullet in. Measured oal again and it was 2.809. i think mostly because the tip of the bullet was compressed a bit. I then put it in my bullet puller and it took 6 whacks to drop. I can't crush the round with my fingers so I know it's not overly soft.
4runnerman
New member
Metal- I have been annealing for 6 years now, Never ever used any kind of liquid to do it, I use 2 torches pointed at each. Other and come up from the bottom.
It's something you just get the hang of after a while, Yes I did toast a couple dozen to get there, but it's a learning curve. When you are done annealing and you size and trim, You will know if you did it right just by the way the case will Chamfer on the inside. It will chamfer real easy and not have that hard metal feel. I get about 16 reloads out of my 308 brass and my 6MMBR I have some cases now that are in the 20's for reloads, and I push a pretty stout load out of those ones. I have since switch to strictly Lapua Brass now on everything except my 223. I would love to do the test once, just to see where I come in on the liquid test. Since I have gotten into Comp shooting I have meet many people, All anneal there brass, but very few use any liquid.
Rory-8 seconds is pretty much right on the money. 2 torches and a slow turn in the drill.
Last edited:
I've got a .222 Magnum for which brass is nearly impossible to find. It's a Sako L461, the short Mannlicher one, and I've got a 1-1/4" gp of 7 shots at 220 yds from rest that proves its accuracy.
Finding suitable brass is a severe problem...after buying the rifle, and a diligent search, I ended up with about 100 Remington's that are far too valuable to waste, so I continued the search for another source. Ruger .204 brass is long enough and requires only a shoulder set back and opening the neck up to take a .224 bullet to be good to go.
I got the .204 brass and tried running it through my .222 Magnum sizer die and it worked just fine, even without annealing. A drop in test with a Wilson case gage revealed no problems with head space and they fired with moderate loads, just fine in the gun, establishing a good firm shoulder location.
Now as to annealing...with all that effort [and a suspicion that even the .204 source may not have longevity either], I've been annealing both the Remington and Ruger brass. I've not used the crayon method of testing for the band of temperatures but did find a way that works for me. It sounds a bit odd, but has worked out safe and sane. I found this method some time ago when making up .35 Whelen brass from US military .30-06 cases.
I'm a bullet caster, have a Lyman furnace for casting and more importantly, a GOOD thermometer for testing lead temperatures. It's easy to get 700 degrees, right on the button using the combination.
To anneal, I use the molten lead alloy as a heat source/sink. This method was suggested long ago by a shooter in a long forgotten American Rifleman. I can't be more specific than that and wish that I'd kept the issue. Alas.
In practice, I lightly wipe my brass with gun oil inside the neck and leave the fired primer in place. This keeps the molten lead from adhering to the inside of the neck. I hold the brass with a pair of smooth jawed pliers at the canelure and dip it to just below the shoulder. Using a clock with a second hand, I give the brass a 5-6 second dip, then drop into a bucket of water off to one side of my bench. I get the same level of 'dip' each time by resting the pliers on the top edge of a block resting on the furnace.
For obvious safety reasons, I wear long sleeves, heavy gloves that are also used for casting, and a full face mask plus hat. Due to the molten lead alloy, this is obviously NOT a procedure for anyone with a slap dash attitude. It requires attention to detail, and a strong commitment to safety...much the same as bullet casting in general...
This method works for me and the proof of the pudding is that I've yet to lose a single piece of this rare brass. Some of it has been loaded over a dozen times.
HTH's, and BE SAFE...Rod
I just went out into the garage to (re)try rodfac's molten lead technique.
Held two 30-06`68HXP cases by the head w/ bare fingers* and dipped
into 760°F/30-1 lead.
The heated air gently bubbling out from the case mouth did get my attention
(and also ensured no lead inside the case neck) during the 5-count.
Wiped them off w/ paper towel and set aside.
Done.
I'd forgotten how simple/well it worked.
* (Don't bother yelling. It was a risk-accepted/case-head temp test)
It's something you just get the hang of after a while, Yes I did toast a couple dozen to get there, but it's a learning curve. When you are done annealing and you size and trim, You will know if you did it right just by the way the case will Chamfer on the inside. It will chamfer real easy and not have that hard metal feel.
Although I feel you never knew/know what temp you anneal your cases . It seems reasonable through trial and error one could get to a consistent annealing process with out a temp indicator . I also agree you can tell if the brass was annealed right by other feels like how it sizes or chamfering . I learned this by heating the cases to the proper temp and noticing those differences .
I feel and recommend using a control sample to get the flame , spin and timing down is important . Even more so for someone new to annealing . FWIW I strongly recommend the 450* 475* below the shoulder method . This is do to the effort it takes to clean the 750* tempilaq out of the necks .
I put a lot of my weight on the round tip top down. Like...tried to push the bullet in. Measured oal again and it was 2.809. i think mostly because the tip of the bullet was compressed a bit. I then put it in my bullet puller and it took 6 whacks to drop. I can't crush the round with my fingers so I know it's not overly soft
Based on your description they sound stress relieved to me . I'd likely load them .
Last edited:
4Runner said:It's something you just get the hang of after a while...
Problem is... each independent session produces independent batch results -- known only after each independent batch is finished.Metal(ReallyImportantPerson):-) said:It seems reasonable through trial and error...
I do really recommend a controlled time and temp method if you want predictable results.
Postscript to Post#16;
Went back with the two 30-06`68HXP cases I'd used the molten lead/dip method on, and two un-processed `68HXP cases from the same box,
- Unprocessed case: Neck expander was resistive and "squeaked" on withdrawal.
- Lead-Processed case: Neck expander withdrew with uniform pressure and no squeak.
I leave the conclusion as an exercise for the student.

