foolzrushn
New member
Update
This is really late, and I thought about just letting it slide, but maybe it will be of interest for those who have not done this particular task. It was a first for me. I probably have gone into too much detail.
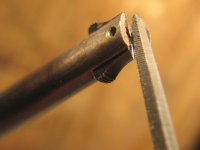
At first I tried to hold back the loading latch, while filing the latch retaining pin with a narrow file.

I thought perhaps I could file the pin through, and thus avoid possibly scarring the loading lever by grinding (as James K cautioned). However I found that the spring was too strong to hold with my fingers for long enough to file, so I gave up on this approach.
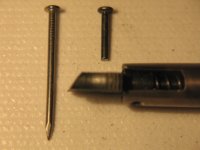
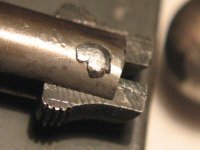
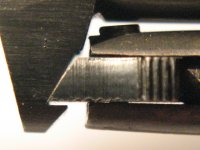
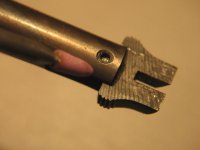
Next I clamped the loading lever securely so that it would not move around. Then I found a hard flame-shaped stone bit for my Dremel, with a tip smaller than the bradded end of the retaining pin and carefully ground away the end of the pin.

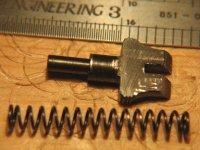
After very carefully grinding away the end of the pin, I made a small diameter punch and drove the retaining pin out of the loading latch.

This is really late, and I thought about just letting it slide, but maybe it will be of interest for those who have not done this particular task. It was a first for me. I probably have gone into too much detail.
At first I tried to hold back the loading latch, while filing the latch retaining pin with a narrow file.
I thought perhaps I could file the pin through, and thus avoid possibly scarring the loading lever by grinding (as James K cautioned). However I found that the spring was too strong to hold with my fingers for long enough to file, so I gave up on this approach.
Next I clamped the loading lever securely so that it would not move around. Then I found a hard flame-shaped stone bit for my Dremel, with a tip smaller than the bradded end of the retaining pin and carefully ground away the end of the pin.
After very carefully grinding away the end of the pin, I made a small diameter punch and drove the retaining pin out of the loading latch.
Attachments

Last edited: