You are using an out of date browser. It may not display this or other websites correctly.
You should upgrade or use an alternative browser.
You should upgrade or use an alternative browser.
whats your favorite modification to your revolver?
- Thread starter mike6975
- Start date
I like custom grips. In ivory,stag, pearl and fancy wood, like these Keith Brown Ropers I have on order.
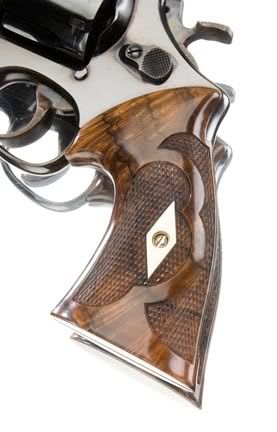
Black Walnut with an Elephant ivory diamond inlay.
Black Walnut with an Elephant ivory diamond inlay.
Raider2000
New member
Revolver....
Well all of mine has had my hands in it before the first grain was ever poured into the chambers or cartridge ever loaded, mostly in the action department where I smooth up the rough areas of the frame that come in contact with the moving parts & stone the sear area of the hammer to smooth it up & bring the initial trigger pull to 4.5LBS where I then smooth up a little more after a few hundred rounds to achieve the cocking feel that I like & bring the trigger pull to a nice crisp 4.0LBS "I don't like em too light to where they can be dangerous when Moma shoots any of em."
My Pietta 1858 NMA "Sherif" .44 cal will soon get a chamber upgrade as soon as the reamer gets here, you see it shoots good but could do better & apaun slugging the bore & checking the chambers I've found that it has a:
Lands = .440
Groves = .449
Chambers = .446
so I'm going to ream the chambers to .4505 to give it a nice tight fit in the bore as that .457 ball screams through.
I've also filed the front sight of it to bring the POI closer to the POA at 25 yards.
Now if we were talking about Semi Auto Pistols as well, well I've totally custom built mine & my wifes M1911A1's
Revolver improvements:
1. Better, prettier wooden grips, sometimes modified and usually refinished by me after I buy them. (I can modify and refinish but can't inlet original wooden slabs to fit the action properly without huge gaps.)
2. Polish sides of moving parts in action to reduce friction and smooth action. Usually followed by inserting lighter spring for trigger reset where applicable. I do NOT touch the sear/hammer/trigger engagement surfaces.
Last edited:
I like custom grips. In ivory,stag, pearl and fancy wood, like these Keith Brown Ropers I have on order.
in S&W N/K/L frames.
My bad, Since this is the bp forum I thought that's what we were talking about.
Quote: "Since this is the bp forum I thought that's what we were talking about."
My error. Since I always just click on New Posts which selects threads from all forums and lists them together, I don't always notice which specific forum section the thread originated in. Will try to look more carefully for forum ID.
My error. Since I always just click on New Posts which selects threads from all forums and lists them together, I don't always notice which specific forum section the thread originated in. Will try to look more carefully for forum ID.
Smokin_Gun
New member
First thing I always do with a new or new to me Rev is back off the trigger/bolt spring screw 1/4 - 1/2 turn...saves the cylinder from takin a beatin. Check hammer alignment and mainspring tension and adjust accordingly. Check the Timming. Then slicker up the innards, bolt head window in frame, bolt/trigger, hand assy. and hammer. Clean, oil, assemble ...wipe her down and head to the range...YeeeHaaawww!
SG
SG
Last edited:
Custom grips. Almost all my sixguns wear custom grips. Any that don't I just haven't got to yet. Which reminds me, I've got two sixguns that needs their grip frame assemblies sent to Bar S for TruIvory.
I also break them down, replace the springs and smooth out the innards. Especially on traditional single actions. They tend to be the roughest, Colt's and replicas alike.
I also break them down, replace the springs and smooth out the innards. Especially on traditional single actions. They tend to be the roughest, Colt's and replicas alike.
long rider
New member
I have got me a nice piece of purple heart wood,
i think i can make 3 pairs of grips for my 58 remms
when i have made them i will post some pics.
i think i can make 3 pairs of grips for my 58 remms
when i have made them i will post some pics.
Playboypenguin
Moderator
Modify a revolver? Why would anyone ever mess with perfection??? 
The closest I have ever come besides minor trigger jobs is simple cosmetic changes.
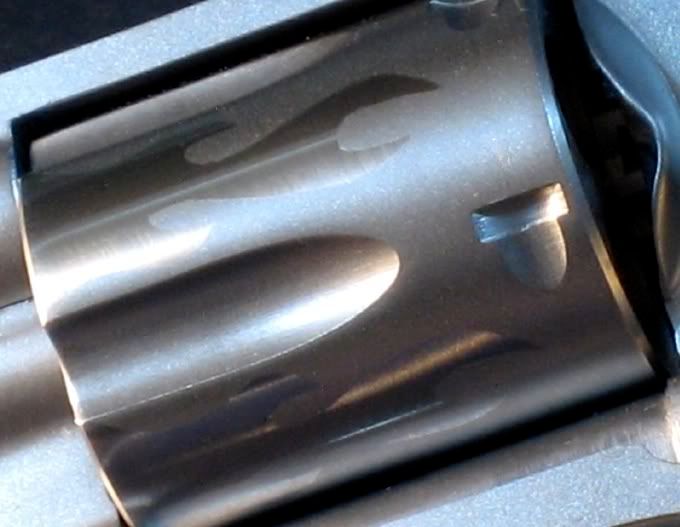
I have put a matte finish on my Smith m60 and added some polished flames on the cylinder and I have had my logo engraved on my CAS revolvers.")

The closest I have ever come besides minor trigger jobs is simple cosmetic changes.
I have put a matte finish on my Smith m60 and added some polished flames on the cylinder and I have had my logo engraved on my CAS revolvers.
sundance44s
New member
First thing I do when I buy a 1858 Remington ..I use a 1/2 inch sanding dremel and open up the cap recess , ( like the R&S comes ) That way I can use my snail type capper ...becaue I shoot the heck out of them !
Helpful thread...
Wow, good idea. Cud you PM me some details on that mod. I've got a good-shootin' Pietta '58 that's begging for it.
1858 Remington ..I use a 1/2 inch sanding dremel and open up the cap recess
Wow, good idea. Cud you PM me some details on that mod. I've got a good-shootin' Pietta '58 that's begging for it.
sundance44s
New member
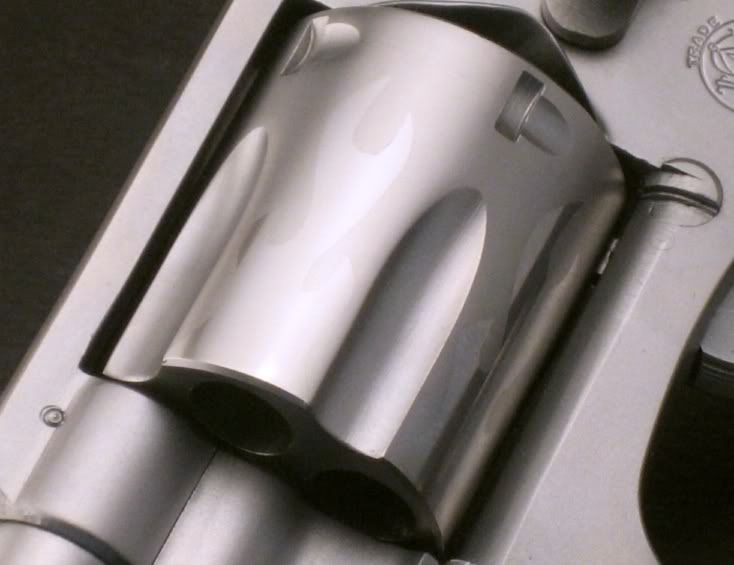
Cylinder Mod
Oquirrh...Well here it is , I took a pic for ya ....It`s not hard , and it`s not my idea , I got the idea from another pard that shoots his cap and ball as much as I do ...those thin stick cappers work with out the mod ...but they only hold 10 caps ..so You end up spending time loading the capper instead of the cylinders . I use a snail type capper after the mod. , my capper holds 100 caps , like an endless supply ..The deal is when doing this mod ..Do not use a high speed dremel ...Use one with a low speed , your work will come out much better going slow ....

Oquirrh...Well here it is , I took a pic for ya ....It`s not hard , and it`s not my idea , I got the idea from another pard that shoots his cap and ball as much as I do ...those thin stick cappers work with out the mod ...but they only hold 10 caps ..so You end up spending time loading the capper instead of the cylinders . I use a snail type capper after the mod. , my capper holds 100 caps , like an endless supply ..The deal is when doing this mod ..Do not use a high speed dremel ...Use one with a low speed , your work will come out much better going slow ....
Raider2000
New member
Sundance, that is a nifty trick you have there & I eventually was going to ask about that since I've seen pictures of I think your piece as well as some others.
I'll have to go home tonight & try that on mine..
I'll have to go home tonight & try that on mine..
sundance44s
New member
Raider ...I was going to send my cylinders out and have it done ....glad I didn`t now ...I have 7 of the 58`s all done this way ..I started with a Pietta 58 cylinder ...because it would have been the cheapest to replace , they were about 34 bucks at Cabelas at the time ...( higher now I`m sure ) ...
The last one I did , I thought I had enough pratice so I used a high speed dremel ...well..I saved it , but things happen a little to quick with a high speed ..The first one took me awhile after the first the rest of them took 20 mins each . The pard that posted me a pic of his he had done ...was a stainless steel model ...( Brave man for a first time) ...It came out good , and I could tell from his pic . I could handle it .
The last one I did , I thought I had enough pratice so I used a high speed dremel ...well..I saved it , but things happen a little to quick with a high speed ..The first one took me awhile after the first the rest of them took 20 mins each . The pard that posted me a pic of his he had done ...was a stainless steel model ...( Brave man for a first time) ...It came out good , and I could tell from his pic . I could handle it .