John E.B. Rawton
New member
I have read over several posts on many forums, copying and pasting into my files for reference. The knowledge that has been shared has been of great value and I thank you.
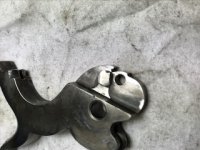
I just purchased two uberti in an 1851 and an 1860. I have been doing some clean up on the actions, removing burrs and addressing some areas that were rubbing to the point of gouging like the side of the hand.
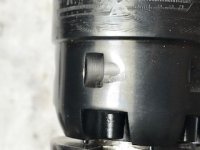
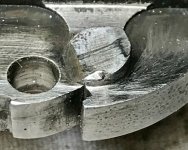
The actions are smooth and feels good but here is what I’ve noticed. The cylinder on each gun is starting to get peened pretty good. The block is hitting within the lead in but the geometry is off, smacking the rear edge of the lead ramp.
At the bolt cam I’ve found that the bolt leg is riding up onto the cam at about 4:00. It does not appear that I can stop this from occurring.
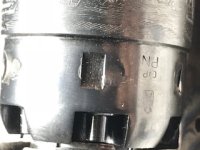
I went ahead and ordered two new hammers (one hammer had a bad cast at the sight) and bolts plus the Colt SA shop manual. I want to be able to get some useful life out of the new guns without them tearing themselves up after a few hundred rounds.
If nothing else my understanding of the action is increasing bit by bit as I come up this curve.
I just purchased two uberti in an 1851 and an 1860. I have been doing some clean up on the actions, removing burrs and addressing some areas that were rubbing to the point of gouging like the side of the hand.
The actions are smooth and feels good but here is what I’ve noticed. The cylinder on each gun is starting to get peened pretty good. The block is hitting within the lead in but the geometry is off, smacking the rear edge of the lead ramp.
At the bolt cam I’ve found that the bolt leg is riding up onto the cam at about 4:00. It does not appear that I can stop this from occurring.
I went ahead and ordered two new hammers (one hammer had a bad cast at the sight) and bolts plus the Colt SA shop manual. I want to be able to get some useful life out of the new guns without them tearing themselves up after a few hundred rounds.
If nothing else my understanding of the action is increasing bit by bit as I come up this curve.