NOE brass mold

Old 454

New member
I just purchased my first hollow point mold from NOE. I bought the 452 230 grain small opening mold in brass.

Any thoughts on break in. I have never had a hollow point mold let alone a brass mold.

I have been casting now for about 2 yrs. Using Lee and a few ild ideal molds.

Thanks for any info you can share with me.
 
They come with directions from NOE. I recommend following those.:)

http://noebulletmolds.com/smf/index.php/topic,2.0.html
My only disagreement is with smoke. I definitely say NO smoke, but to each his own. Some people even smoke, themselves!;)

Do use a hot plate. Run the mold hotter than iron molds. (Cast very fast until you are getting good bullets or start seeing frosted bullets)
Don't stop to admire them, don't stop to cull them, don't put sprues back, just cast like your arm was on fire and it'll start dropping perfect bullets and you can then find your rhythm and can even cull and put sprues back later, after you know how long your sprue puddle needs to sit before cutting. Have fun!
You'll love brass!! :D
 
Brass is great.

Follow NOE's break-in instructions.


But don't over-heat the mold blocks while casting. Brass warps easier and more profoundly than iron or aluminum molds, and rarely returns to its original shape. (This is a bigger problem with some other companies' molds [like Accurate] - NOE's aren't as bad.)
If your bullets are getting frosty, air-cool the mold for 30-60 seconds and then resume casting at a slower tempo.

Don't be afraid - just be mindful.
 
I just jumped on a group buy for a 185 grain tapered "snover" style bullet for 32-40 over there. My first group buy. I opted for a brass 2 cavity mould. My first brass mould. It should be interesting.

My 200 grain Saeco mould casts a nearly perfect bullet, and seems to stabilize ok in my 15 twist barrel, but I'm curious about a lighter, pointier, bullet. I get 1" at 100 pretty easily using a scope with the 200 grainer, I think this one might do better!

Plus two cavities instead of one ought to make bullets twice as fast, right?

Regards,
Stubb.
 
Send it to me and i'll break it in for you...

Like others have said it takes a little more effort to get the brass up to temperature but once its there the maintain the heat very well. I've never used a HP mold but I imagine a little smoke will cure any problems with sticking.

NOE recommends a couple of heat cycles before casting. I have done this with some molds and skipped it with some molds with no discernible difference. They also recommended cleaning before first use.
 
OMG....lol i just recieved my brass mold today... what a beautiful mold !

Ok now for a few more questions.

I cleaned the mold per instructions with dish soap hot water and a tooth brush.

Instruction that came with the mold was more or less for aluminum molds. Stating casting temps below 600 degrees. Break in on a hot plate at 350 to 400 deg.

I have the mold on my hot plate at med. Temp. Is this hot enough ???

What is the recommended casting temp on a brass mold ?

Any info you have is greatly appreciated. As stated this is my first really nice mold. And i want to make sure that i treat it properly.

Thank you all again
 
Well i casted some late last night.

I think this mold needs a lot of breaking in.

Lots and lots of culled bullets. The ones i did get are very frosty. So I am still looking for that sweet spot on temp.

680 deg. They were nice and shiny but wrinkled. 700 deg. They got frosty.

Any suggestions ?

Also one thing i never seen happen...a couple bullets when they droped just shattered when droped out on the piece of raw hide i drop my bullets on. They were very frosty vut just fell apart.
 
Your mold was too hot at the end. The lead wasn't. I keep my lead at 745° with a PID and it works with my rhythm just fine. I can let it back down to around 680° and still get good bullets, but I just like it hotter. It seems easier to me. But your mold was too hot, that's why it frosted at that lower temp and also why the bullets shattered when dropping them. Don't preheat as much on the hot plate and see if that will work for you. Heat it about 1/2 to 3/4 as much as you did and let the lead bring it up to the temp it likes, as you cast. It should get to the sweet spot in about 5-8 pours. It also might not have been completely oil-free yet and that's why it wrinkled at first. It is odd for one to go from wrinkling to frosting without hitting a good area in between somewhere. Usually a new mold will cast much much better on the third time I use it. I think it has to sweat out all of that cutting oil or something.... I can't quite explain it, but it does work better after just a couple of uses.
 
I drop my bullets into water. I have a cheep insulated mug with a washrag in the bottom for a cushion. I fill the mug about half full.
 
I followed the directions except that I cleaned mine in acetone . I don't like water in my moulds...old habit . Acetone and toothbrush scrub.
I didn't have a hot plate so warm it by sitting mould on top of pot to heat.
Cleaned and cast 100 or so, placed mould blocks back on top of pot to slowly cool down. next time I cleaned exterior and sprue plate, not the cavities, and cast another 100, let cool. Did this twice to season mould. On third session , instead of smoking the cavities, I used Liquid Wrench Dry Lube on a Q-tip to apply a thin coat to the cavities...this stuff works better for me than the smoking. Liquid Wrench Dry Lube will not contaminate the cavities and is a great release agent.
Heat the mould on top of the pot. When everything is warmed up, two or three castings go back in the pot and after that every one will be a keeper , the few that weren't were my fault...not completely filling a cavity usually.

You have to season the mould, like a cast iron skillet , by doing a few cleaning - heating -casting-cooling cycles. After it is seasoned it will cast great bullets...at least my aluminum mould does.

The trouble with them is they are so nice to work with, It makes you want to buy more and they're not exactly cheap. I wish I had a bigger mould budget, I haven't had mine long and already I want another.
I will say they are worth every penny and Al "Swede" Nelson is a super nice guy.
Another tip, only use trace amounts of mould lube, I had a bad habit of using too much and it will get into the cavities and cause wrinkles.
Gary
 
Last edited:
Thank you all for the info. I will clean the mold with some break cleaner just to be sure its clean of oils and such. Also i will heat on hot plate on medium heat instead of high.

Also not much problems with sticking on the pins.
I kind of figured the mold needs to season some more.

I did get some keepers out of the ones i casted that are gorgeous.

Once i get the mold running good i will post up some pics

Thank you all again. You are all most generous with your knowlage
 
This is the first mold I ever bought. I didn't know anything about casting and found a deal on this baby and thought I was starting out right. It sure was a learning curve, and a steep one! :eek: 
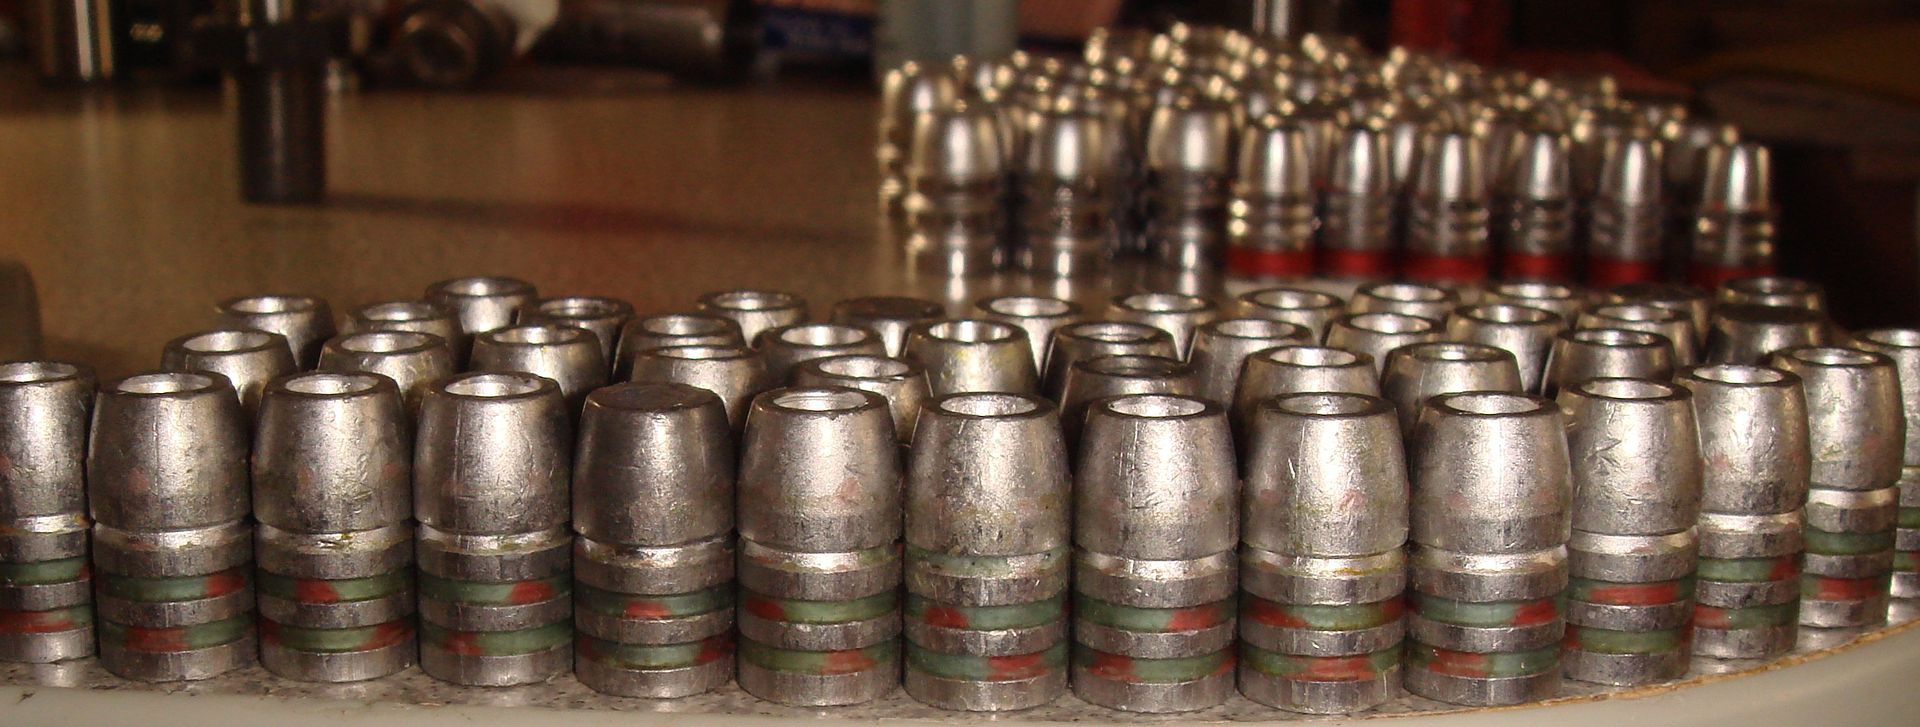
The square loob grooves on this beast will grip a bullet like pliers if it isn't hot enough. I did finally make friends with it though and it's still my most accurate .357 bullet. (although for the safety of my sanity I really wish I had started out with a 2 cavity Lee mold);) I have many brass molds now though and prefer it over any other metal.

NOE 360160 WFN
DSC03543_zps8f6b8428.jpg


jan30002_zps3895f27a.jpg
 
(...) The square loob grooves on this beast will grip a bullet like pliers if it isn't hot enough. (...)
I still have nightmares about the square gas check shank, perfectly flat meplat, and 'square' crimp groove on V.1 of my 425 gr .432" bore-rider mold.

Getting those bullets to drop was like trying to talk a toddler into giving up their candy.

I expected Tom(?) at Accurate Molds to tweak my design for ease of use and easy bullet release, but he cut it exactly as I drew it (which was more of a dimensioned sketch than a proper bullet drawing). So, the lack of draft on the nose, base, and middle of the bullet made release a serious problem. I can't blame him for it, since we never actually discussed the subject. It was just an oversight on my part.

But, I discovered the mold to be out of spec, anyway (0.0015" over - which turned out to be a scaling flaw in the formula he used to calculate expansion/shrinkage in large-cavity brass blocks). So I talked him into adding some draft to the 'square' areas for the replacement. It took three more attempts to get it right - one more failure was his fault, one was mine.
Mucho gooder, now.
 
Back
Top