Need gun-related 8th grade Science Project suggestions

Micropterus

New member
My 8th grade son got approval to perform a science project involving firearm(s). Of course, he won't be able to take any guns or ammo to school, but he will be able to show photos and video of his experiment.

The problem is, I am having a hard time coming up with a science project that is simple enough for 8th graders to understand (and me, too). So I'm looking for suggestions.

I have a pretty standard collection of handguns in various calibers, some shotguns and rifles, including .22LRs. I DO NOT have a chronograph nor do I reload. And I don't have a Ransom Rest.

Any suggestions? I love his enthusiams and love for guns, but this is actually a pretty tough one and I'm getting to the point of telling him to pick another subject.
 
Demonstrate that a projectile fired from a perfectly horizontal gun and an object dropped straight down from the same elevation as the gun barrel at the same instant will hit the ground simultaneously. If asked in advance, most kids will say one or the other will hit the ground first. If done correctly, they will land simultaneously. It is a gravity experiment using a gun. That should do it.
 
Handguns it shall be. One of the first lessons to be learned when dealing with science projects, whether they be high school or university projects, is to pare down the the idea/question to be explored or answered. It is incredibly easy to get totally overwhelmed.

I would respectfully suggest getting this project down to one handgun and two loads. FMJ and HP. Explain the difference, have a cross sectioned example of each projectile, explain the different uses, explain the how and why of expanding handgun ammo, and blast some wet newsprint to give a visual of same weight same caliber projectiles traveling at the same speeds, and what they do due to the different construction. What work they perform. There should be enough in this simple project to make the teacher step back and look.

I hope this helps, good luck.
 
Hello, Micropterus. I doubt you'll ever get a handgun in a classroom of today..However, there is an interesting project he could do..showing the effect of a heaver projectile vrs. a lighter one on the target. The heaver, due to longer brl. time will print higher than the faster lighter bullet. He could make up a brl. that would pivot around a pin & use compressed air.
 
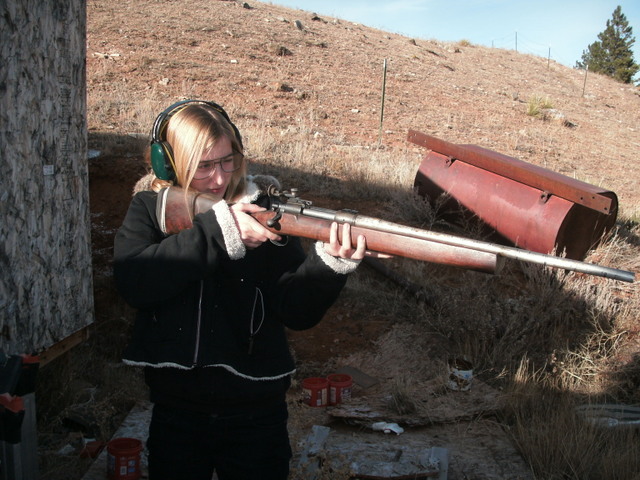
My Granddaughter's 8th Grade science project:

Goal; To determine the shortest barrel length for hunting elk with a 308 Win.
She wanted to make the barrel as short as possible, yet still deliver 2000 Ft lbs of energy at 300 yards.

The shorter barrel would be for ease of carrying in the brush.

She started out with a 26 in barrel on a Rem 700 chambered in 308. Using factory 180 grn bullets.

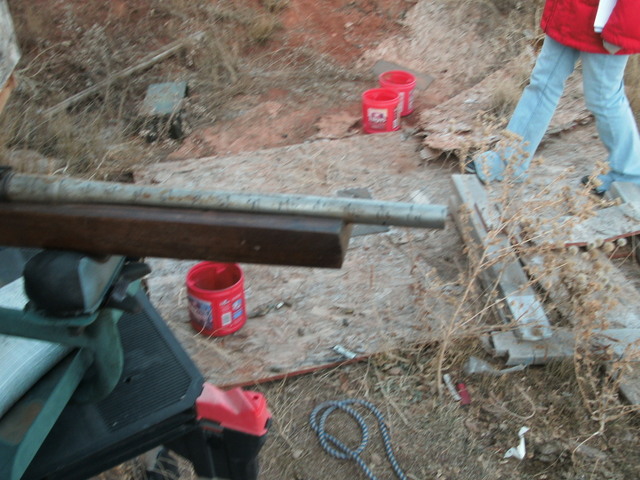
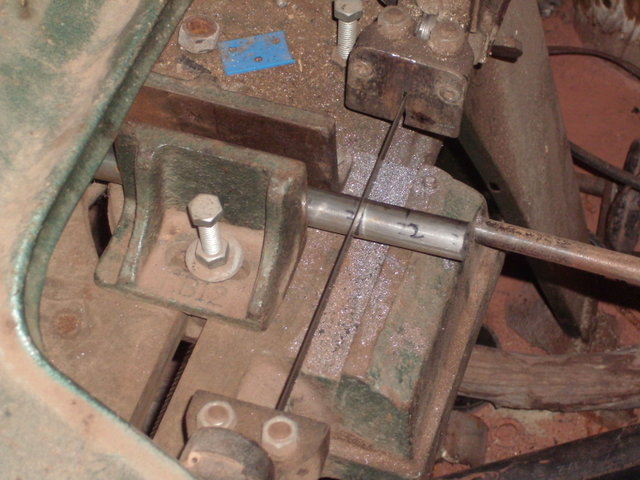
She cut the barrel 2 inches at a time until she got to 16 inches, then firing through a chronograph. She put the number in a Ballistic Program to get the velocity, then the KE, at 300 yards.

063.JPG

066.JPG

069.JPG
 
If you could take a picture down the barrel showing the rifling in a handgun you could then go on to explain WHY rifling makes a firearm more accurate or maybe how the manufacturers rifle a barrel (polygonal rifling could be mentioned) etc. etc.
 
How about what effect rifling has on the bullet, when rifling was invented (that is why they started calling them rifles), how rifling works and the different types of rifling (traditional vs. polygonal). He could even cover the 5R rifling and why some claim it is better than the traditional 6 lands and grooves.
 
If he wanted to get real technical, he could cover rifling rate of twist and barrel length needed (for velocity) to stabilize the different bullet weights.
 
How about a simple graph of muzzle velocity in relation to charge weight? Need more complexity? Figure ES and SD for lots of 10 or 20, in increasing charges, and plot those on a graph ..... still not enough? ...... find the "sweet spot" and show it is repeatable and makes the smallest groups.

you might need a rest, and you'll need a Chrony...... have fun!
 
You could build a ballistic pendulum. Fairly easy to build and shooting it with various firearms in different calibers will show the differences in the momentum of the various loads.

If he's mathematically inclined he may want to do the calculations to determine the muzzle velocity, but even if he decides not to go that route, the pendulum, how it works, and the measurements taken from it should be reasonably impressive.

http://en.wikipedia.org/wiki/Ballistic_pendulum

http://hyperphysics.phy-astr.gsu.edu/hbase/balpen.html

http://en.wikipedia.org/wiki/Ballistic_pendulum

http://youtu.be/cVjxn4KjOb4

http://demonstrations.wolfram.com/BallisticPendulum/

http://www.hartnell.edu/physics/labs/2a/theballisticpendulum.pdf
 
JohnKSA beat me to it. A ballistic pendulum is a wonderful project, and especially if either of you have enough algebra to work the calculations. I did one for Physics I.

Also, please be very careful in what actually goes to school. Schools are tremendously skittish about firearms, and "zero tolerance" policies ensure that any penalties are outrageously excessive and out of hand.
 
Several thoughts come to mind...

Ballistic trajectory
You'll need a box of paper plates, a staple gun, some wooden stands, a hoome-made pistol rest, two types of ammo, felt marker, pens, pencils, notebooks and measuring tools (fine scale ruler, a sliding micrometer, etc.)

The plan is simple. Make a wooden rest for the handgun that can be clamped to the table. Place paper plates in front of the gun every 3 ft out to 25 yards. The first plate should be about 6-12 inches from the muzzle. Fire a round and plot it's path through the paper plates as a measure from the top or bottom of the plate. Use this to chart the path of the bullet. With the gun confined to a fixed rest, they need to explain the apparent rise in trajectory between the muzzle and the bullseye point (usually 25 yards). A 158gr LSWC compared to a 125gr LSWC shows the ballistic differences in flight between different weights of bullets. (A chronograph would be helpful but you can use the published ballistics). Digital photos of the test configuration and test firings add eye-catching interest.

Humanity of JHP/JSP ammo vs. FMJ
Arrange with a local grocer to obtain "expired" pieces of meat of the same kind at a major savings. Pork butt shoulder, Hams, tri-tip roasts, whatever. You'll need a notebook, digital camera, handgun, a few types of ammo - Some FMJ and quality JHP of the same weights and similar velocities. Also a sharp knife, a ruler or measuring device, felt marker, ziploc bags, a "soft" backstop and perhaps a white rod for a pointer.

At a given distance fire a FMJ round into the target product, using a soft backstop to catch any "through and through" bullets. 12"-14" of dry phone books backed with a 1/2 wood panel should work. Take photos of entrance & exit holes using the pointer if necessary. Recover the bullet, tag & bag it. Use the sharp knife to reveal the bullet's path and photograph. Repeat for the JHP round. Detail the differences and the consequences. Display the spent bullets with photos of physical damage.
(i.e. the FMJ causes little damage, results in longer period of pain, suffering and death from infection or slow blood loss. May require multiple hits to incapacitate which complicates surgical intervention and lowers survival chances. The JHP produces a larger wound more likely to incapacitate quickly with only one shot. Medical intervention is focused on one path of injury increasing survival chances.)

Do you have an old "beater" pistol or revolver?
The Fallacy of Micro-stamping
Using an old gun, use a fine-tip engraver to etch a series of small dots on the breechface around the firing pin hole, within the diameter of the cartridge case. Fire several rounds, including some +P rounds (if safe in that gun) and save the cases. Then use a small jeweler's file and/or sandpaper on a stick to smooth away the indentations. Repeat the firing and retain the cases. Compare. Indicate the amount of time it took to file down the dots and surrounding area to prevent imprinting on the cartridge cases. For extra fun, time the removal and replacement of the firing pin in the slide to show how quickly it can be replaced. Repeat for extractors and ejectors if desired.
 
Mythbusters may be of some help

The TV show Mythbusters has done many gun experiments, and the gravity one (dropped bullet vs. fired bullet) is easily reproduced. Watch the episode and see if it fits for your child's project. A good physics lesson in gravity.
 
I heard on the radio yesterday that a raquet ball can hit your eye with the same energy as a .22 bullet - (a public safety tip for wearing eye protection when playing sports).

I wonder if the energy is really the same.
 
The Fallacy of Micro-stamping
Using an old gun, use a fine-tip engraver to etch a series of small dots on the breechface around the firing pin hole, within the diameter of the cartridge case. Fire several rounds, including some +P rounds (if safe in that gun) and save the cases. Then use a small jeweler's file and/or sandpaper on a stick to smooth away the indentations. Repeat the firing and retain the cases. Compare. Indicate the amount of time it took to file down the dots and surrounding area to prevent imprinting on the cartridge cases. For extra fun, time the removal and replacement of the firing pin in the slide to show how quickly it can be replaced. Repeat for extractors and ejectors if desired.

WIN.
 
Back
Top