My Hammer Stirrup fell out!

Master Blaster

New member
Over the years I have change the mainspring on S&W revolvers many times.
Its always been a simple procedure and never required the removal of the sideplate until this past Saturday. I came into a new revolver a 625 Performance Center made in 2017. The trigger pull is slick as glass in double action but a bit heavy so I ordered a wolf reduced power rib mainspring kit with three rebound slide springs. In the past when I replaced a mainspring I simply removed the grips, unscrewed the strain screw and pulled out the mainspring by moving it forward at the top to unhook it from the hammer stirrup and sliding the bottom out of the slit in the frame. So this time when I removed the spring a part fell out onto my workbench. :confused:

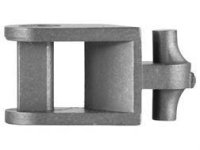
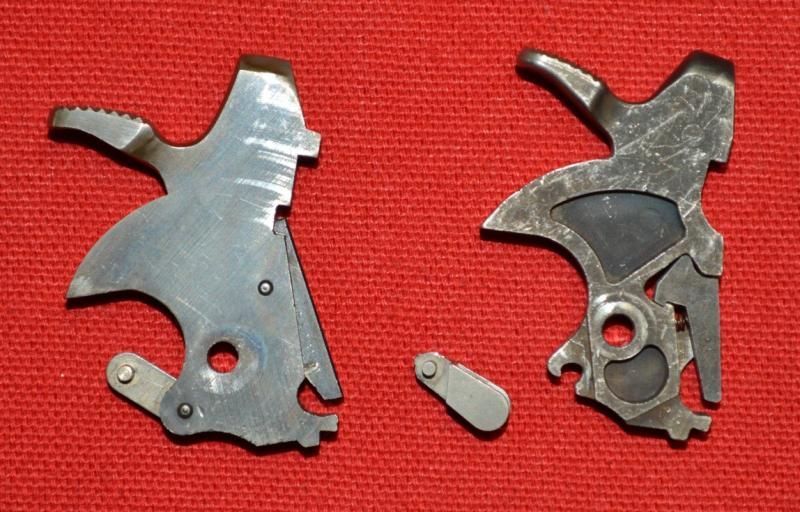
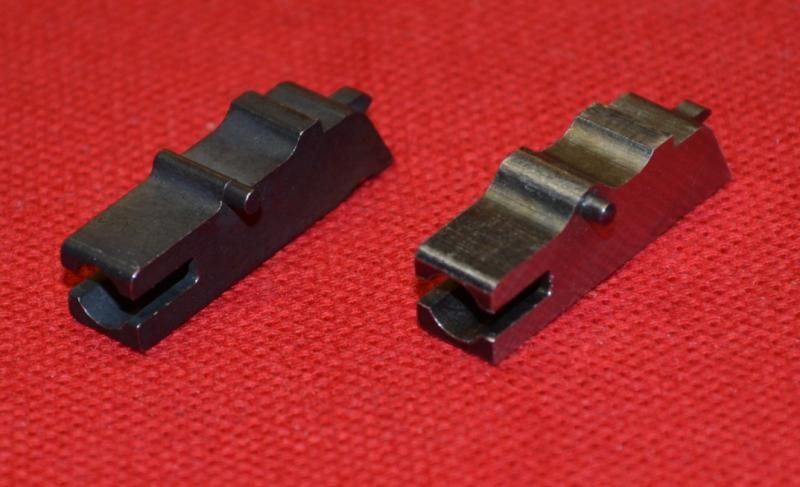
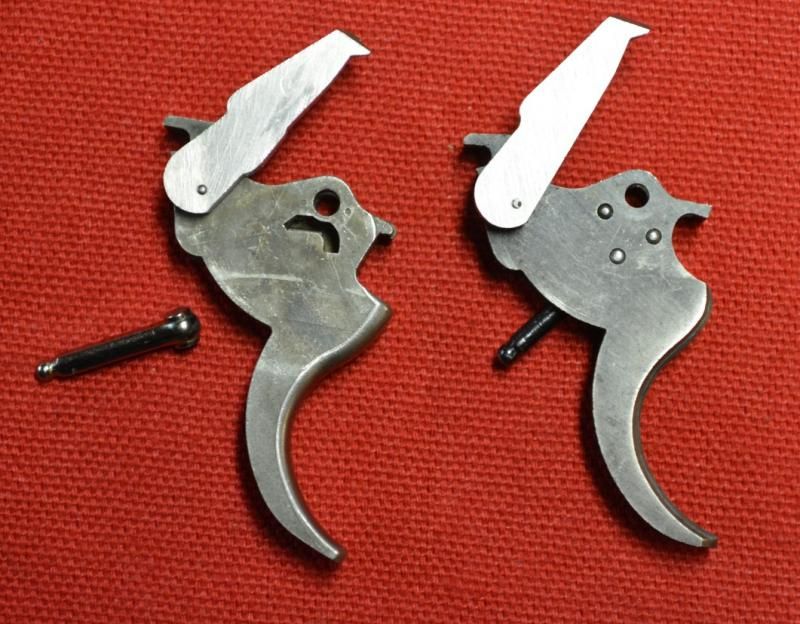
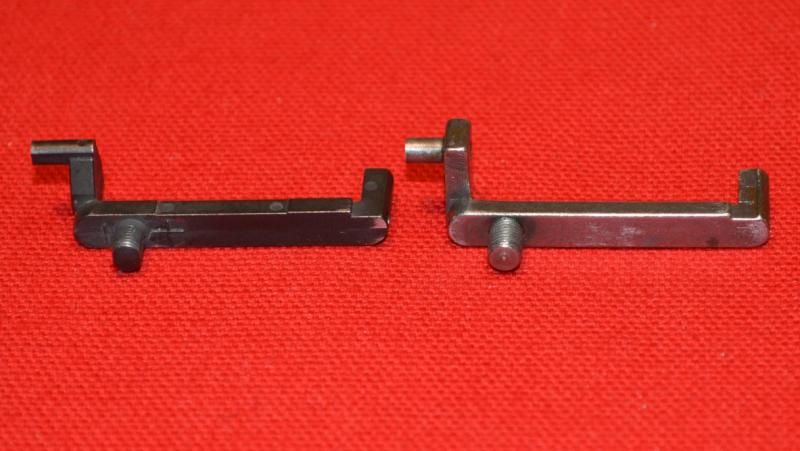
I examined the part and realized it was the hammer stirrup, my first thought is how did the pin fall out did it break? Then I realized it looks much different than in my older smiths. So I removed the sideplate and realized that the new hammer design only has an open slot where there used to be a recess and a pin. The cross piece on the hammer stirrup sits in that slot and it not pinned in in any way.

So after a couple of minutes I had the stirrup back in place and the spring attached. I put a little tension on the spring with the strain screw to hold everything in place and put the sideplate back on.

Apparently there are hammer nose hammers with a pinned stirrup, post 97 hammers with a pinned stirrup (no hammer nose), and the new hammer with a stirrup slot.
 

Attachments

  • newhammer.jpg
    newhammer.jpg
    4.7 KB · Views: 120
  • oldHammer.jpg
    oldHammer.jpg
    4.5 KB · Views: 97
  • oldnewhammer.jpg
    oldnewhammer.jpg
    4.3 KB · Views: 88
Last edited:
It's been so if I recall correctly since about
the late 1990s.

Smith internals used to be more "unitized"
meaning the parts were pinned together.
But the new method is cheaper so......


Actually, ever pull apart a Colt such as
a Python? Now there's a bit of a wonder.
Even starting with the cylinder thumb latch,
if you're not careful you'll lose the latch
spring as you remove the side plate.
The assistant designer if not the main
designer of a Python's internals was
Rube Goldberg.
 
Howdy

It's part of the changeover to MIM (Metal Injection Molding) parts. The old hammer assembly featured the double action sear and the stirrup pinned to the hammer. The new design is simpler to put together than the old design. The stirrup drops in place is a partial hole at the rear of the hammer, the double action sear drops into a recess in the body of the hammer along with its spring. As has always been the case, saving a little bit of time in assembly translates to cost savings in making the product.

In these two photos a hammer from a Model 17-3 is on the left, the hammer from a Model 617-6 is on the right.

While I prefer old fashioned machined parts myself, part of redesigning the parts for MIM included redesigning the parts so they are simpler to assemble. Pinning the parts together required more time for the assembler, and probably involved using a few fixtures. The redesign requires no driving pins in place, it is simpler to do. The geometry of the double action sear and its recess define its motion. Just be careful if you take them apart that you do not lose the spring.

Regarding the hammer stirrup, it only goes back on one way. Observe the orientation in my photos. If you try to flip it over it will not go in properly.

Sorry, it has been a long time since I took that 617 apart, I don't remember if the stirrup can be reinstalled without removing the side plate or not. I took the side plate off because I took everything apart for a a photo essay I was doing at the time.

hammers01_zps9a1df120.jpg


hammers02_zpsffc6b6e3.jpg
 
That's a lot of recesses in the newer hammer. Even my new SP101 hammer has one visible on full cock, whereas my old 1993 gun is solid in the same spot.

MIM = Minimum Investment (in) Money. :D
 
Actually MIM is a big investment up front and the materials are 10X as expensive as high quality alloy steel, BUT the big savings is on labor, and out of spec parts.
 
Actually MIM is a big investment up front and the materials are 10X as expensive as high quality alloy steel, BUT the big savings is on labor, and out of spec parts.

That is correct. A large upfront investment in the tooling. Savings are realized in lower part cost when mass produced, and less assembly time.

I suspect the reason for most of those recesses in the MIM hammer are to cut down on material cost. Also, I don't know this for a fact, but perhaps warping can happen when the parts are sintered if cross sections are too thick.
 
Not sure why labor would be a differential factor given that S&W went to CNC machines in the late 1980s and I'm assuming that the hammer is one of the CNC machined parts. Or was.
 
Driftwood Johnson said:
I suspect the reason for most of those recesses in the MIM hammer are to cut down on material cost.

Maybe you're right, but it's possible at least some of those recesses remove weight at strategic spots in order to place the Center of Gravity correctly.

Designing a hammer correctly is deceptively difficult; it definitely isn't willy nilly or a simply a matter of physical fit. The hammer's shape, mass, it's weight distribution (i.e. CoG) and relative position of the pivot and firing pin all play a significant and interdependent roles in it's function. I'd be very surprised if the differences you see in those hammers are just to reduce material cost.
 
The redesign is part of the change to MIM. Hard to mold in a hole crossing a slot. To keep the same pinned design would have required followup machining on a molded part, doing away with the savings in operations. So the small bits just drop into pockets and notches now.
 
Not sure why labor would be a differential factor given that S&W went to CNC machines in the late 1980s and I'm assuming that the hammer is one of the CNC machined parts. Or was.

Just because parts are made with CNC does not necessarily translate to cost savings. Parts still need to be put on the machines, and cutter time is still measured in hours and minutes. Time is still money.

The assembly labor savings with the S&W MIM hammer come from the fact that the hammer can be assembled more simply. No driving in pins, just pop the spring and double action sear in place and pop the stirrup into position.

Same story with the rebound slide. MIM part on the left, standard machined part on the right. Notice the pin for the hammer block on the machined part is a separate pin, pressed into place. All one piece with the MIM part. The MIM part pops out of the sintering process complete. The machined part has to go through several machining operations.

reboundslides01_zpsd93d3963.jpg


MIM trigger on the left, Machined on the right. I forget the name of the part at the rear, it is the part that the rebound slide uses to push the trigger forward. Anyway, it is a pinned assembly on the machined trigger, it just pops in place on the MIM part. Take a look at the geometry of that part. Even though it has more complex geometry, the MIM version pops out of the mold complete, the machined one needs to be turned, then pinned in place.

triggers01_zps6cec30ba.jpg


I forget the name of this part too. It is the part the thumbpiece screws to to allow the cylinder to open. The MIM part on the left comes out complete in one piece, including the interrupted threads on the stud. The machined part has to be assembled from three separate parts. The pin protruding horizontally and the threaded stud are separate parts, pressed into the body. This is where MIM really shines. Cutting down on parts that need to be assembled.

cylinderbolts04_zps2fcbbf2a.jpg


Don't get me wrong, I won't be buying any more modern Smiths with MIM parts in them, but I can see where MIM drives the cost out of assembling parts and the entire gun.
 
Back
Top