Hi All,
At the range yesterday my Marlin 1895 Guide Gun (45-70) developed a case of hammer follow. The hammer would fall to half-cock every time I closed the lever fairly firmly...if I was gentle with it then the hammer would stay back. Thanks to the very generous half-cock notch the gun was not unsafe, just annoying.
I figure the problem had to do with a trigger job I hired a local gun store to perform after I bought the rifle new last year. I wanted a 3# trigger but the smith ended up doing 4# because he said it was "misfiring" at 3#. I assume he meant "following" instead of "misfiring" as he didn't replace any of the springs. Anyway, I am guessing he didn't set quite enough sear engagement and the hammer hook finally wore down.
I could have taken the gun back to the LGS but I am impatient and I like to tinker so I decided to try the repair myself. Also I thought of the half-cock notch as sort of my safety net...I figured the worst I could do was make it so the hammer would not stay at full-cock at all. All my efforts were focused on the hammer - I left the sear alone.
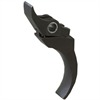
To make a long story short, I made the problem much worse, then fixed it, then broke it again, then fixed it again. I can now slam the CRAP out of the lever and the hammer stays at full-cock. Trigger is still nice and light but has a nice little "hitch" in it now. The main hammer hook comes off the hammer ring at slightly less than a right angle, but the corner where the hook meets the ring is not very sharp, and the face of the hook is a little concave too. The sharp edge of the sear rides these curves and somewhere along there is that hitch. I hit the hook face with 1000 and 2000 grit wrapped around a file (which helped) but that hitch is still there.
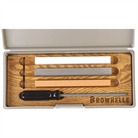
I need to flatten the hook face and sharpen the corner a little but my cheap set of "jewelers files" from Harbor Freight is simply not up to the task. None of them is perfectly straight or perfectly flat. If I had better technique I could maybe make them work but at my skill level I need better equipment. Also for all I know a file is not what I am supposed to be using. Maybe I should be using a stone? What is the best thing to "sharpen" hammer hooks with? I am about to have a look at Midway and maybe Brownell's and I thought I'd ask you guys before I bought the wrong thing.
Also, please understand that I respect gunsmiths and the work they do. I understand that the most straightforward thing for me to do would have been to take the rifle back to the LGS and leave it for a couple of weeks while they fix it, probably under shop warranty. But I really wanted to try my hand at this and like I said I don't think there was any safety issue. If I hadn't been able to get this far I would have gladly taken it back to the LGS, owned up, and paid them to fix it.
-cls


