Giving tumble lube a whirl......

Beagle333

New member
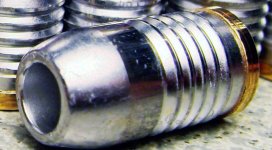
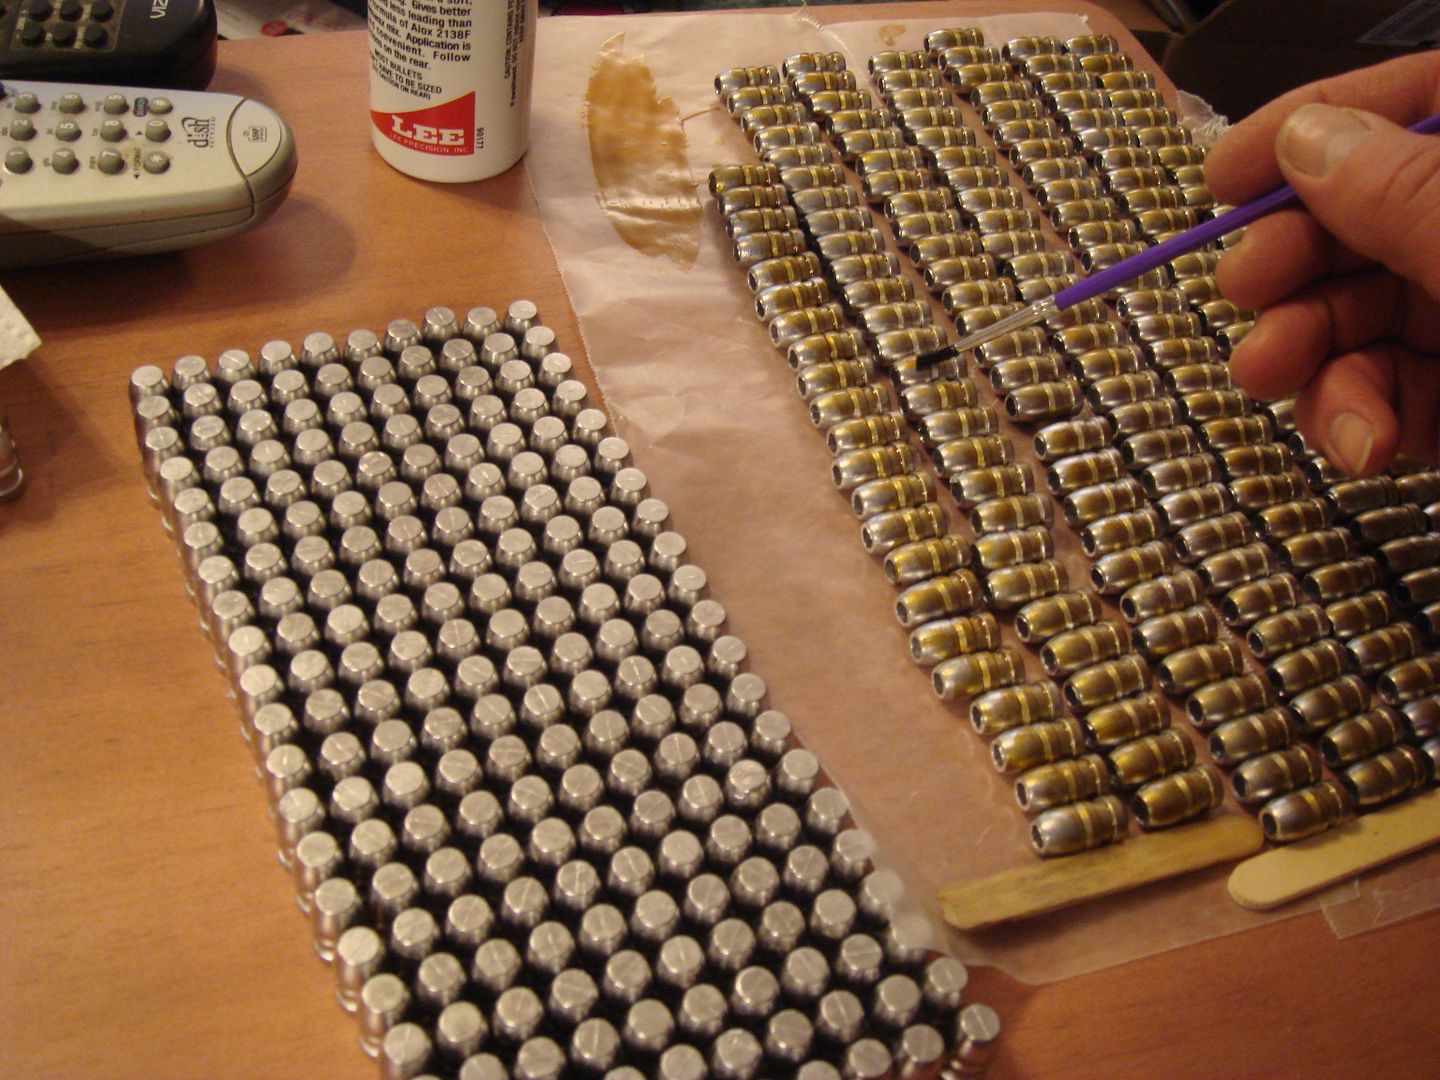
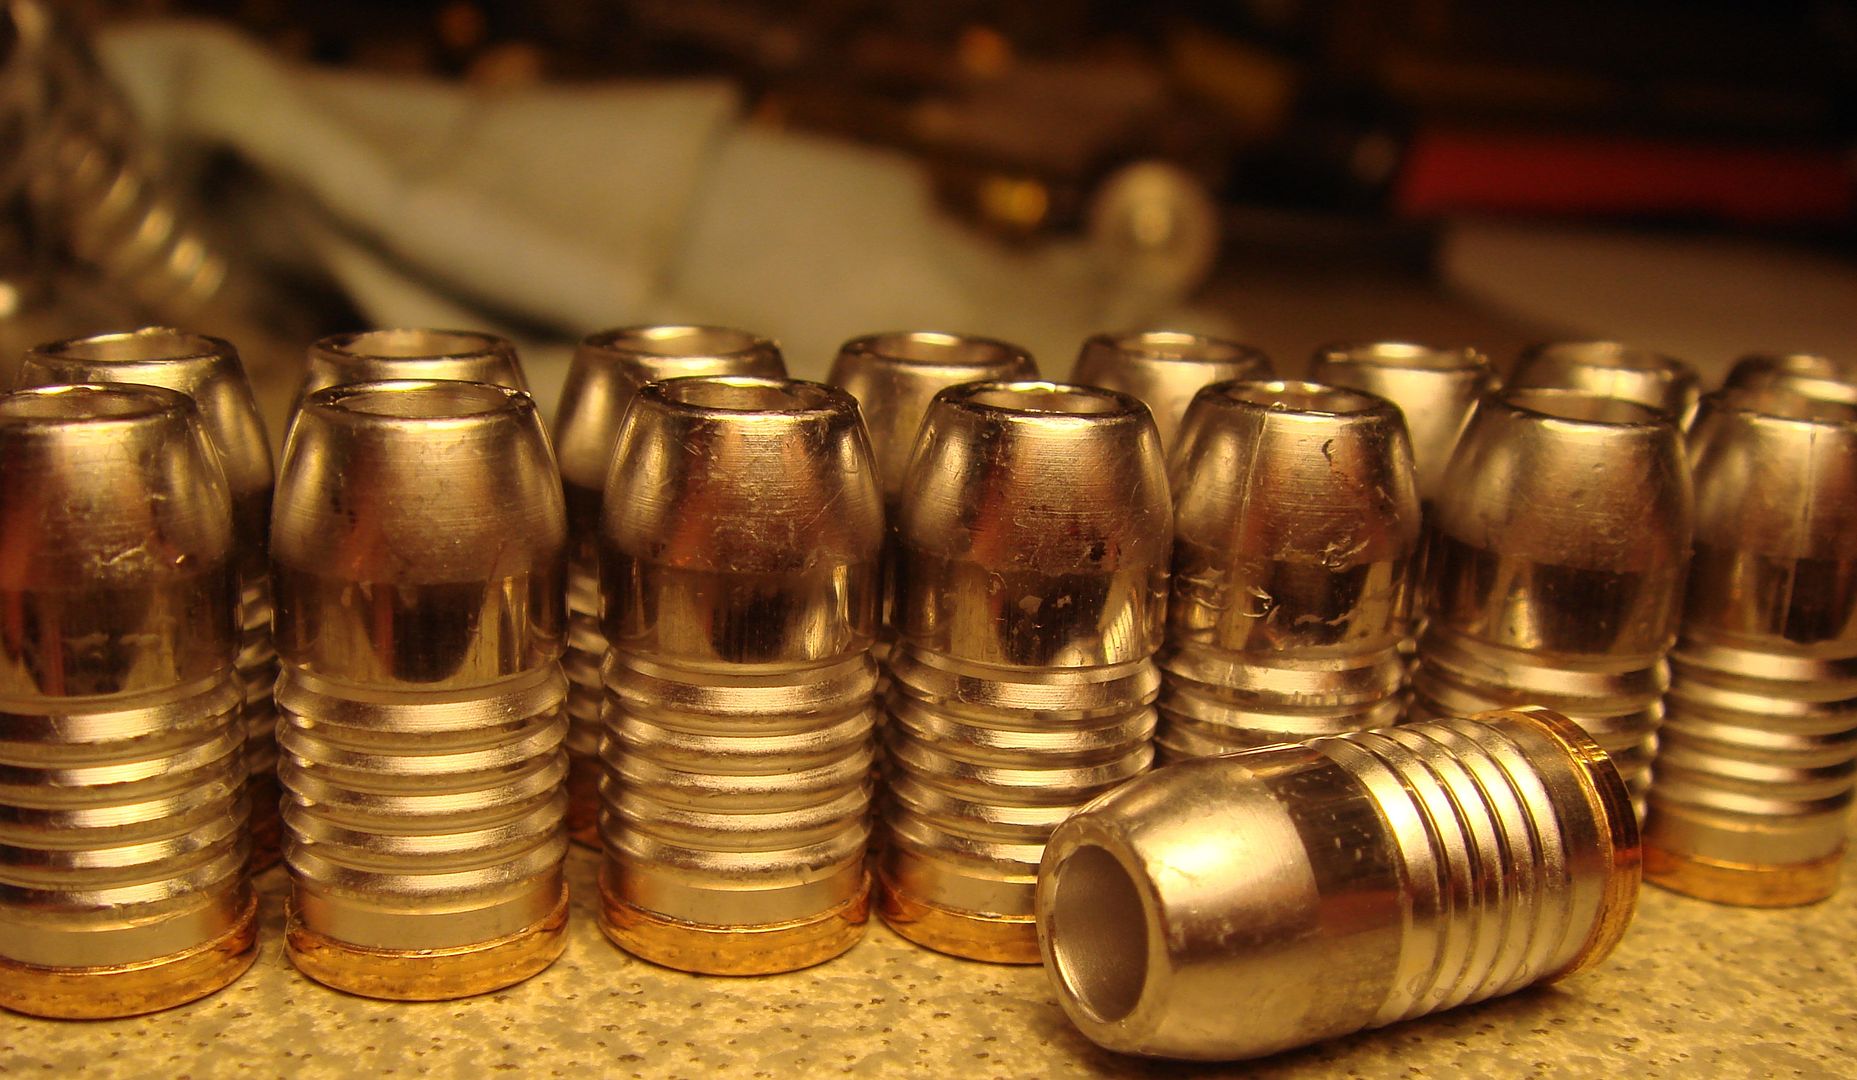
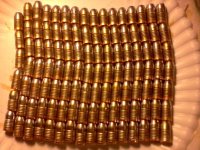
Today, I attempted the NOE TLC359-175-RF RG2 GC. I made these a little softer since they are gas checked. I can maybe use these as a test to see how I should be mixing my alloy for GC HPs. I don't have a hardness tester, I'm just gonna shoot em. :)

This is my first tumble lube mold.


175TL003_zps9200e850.jpg


here's a pic of the mold from their website.... I forgot to photo the mold. :o

{Sorry. No hot-linked photos without express permission from the source. It eats up their bandwidth every time someone here views it, dipping into their wallet, plus it violates their copyright if you didn't get permission first. Please read the board policy on posting copyrighted materials.}
 
Last edited by a moderator:
Beagle to help with tuble lube I put the bottle in a cup of hot water for a few minutes. It thins it out enough you do not have to use much at all, and it dries faster. Skip that lube at night, and load the next day crap. Lube them, pour them onto a paper plate in a flat pile. Wait a day, toss them around a bit. When you can handle them, and they do not feel greasy, and tacky at the same time then they are ready. For me that is two to three days most times.

Oh and by hot water I mean from the tap hot enough that you want to pull your hand out from under it hot. Or sometimes I put it in my truck outside in the day during summer. 10 minutes it is thinned out. Some say to cut it with mineral spirits, and paste way. I just heat it till it thin. You will be able to tell when you shake the bottle.

Oh and nice looking bullets, and neat looking mold as well.
 
Are those gas checks crimp-on (I thought all of them are these days)? If they are, I assume that you are going to run them through a bullet sizing die after they are lubed and not shoot them as cast?
 
They are crimp-on, and they are crimped. These have been thru the sizer. If you look closely, especially at the light reflecting off the one lying down (and the ones behind, if you inspect closely), you can see that a large section of the nose is shiny (due to sizing) and the tips of the lube bands are also flattened and the check is crimped. I didn't take an picture just to illustrate this, but here is an enlargement. I sized at .358, so the nose, bands, and gas check are the only parts that touch the sizer. I will lube them later, before loading.
be161b89-38af-4049-839e-54b8dfa0f6b1_zps11dcc1dd.jpg
 
Speaking of lubing.... here is the first batch. I paint one side with a Qtip and roll them over the next day and paint the other side. I don't get lube on the nose or the base this way, but I do probably get way more in the grooves than is needed. I'm not a high volume shooter, and I dip lube most of my bullets in TAC#1 (high speed lube) anyway. But I got a bottle of Alox with my first sizer, then I bought a 32oz jug of it from Lars, just because I figured that first bottle wasn't going to last long, then I got 3 more sizers - all of which came with another bottle each. And I'm still working on using up that first 4oz bottle, a year and half later. I think I've got enough Alox for life, even if I never buy another sizer. lol :D

(I do use the hot water and light tumble lube trick on my other bullets, before sizing, then I dip lube them)
 

Attachments

  • lubed.jpg
    lubed.jpg
    47.4 KB · Views: 38
Beagle I just swish them in a very tiny amount in an old butter bowl. That is way too much lube on those. Having it on the gas check will not hurt anything at all, and no one will see it once it is loaded. The tip of the bullet can be wiped off with a rag, or patch. They will still shine like new pennies.
 
Beagle333,

Sorry; had to pull your linked photo from the first post. Please see the note I inserted.

Then, in the mean time we need to get you a new light source. The colors ought to look more like this. ;)

attachment.php


Nice looking bullets. What diameter did they cast originally and what diameter is your bore?
 

Attachments

  • 9-15-2013 6-08-06 PM.jpg
    9-15-2013 6-08-06 PM.jpg
    133.4 KB · Views: 140
I paint one side with a Qtip and roll them over the next day and paint the other side. I don't get lube on the nose or the base this way, but I do probably get way more in the grooves than is needed.

Ya know, I really like those bullets and was gaining a pretty decent amount of respect for ya right up till i read that.....^^^:D:D You could at least look into one of the cheap art brushes that is as around 3/8" or so wide. Then you could really get it on pretty like. :eek:

Now come on throw them in a heavy duty baggie, slobber some lube on them, and roll em around in your hand. You will be done in 3 minutes and not even get your hands dirty. Toss em out on tha plate and let them dry. If you heat the bullets up with a hair drier it even goes faster. Then you can take those q-tips and just clean out the nose holes with them like they were made to do. :D


Blah ha ah ha, I couldn't help it. It's been so long since you have tried to drag me into a new mold I been missin ya. Oh and just so ya know, I have bid on three separate molds since we last talked, all up to $130 and didn't win any of them. Well to be honest two were highly sought after H&G's and I didn't figure I had a snow balls chance of winning, the other was in your favorite caliber in a Lyman 4 cavity 158gr SWC GC. I was thinking the whole time how much fun I was going to have with it, then I got outbid.
 
Ya know, I really like those bullets and was gaining a pretty decent amount of respect for ya right up till i read that.....^^^ You could at least look into one of the cheap art brushes that is as around 3/8" or so wide. Then you could really get it on pretty like.
Like this? I did try it.... but the Qtip mops it on there better. :p:p:D
paint_zps11266a01.jpg
 
I use the TL differently. I usually dilute it with about 10% mineral spirits. This makes it thin, obviously, and discourages heavy build-up. At typical pistol velocities I don't find you need much. I roll the whole bullet in it, then set them upright on an old cookie sheet. When it dries to the slightly tacky phase, I dust the bullets with motor mica from a salt shaker and put them in a plastic tub and roll that around a little to press it into the surface, then let them finish drying. This eliminates helps the handling, helps keeps too much from sticking to the seater die stem, and gets some dry lube where the bullet hits the feed ramp in a self-loader.
 
Sorry; had to pull your linked photo from the first post. Please see the note I inserted.
I apologize for that.... I should have just took a pic myself.:o

Then, in the mean time we need to get you a new light source. The colors ought to look more like this.
I don't know why my camera makes the colors like that. My light source is a little CFL bulb in a desk lamp.... perhaps that's it. I need a good fluorescent source.;)

**************************************************


I almost always tumble in a butter tub, lightly, then size and tumble again.
I just did it heavier this time because I was going to put some more speed on these, since they are checked, ..... that, and I like a lot of smoke.:)
Normally, I follow the directions for Alox, and I recommend that for everybody who wants to learn tumble lubing and is considering using this thread as any sort of guidance. :D


Meanwhile... back to the bullet... I poured another batch of them today, using 70/30 pure to WW ratio. I want to see just how soft I can go with the HPs and still keep it from leading. I have great hopes for this bullet. I may even try powdercoating some of them and see how that works.:cool:

I didn't put the mic on any of them before I sized, but they were sized at .358, so they drop bigger than that.
I have never slugged the bore, but they won't slide all the way out the end of the cylinder at .358 so I know they are a little smaller than that before they hit rifling.
 
Last edited:
That would put you somewhere in the area of 1% antimony. The usual rule of thumb I hear is to stay below 2% to minimize brittleness (which would cause a hollow point to fragment). So I would think you should be good to go.

I use a pair of CFL's in reflectors for photography at the bench, but I was careful to get the ones that are daylight color spectrum. They look kind of blue until you get used to them. But that's what you need.
 
I don't know why my camera makes the colors like that. My light source is a little CFL bulb in a desk lamp.... perhaps that's it. I need a good fluorescent source.
After taking photos and downloading to your computer, you can use a program like, "Windows Live Photo Gallery" to adjust the color and exposure of the photo. That program is free with Windows 7 and is easy to use. Photos taken and downloaded, used as is, are rarely ideal and can almost always be improved to show detail. Having photographed a lot of guns for sale, it drives me nuts to see a picture of a gun that is too dark to see, or the colors are way-off, when the problems can easily be fixed by editing as UncleNick did to your photo above.
 
I only got XP and it just has MS Office Picture Manager. I didn't see much difference using the various auto-correct buttons.:rolleyes:

I pity the fellow who posts the next crappy cell phone pic of his bullets!
Y'all are a rough crowd.:cool:
 
Would that be to his good side track or to his bad side track? Photographers always want to know.;)

The last photo looked better and a lot less monochrome. Filters never correct perfectly because the missing colors have more noise and less information in them. I used the histogram equalizing auto correction filter in the photo editor that comes with the Snagit screen capture utility, but I'm sure Picasa, Infranview, or GIMP or one of the other free photo editing programs will do something similar.
 
Would that be to his good side track or to his bad side track? Photographers always want to know.
It always seems to be positive, around here.

For the record...
I used to use diffusers with a 'daylight' CFL, an incandescent "full spectrum" reptile heat lamp, and a "full spectrum" fish tank fluorescent lamp to balance the lighting in my reloading room / man cave for photography. (Yea, I had a fish tank in my reloading room, for a while. :eek:)

But, once I finally had enough spare cash for the Digital SLR, I found a different diffused "daylight" CFL to be enough to counter the halogen and fluorescent lighting in the room.

For quick cell phone pics, that never really mattered, though. ;)
 
Back
Top