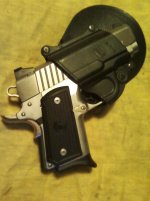
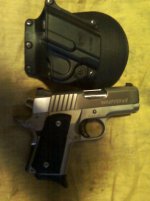
Tell you what, it was interesting watching how easy Mike made it look.
Kydex becomes very flexible at 300F, so all he needed for heating were a heat gun, and a conventional toaster type oven (granted, it was a fairly big heat gun, and a very big toaster oven), and a press that was lined with a special foam, that is good to 500F and so won't melt into the Kydex at 300F.
First thing Mike had to do was cut a Kydex blank to cover the ejection port of my PX4, which took a fair amount of cutting with a small metal snip, because of the odd shape of the rotary barrel at the breech. It had to be covered to prevent the holster Kydex from forming and hardening around the irregularity, and locking to it.
Once that was done, Mike figured which of several patterns would most closely approximate the necessary shape for the PX4. He asked if I'd prefer brown or black, and obviously I chose the brown. He then traced the pattern with a sharpie, then took the Kydex sheet over to a reciprocating saw, and cut the basic form. He then smoothed and beveled the edges with a dremel, and then a sanding wheel.
We then went over to the bench, where Mike heated the area for the center crease, and made a rough form of the sheet around the PX4.
Edit: Forgot to mention, he took a rod the height of my front sight, and taped it to the centerline of my slide, behind the sight. This would form the arch in the holster that allows the sight to move when drawing and re-holstering.
Once he had it approximated, he pulled it off the pistol, and put the folded sheet into the oven for a little under 10 minutes, to heat the whole thing to 300F.
Meanwhile, he asked for one of my magazines, which he then unloaded, and put into the magazine well. He said if he didn't do that, the grip might collapse in the press.
Once the Kydex was hot enough, he took it out, and put it around the pistol again. He then put the pistol, in the rough holster, into the press, and tightened it down with a C clamp. We let that set for a little while.
He took it out, formed around the pistol. We removed the pistol, and then he took the part that extended above the grip on the inside (kind of like a bodyshield) and heated it with the heat gun. He took a piece of wood the approximate thickness and width of my leather belt (1.75" and fairly thick), and folded the upper portion around that, against the back of the holster.
With the gun back in the holster, and the back portion formed around the blank to make the belt loop, he put the whole thing back into the press.
Once that hardened and set, he gave me my pistol, and took the holster over to the reciprocating saw again, to remove the excess Kydex. More dremel and sanding wheel followed, to re-bevel the newly cut area. He then drilled two holes in the holster, on the open side (opposite the ridge for the front sight), and put two Chicago screws in it for tightening/adjustment. He had some hose that he had cut into to small lengths; these went between the layers of Kydex, and sheathed the screw shafts. (The screws were inserted through the front of the holster, through the hose sections, and into the fasteners which inserted through the holes in the back of the holster.)
Next thing I'm buying from Mike will be one of his rigger's belts. His don't have the D-ring for attaching to a safety line in an airplane or helicopter, but that's ok; I have rigger's belts with D-rings. The thing about Mike's belts is that the rings they have, for buckle purposes, are made of a nearly indestructible urethane. What's significant about that? No metal parts = no need to remove in the security line at the airport. This will be my new airline travel belt.
Morals of the story: 1) it's interesting to watch craftsmen at work; 2) it's useful to know craftsmen.


