So I bought a marlin 795 about a month ago or so, and I decided I wanted to make it look unique. Im gonna give you guys some DIY instructions , in case anyone else wanted to do it. I did NOT think up this idea, and I followed various DIY's found in various places as well. But there are little tricks here and there that I found throughout the process so I'll try to put it in my words, to see if it helps anyone else.
The supplies you will need are
Krylon Ultra Flat Camoflauge Paints: Brown, Green,Beige.
1. Matte Finish Clear coat.
metal coat hanger
tape
cheap foam brushes
mixing can's
alcohol
1)
So the first thing to do is tape everything off. I taped off the bolt, the trigger, and the barrel tip. Use alot of extra tape, to make sure everything is covered. Don't cheap out, tape costs close to nothing, but having problems because you skimped on covering stuff up could be costly. If your doing your optics, then cover the lens, and any place that has typing or moving parts. If I did it again, I would disassemble and take out the bolt mechanism just in case, but I was too lazy and instead made sure I taped up very well. Also, I taped up the entire trigger mechanism, to not risk getting in any crack's. It ended up looking just fine with the tricker being black.
2)
the second thing to do it is wipe the gun down with alcohol, you don't need to be super thorough, but just make sure to wipe it all with alcohol on a rag and then dry it off. Afterwords, I only picked it up with clean rags, and not my fingers. They will leave oil and that might compromise your paint job.
3)
Hang it up on something outside using an opened metal hanger, through the loop under the barrel. I had limited area were I can do it and hung it off the fire sprinkler on the top of my condo balcony.
4)
Take out the beige paint. Start to spray it on the the gun everywhere. Using long strokes from about 6-12 inches away, and only do a very light coat. After the first coat, you should still see most black, and it should just look like it was 'sandblasted' with beige. Let this dry 15 min. Now do 2-3 more coats of this. Make sure to change up your angles that you spray, so you get all the nooks and crannies. I think I did a 4th last coat, where I sprayed it a little more heavy and made sure to get everything. This many coats aren't necessary, but won't hurt, as long as they are light and you wait the proper drying times.
5)
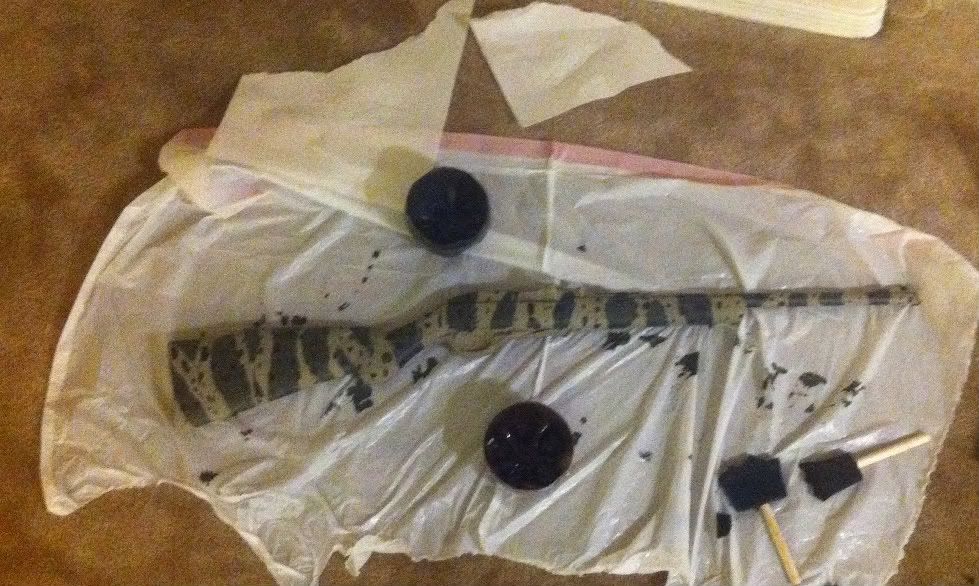
Next, wait for it to dry, I believe 30-45 minutes. All these times will vary slightly based off weather outside, but just wait till its dry to the touch. Take it down and put it on something. Now take a foam sponge and rip little bits off the end, to make it wavy. Take the green and empty out a little puddle into a can. Using the brush put it into the paint and make sure its not dripping off. Now this is the artistic part. Make 'random' lines that end in random places and don't have too much pattern from one to the next. Look at my pictures to get the idea, but you can do it any way you want. If you want to do it ABSOLUTELY perfect, then I recommend practicing on something else , because after about half one side of the gun is when I got the hang of making them perfect and spaced out right. Otherwise, go for it and don't worry you can always paint it back to black. At first you might freak out and think it looks horrible and what did you do to your dear gun. DON'T stress! It looks really bad and off, when you just start. Luckily when you finish a side, it all comes together and looks like great. After finishing a side, you can fill in little curves and other features where you see fit. I used the corner of the brush to do most my painting, and not the bottom. Let this dry for 20 minutes or until its dry to the touch. You should be happy with how it looks, and relieved that it actually turned out.
6)
Prepare another foam brush, and empty some of the brown into a different can. Now with this, you for sure have to use the corner of the brush. Paint small uneven spots , all going vertically up and down on the gun(bolt to trigger, not barrel to trigger). Place these randomly everywhere, wherever feels right. When you just start you will probably freak out again, regretting that you just ruined your last masterpiece. Don't worry! It looks really bad and off just like the last process, until you finish the entire side , and it looks great. Look off my pictures below to see what I mean by the vertical pattern. Wait about an hour for this to dry
7)
Now hang the gun back up on the coat rack, dont forget to use rags when touching it. Spray 3-4 light coats of the clear coat, in the same way you did the base coat. Waiting about 15 minutes between coats. Now just let it dry for about an hour and you can finally touch it! Remove all the tape.
8)
While you can touch it after an hour and play around with it with your hands, don't do anything too rough. Give it at least 24 hours to dry properly, before shooting, and for about 3-4 days it was still slightly sticky, until it finally fully cured.
9)
Enjoy your gun, and be proud of being unique.
Hint: If you have paint all over your hands like I did, use baby oil/mineral oil to remove it. It doesn't seem like it would work, but it worked like magic. Just keep rubbing and putting more on until the paint is all off.
Pictures:
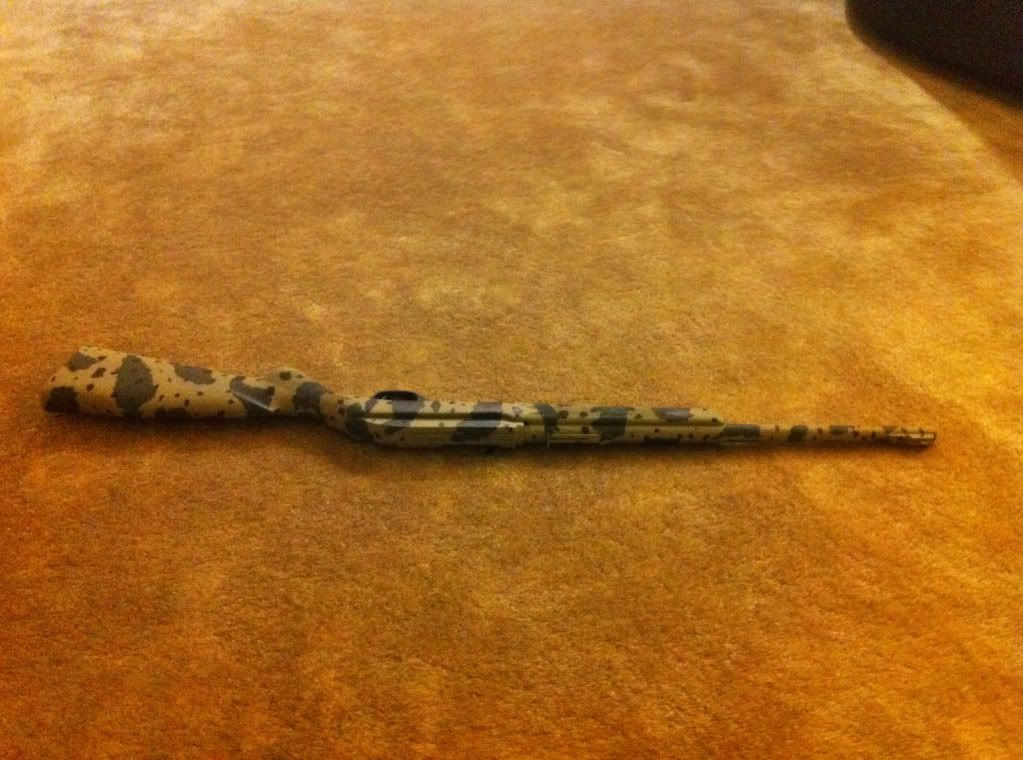
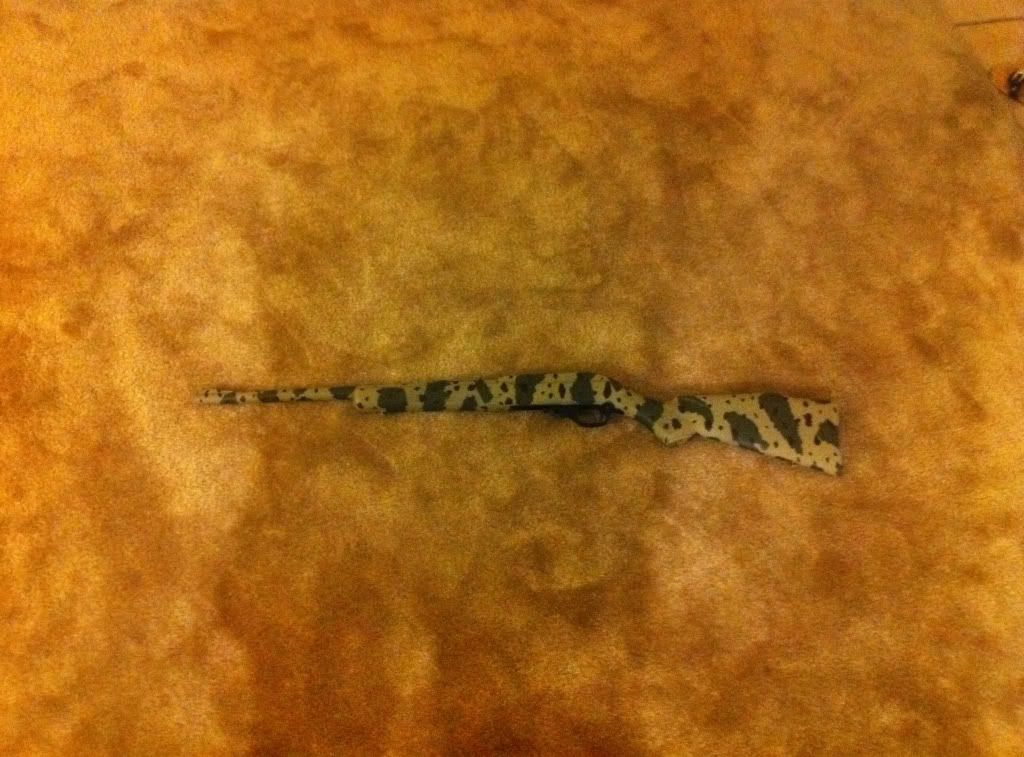
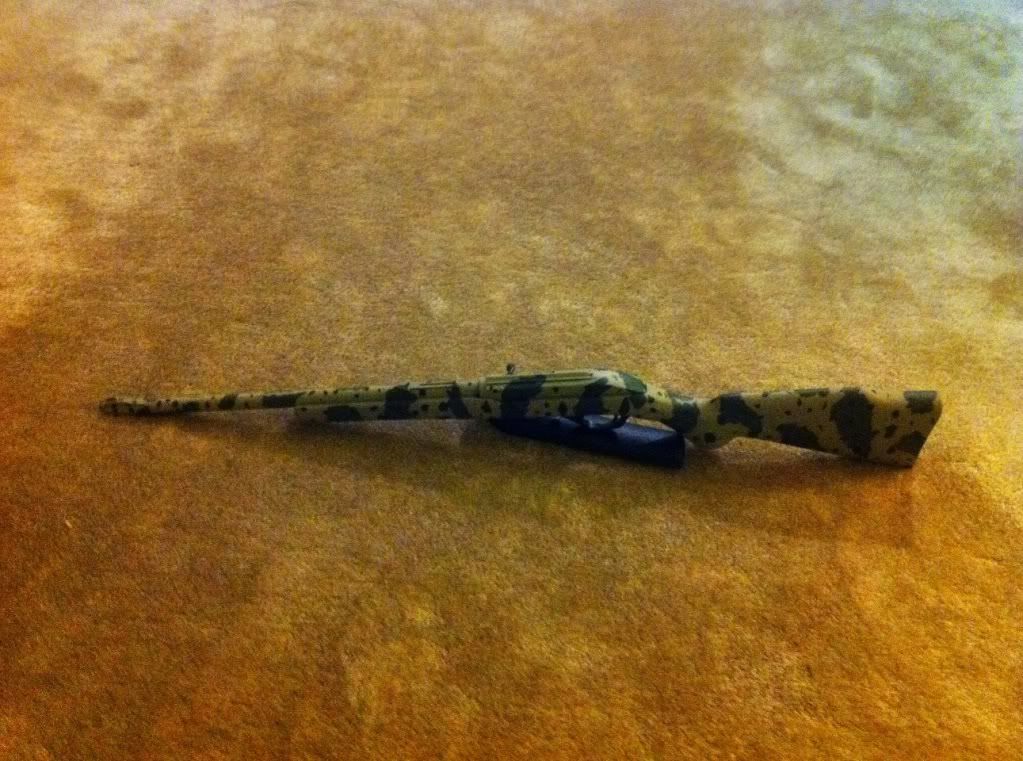
Notice this side of the rifle compared to the other side, that I posted towards the beginning. This is the second side and I believe it came out slightly better as I got more used to the pattern.Thats why I said if you want it absolutely perfect you should practice, But its really not that big a difference.
I was extremely surprised with the quality of the outcome. It looks professionally done, and as if it came with the color scheme. I expected people at the range to not like it, just because I thought most would be really conservative. But I actually got a couple people giving me compliments. One of the workers there asked If I had it professionally done, and they guy next to me really liked it and was asking me all sorts of questions.
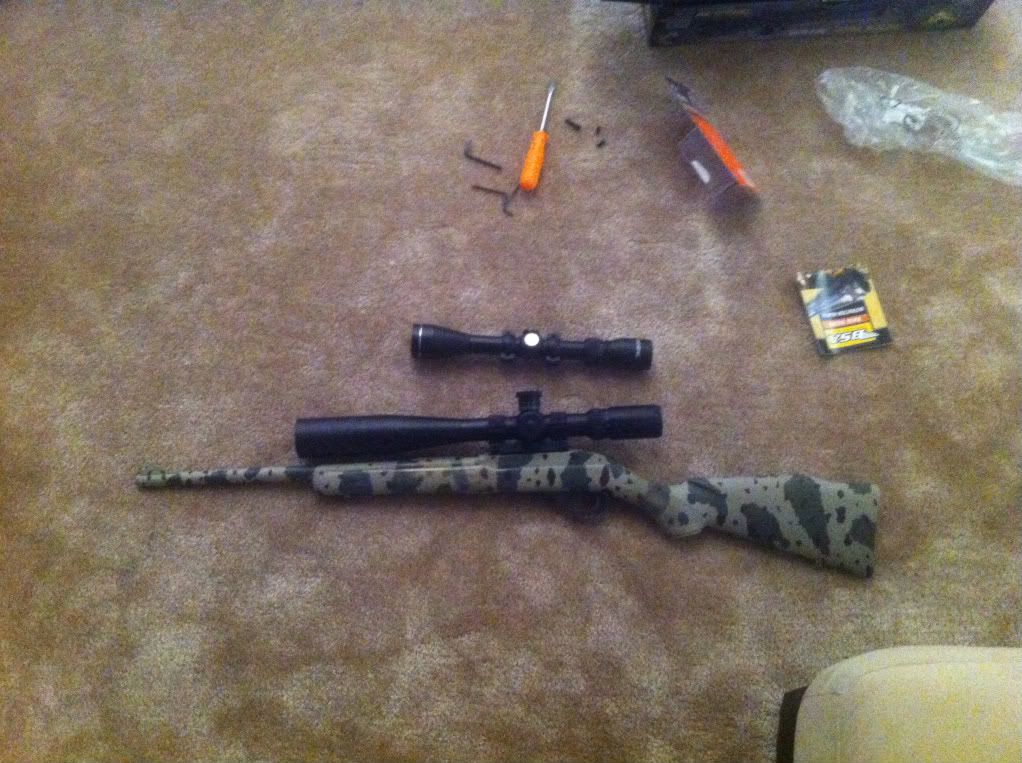
I just got a new scope, so I haven't painted it yet. But here's a picture with it anyways. I will be painting the scope very soon, and then it will fit right in(it's really long because it has the sunshade on).
The supplies you will need are
Krylon Ultra Flat Camoflauge Paints: Brown, Green,Beige.
1. Matte Finish Clear coat.
metal coat hanger
tape
cheap foam brushes
mixing can's
alcohol
1)
So the first thing to do is tape everything off. I taped off the bolt, the trigger, and the barrel tip. Use alot of extra tape, to make sure everything is covered. Don't cheap out, tape costs close to nothing, but having problems because you skimped on covering stuff up could be costly. If your doing your optics, then cover the lens, and any place that has typing or moving parts. If I did it again, I would disassemble and take out the bolt mechanism just in case, but I was too lazy and instead made sure I taped up very well. Also, I taped up the entire trigger mechanism, to not risk getting in any crack's. It ended up looking just fine with the tricker being black.
2)
the second thing to do it is wipe the gun down with alcohol, you don't need to be super thorough, but just make sure to wipe it all with alcohol on a rag and then dry it off. Afterwords, I only picked it up with clean rags, and not my fingers. They will leave oil and that might compromise your paint job.
3)
Hang it up on something outside using an opened metal hanger, through the loop under the barrel. I had limited area were I can do it and hung it off the fire sprinkler on the top of my condo balcony.
4)
Take out the beige paint. Start to spray it on the the gun everywhere. Using long strokes from about 6-12 inches away, and only do a very light coat. After the first coat, you should still see most black, and it should just look like it was 'sandblasted' with beige. Let this dry 15 min. Now do 2-3 more coats of this. Make sure to change up your angles that you spray, so you get all the nooks and crannies. I think I did a 4th last coat, where I sprayed it a little more heavy and made sure to get everything. This many coats aren't necessary, but won't hurt, as long as they are light and you wait the proper drying times.
5)
Next, wait for it to dry, I believe 30-45 minutes. All these times will vary slightly based off weather outside, but just wait till its dry to the touch. Take it down and put it on something. Now take a foam sponge and rip little bits off the end, to make it wavy. Take the green and empty out a little puddle into a can. Using the brush put it into the paint and make sure its not dripping off. Now this is the artistic part. Make 'random' lines that end in random places and don't have too much pattern from one to the next. Look at my pictures to get the idea, but you can do it any way you want. If you want to do it ABSOLUTELY perfect, then I recommend practicing on something else , because after about half one side of the gun is when I got the hang of making them perfect and spaced out right. Otherwise, go for it and don't worry you can always paint it back to black. At first you might freak out and think it looks horrible and what did you do to your dear gun. DON'T stress! It looks really bad and off, when you just start. Luckily when you finish a side, it all comes together and looks like great. After finishing a side, you can fill in little curves and other features where you see fit. I used the corner of the brush to do most my painting, and not the bottom. Let this dry for 20 minutes or until its dry to the touch. You should be happy with how it looks, and relieved that it actually turned out.

6)
Prepare another foam brush, and empty some of the brown into a different can. Now with this, you for sure have to use the corner of the brush. Paint small uneven spots , all going vertically up and down on the gun(bolt to trigger, not barrel to trigger). Place these randomly everywhere, wherever feels right. When you just start you will probably freak out again, regretting that you just ruined your last masterpiece. Don't worry! It looks really bad and off just like the last process, until you finish the entire side , and it looks great. Look off my pictures below to see what I mean by the vertical pattern. Wait about an hour for this to dry
7)
Now hang the gun back up on the coat rack, dont forget to use rags when touching it. Spray 3-4 light coats of the clear coat, in the same way you did the base coat. Waiting about 15 minutes between coats. Now just let it dry for about an hour and you can finally touch it! Remove all the tape.
8)
While you can touch it after an hour and play around with it with your hands, don't do anything too rough. Give it at least 24 hours to dry properly, before shooting, and for about 3-4 days it was still slightly sticky, until it finally fully cured.
9)
Enjoy your gun, and be proud of being unique.
Hint: If you have paint all over your hands like I did, use baby oil/mineral oil to remove it. It doesn't seem like it would work, but it worked like magic. Just keep rubbing and putting more on until the paint is all off.
Pictures:


Notice this side of the rifle compared to the other side, that I posted towards the beginning. This is the second side and I believe it came out slightly better as I got more used to the pattern.Thats why I said if you want it absolutely perfect you should practice, But its really not that big a difference.
I was extremely surprised with the quality of the outcome. It looks professionally done, and as if it came with the color scheme. I expected people at the range to not like it, just because I thought most would be really conservative. But I actually got a couple people giving me compliments. One of the workers there asked If I had it professionally done, and they guy next to me really liked it and was asking me all sorts of questions.
I just got a new scope, so I haven't painted it yet. But here's a picture with it anyways. I will be painting the scope very soon, and then it will fit right in(it's really long because it has the sunshade on).


