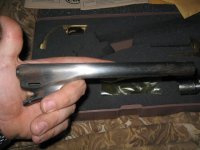
cva 1861 colt navy kit

jaysonvilett

Inactive
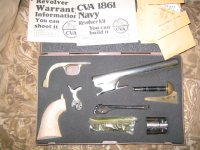
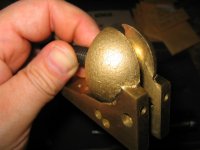
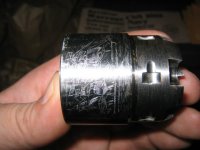
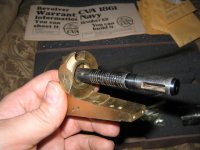
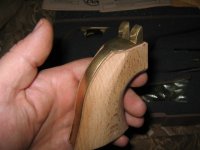
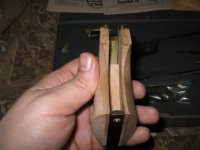
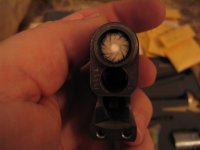
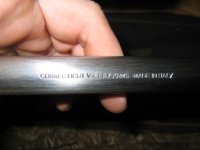
Hello to all, My name is Jayson and I'm new to black powder revolvers.Went to a gun show the other day ,and pick up cva 1861 colt navy kit for $90.00 bucks and wanted to share some photos of it to you. it was made in 1995 and was never put together and was hopeing someone could give some tips and tricks on how finish this kit before I get started on it. I will post photos as I progress with this kit so everyone can enjoy it. All replies will be greatly appreciated. thanks again Jayson.:)
 

Attachments

  • IMG_0778.JPG
    IMG_0778.JPG
    136.5 KB · Views: 1,835
  • IMG_0779.JPG
    IMG_0779.JPG
    84.7 KB · Views: 1,181
  • IMG_0783.JPG
    IMG_0783.JPG
    90.2 KB · Views: 1,137
and more photos

and more photos:)
 

Attachments

  • IMG_0786.JPG
    IMG_0786.JPG
    71 KB · Views: 786
  • IMG_0785.JPG
    IMG_0785.JPG
    70.4 KB · Views: 718
  • IMG_0789.JPG
    IMG_0789.JPG
    96.9 KB · Views: 913
I have the same kit gun but it doesn't have the assembly instructions. Does yours have the instructions? If I could possibly get a copy of the instructions some way , email, fax etc I would greatly appreciate it. Thank you.
 
instructions

I do have the instructions for the 1861 cva navy colt. if you want, PM me and I can make copies of it for you,and send it to you.


Jayson
 
I have one that I received as a gift in 1990. Though it was listed as a 1861 Colt Navy it is really a 1860 Colt Army. The Navy is a .36 cal while the Army is a .44 cal. It was easy enough for me to put together at the age of 12. I never got a chance to shoot it though. it sat in a drawer for 21 years gathering rust before my Dad decided to restore it for me. I hope to get a chance to go shooting soon. If anyone knows of a fireing range in central NC let me know.
 
I had one back in the 70's pretty much took me 6 months to get it together. Well, maybe not that long but I remember it was a lot of work. Seems like I had to use a rasp on the grips. I polished brass out my ##s

But, That was pretty much what you could get back then. A Labor of Love:)
 
cva 1861 navy revolver .44

does anyone know which cartridge conversion the cva 1861 navy revolver .44 cal. use to convert to catridges?
 
Hello, derisford. If that CVA has a brass frame..only light B.P. loads are recommended..It is NOT designed for ctg. conversion cylinders.
 
Jason

Welcome to the forum from a former Pennsylvanian.

You asked for tips on finishing the pistol.

It looks like you are doing pretty good with the process.

When I was doing kits, the first thing I did in most cases was to test fit the parts to make sure the pistol fits together and works. You may have to leave out the grips because they may take a little shaping before they fit into the frame. Also, do not put the sight on the pistol yet. The revolvers I put together cycled pretty well without a lot of filing.

Once you are sure that the pistol will cycle and that indexing is fairly good, you can get started on the cosmetic aspects of the job.

To take the parts from their rough state to a more finished appearance is a staged process which begins with a file and then moves to various grades of sand paper and steel wool. It winds up (if you desire) with a fast cotton wheel and some rouge. I like black and green. You can get almost the same effect with steel wool. It is just that a fast wheel is, well, faster.

In the kits I bought, the steel had marks from the maufacturing process that were left by the milling machines. The brass parts had the casting marks which appeared as wrinkles and as cracks which are only a few thousandths of an inch deep.

I found that as you move through the process, care must be taken to avoid getting flat spots during the early part of the project when you are using the course tools. Just observe carefully with each stroke and don't overdo it. After I finish with a file I wrap sand paper around the file for the next phase of smoothing. On the barrel of this particular pistol you can do a good bit of the finish smoothing with the paper in your hand rather than around a file. (The paper-around-the-file technique is good when there are a lot of flat surfaces such as on an 1851 or on a Remington.)

I have been saying sand paper but I really should be using the term, "Abrasive cloth". Home Depot has it but their selection is not really that good. You may have better luck at car parts stores.

One of the beautiful aspects of this pistol is the graceful curves on the barrel. Yours has smoothed up nicely. You may want to examine photos of a lot of different pistols to get a feel for what you want yours to look like. In my opinion, the beauty of the pistol rests on a proper contour at the back of the barrel in the area below the bore on each side. In my opinion the pistol looks best when the line has been taken out but not much more than that. I do that part with a half round file. It is the first thing I work on in the smoothing process. To me, an 1860/61 with a pronounced line looks unfinished. I would do just a tiny bit more work on that part of the barrel but I hasten to add that it is a personal thing with me.
 
Last edited:
Some additional thoughts

I have two of these pistols (brass frame 1860 CVA imports) and if yours was a little older I would say they were essentially the same pistol. Mine are both made by ASM for CVA import. They are good quality pistols that cycle well and shoot reliably with light loads. Action is smooth and line-up lock-up is pretty nice. I got one of them as a clunker and it realy came out nice.

If the kit was truly made in 1995, I think it is not an ASM since I think they were out of business by that time. I don't know who was doing CVA kits at that time, possibly Pietta.

By the looks of what you got, $90.00 was a very good price for this pistol.

If BPREVOLVER is reading these posts, he can tell us who made the kit (assuming 1995 is correct) and will be interested in the photos perhaps for documentation.
 
hi

i got one to but the wedge that that takes out the cylinder is stuck -----------------------------------------help please ---------------------------------------------------------------------
 
built a Police model but the groove in the recoil shield is too shallow for caps to pass.
"You can Shoot it"
Right... A wallhanger
ZVP
 
CWB

For stuck wedges I like to use the plastic handle of a relatively large screwdriver. Support the pistol on the left side, perhaps using 2 blocks of wood leaving a space between the blocks that the wedge can be driven into. You want to support the barrel so that all of the force you use to loosen the wedge is resisted by the barrel only resting on the blocks. So you are placing the wood blocks on a table or bench and then laying the pistol, left side down with the barrel on the blocks.

Tap the wedge with the handle of the screwdriver. It should come out with not too much profanity. I have never had a wedge that was stuck so bad that this technique did not work sooner or later.
 
Hi Jayson,

Wanted to thank you for the detailed photos of the kit. I've been thinking about picking one of these up to putter with, and this gives me a very good idea about what I'd be facing. Thank you - you've only got four posts on this board, but you've already helped someone out. :cool:

cheers, erich
 
Back
Top