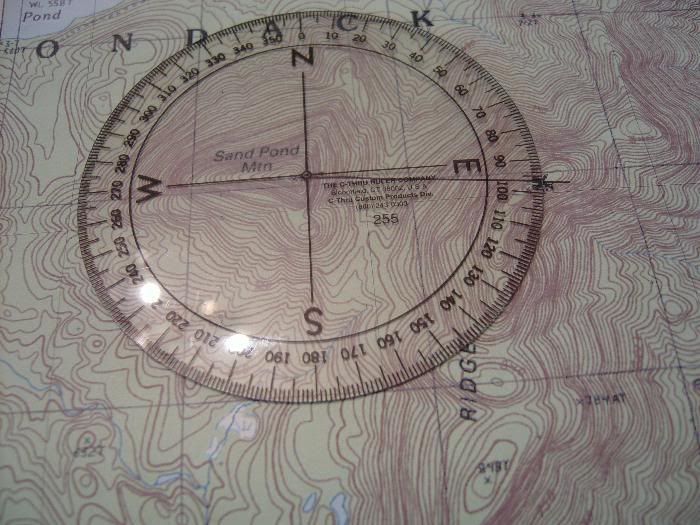
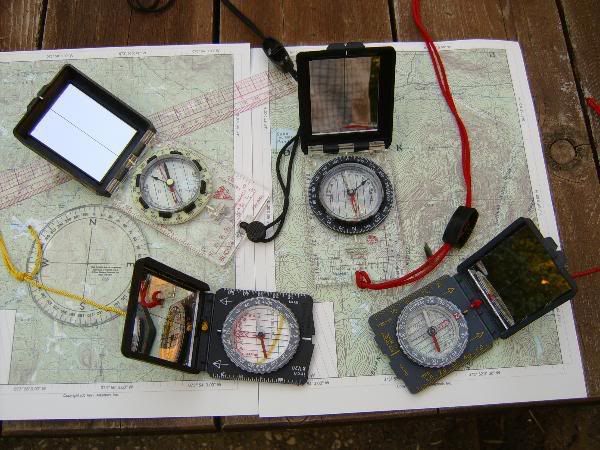
Compasses

black bear 84

New member
COMPASSES

Hi guys,
The impulse to write this post came with the recent discovery that we live in the midst of a generation so dependent on gadgets (and adept at using them) that they lose, or never discover, the simpler way of doing things.

I conducted an “antler hunt” in the April spring woods with a group of Boy Scouts of my son’s troop. The plan was to scout the woods during the day and using flashlights at night, employing compasses to coordinate the excursion.
The group consisted of several boys aged 13 to 16 years, bringing with them a large assortment of electronic equipment. I have to say that they were very excellent at using them, especially the iPods, cell phones, two-way radios, and GPS’s, but they failed miserably in their understanding of the low -tech compass.

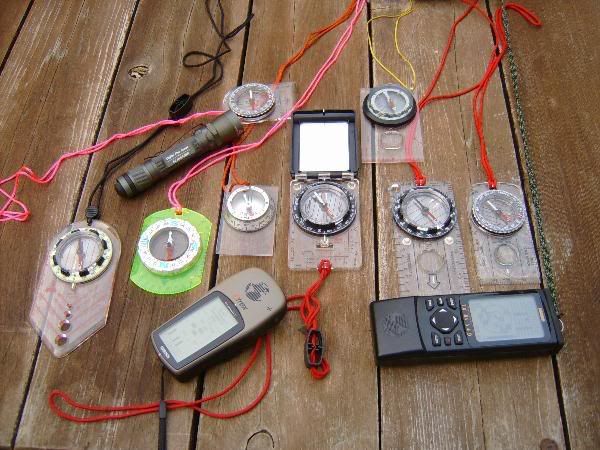
THIS PICTURE SHOWS A VARIETY OF COMPASSES AND TWO GPS’S, THE GARMIN XL12 LT
AND THE GARMIN E-TREX SUMMIT, AS WELL AS A SUREFIRE AVIATOR FLASHLIGHT.
severalcompass.jpg


I have nothing against GPS’s; as a matter of fact, I use them myself and have a couple that I use often to complement the compass I use.
After all, the GPS can give you your position (and you can plot this in a map) in any weather and even at night, making it easy to walk cross-country in the woods. However, I am not one of those guys glued to the GPS. After I get my position and course to follow, I put the gadget away and use the compass to get the direction for my trek.

This is going to be sort of a very short (space limitation) refresher course on how to use the basic base plate compass. Of all the types available, I am going to stick to the Silva system for now, as it is the easiest to understand. They come in several flavors; from the inexpensive less- than-$10, to the more elaborate of $50 or so, but they all do the basic job of guiding you well.

That I stick to the Silva system doesn’t mean that you have to buy a Silva Compass. The market is full of others brands that use the same base plate system such as Brunton, Suunto, Kasper & Ritcher, etc.
The mechanics of taking bearings and following directions are very easy. I will try to make them short and understandable, as the scope of this article is only to produce the basics, and should not be considered a treatise in navigation.

The compass’ needle points to the Magnetic North, not the geographic North, but we only have to compensate for it when we use the compass together with a map.
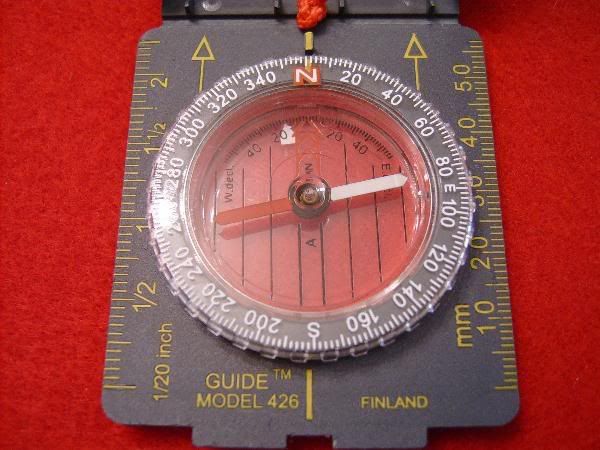
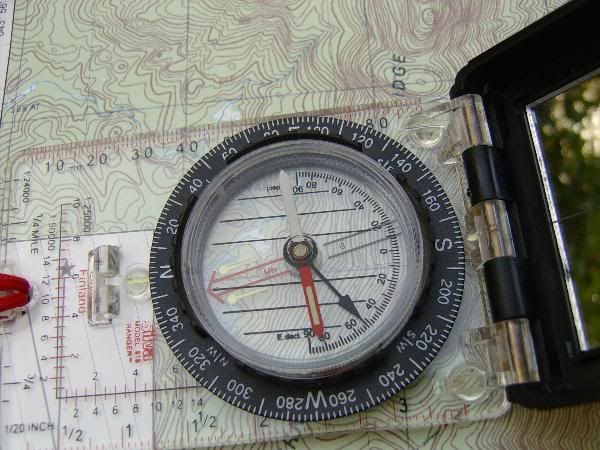
For navigation in the woods without a map, this is what you have to do. With the compass in front of you, point the direction-of-travel arrow in the direction you want to go, then rotate the capsule until the magnetic arrow North part (usually red) lies pointing to the letter N (for North) in the capsule. Read the bearing (in degrees) at the junction of the line-of-travel arrow and the capsule. In this case, it is showing 270 degrees, which means that the direction you want to travel in is 270 degrees, or exactly West.

Now, move your feet and rotate your body (not the compass) until the magnetic needle points to the N. Pick a landmark lying in your direction (West) and walk to it without looking at the compass. When you reach that landmark, reorient your body again, pick another landmark (a tall tree?) and keep walking until you get to your destination.

When you want to return, don’t change anything on the compass! Move your body, putting the South part of the needle over the “N,” or alternatively, just invert the base plate with the direction-of-travel arrow pointing towards you. Or, if you want to change the setting, just put East as your returning direction in the line-of-travel; that will be 90 degrees in your numbered capsule.

And to make this explanation as simple as possible, I will explain compass and map together in the next posting.

All the best
Black Bear
 
COMPASS AND MAP TOGETHER

The compass needle points to geographic North only at the agonic line (line of no declination because it is the same as the geographical North line). This line passes now through the west part of Florida and the Great Lakes. My friends in Wisconsin never have to adjust for magnetic declination. I hike and hunt in New York, where I have to adjust for 17 degrees West, and in Maine as much as 22 degrees West. The people on the West coast have to adjust for declination East.
If you are located over that line, the needle will point geographic North. All other times the magnetic needle points to the magnetic North that is located some 1300 miles from the geographic North.
Your topographic map will tell you in a diagram found in the left corner how much is the declination in your area. If the map is old, you may have to find the present declination to be more accurate in your traveling if it involves a long trek, where one degree could make a difference.

Once you found how many degrees of declination you have to adjust for, you can do it on the compass or on the map.

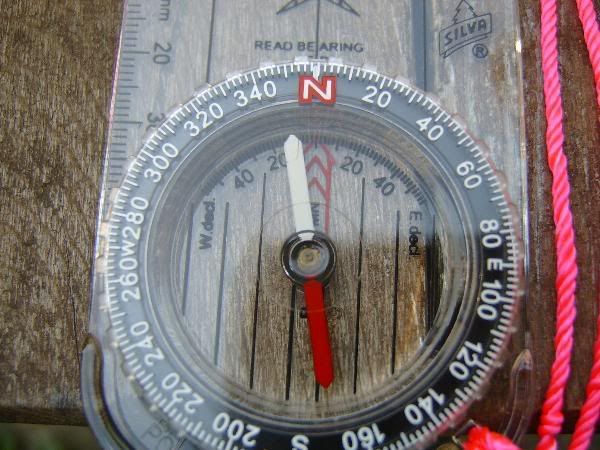
PICTURE OF A COMPASS WITH INSIDE DECLINATION SCALE

insidescale.jpg


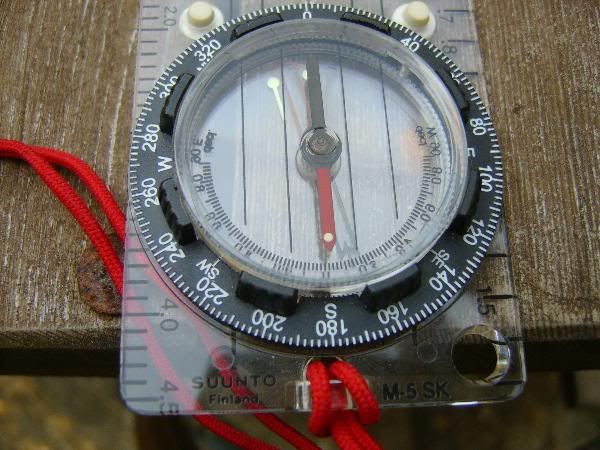
PICTURE OF A COMPASS WITH AN ADJUSTABLE SCALE, IT MOVES THE LOWER INSIDE DIAL
BY A GEARED SCREW.
M5SK.jpg

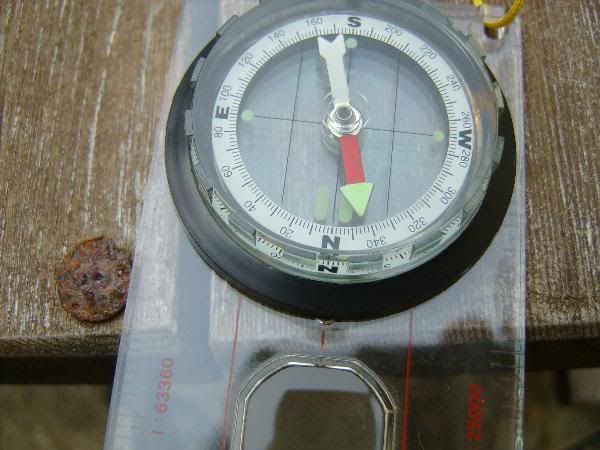
PICTURE OF A COMPASS WITHOUT A SCALE, IN THIS CASE YOU HAVE TO FIGURE YOUR DECLINATION BY ADDING OR SUBSTRACTING FROM THE 360 DEGREES, IN THIS CASE THE DECLINATION IS 18 WEST, SO THE NEEDLE IS PLACED OVER THE 342 MARKINGS.
EACH OF THE MARKINGS IS EQUIVALENT AT 2 DEGREES, THERE ARE 180 OF THEM AROUND THE COMPASS.

noscale.jpg


ADJUSTING THE MAP
To make the map speak compass language (magnetic North), extend the line of declination all across the map from the little diagram in the corner, using a long ruler and spacing the lines about two inches. Or use your compass as a protractor (measuring angles) to trace the start of the line from anywhere on the map.
After doing this, both the compass and the map will “speak” magnetic readings and you will not have to adjust the compass for magnetic declination.

ADJUSTING THE COMPASS
If you would rather adjust for declination on the compass (and save yourself from tracing lines on the map), every time you are going to follow a bearing in the field, you have to move the needle to the proper declination. So instead of pointing to North, it will point 22 degrees West of North (in the case of Maine), or 338 degrees.
Or, if you are West of the agonic line, then your declination will be East and you will have to move the needle East of the North marking on the compass.
Some compasses have a scale printed in the capsule, and some of them adjust by means of a internal rotating bezel that adjusts with a screwdriver stored in the lanyard. I like the latter type because there is nothing to do after you set it; you just place the needle in the “gate” that is already adjusted to the proper declination after you do it the first time.

To use the compass and map together, find where you are in the map and where you want to go, connect the two places with a line that extends from the side of your compass, and without moving it, rotate the “capsule” of the compass so that the lines inscribed on the bottom of the capsule combine with your drawn magnetic lines on the map OR the North line(s) or margin on the map if you are adjusting for declination on the compass.

Just follow the bearing that you have just set at the back end of the “line of travel arrow” and you will arrive at your destination.

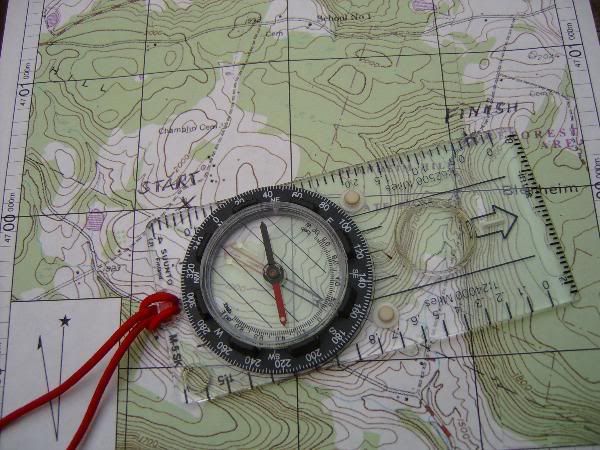
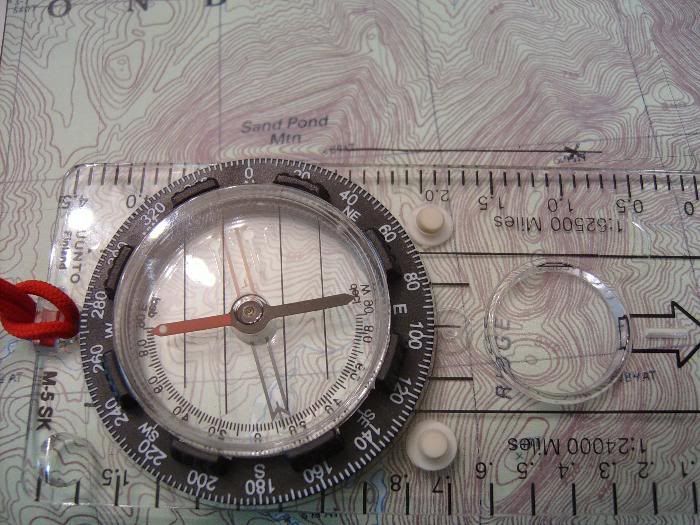
IN THIS PICTURE, A SUUNTOO S5SK IS USED TO CONNECT THE START AND FINISH, ONLY THING TO DO NOW IS ROTATE THE CAPSULE UNTIL THE LINES INSCRIBED IN IT, PARALLEL THE NORTH LINES ON THE MAP, AND READ THE DEGREES AT THE JUNCTION OF THE LINE OF TRAVEL ARROW AND THE BEZEL WITH THE NUMBERS. (DISREGARD THE MAGNETIC NEEDLE WHEN THE COMPASS IS ON THE MAP)

firekiller.jpg


All this is very basic, but it will take you to the proper destination. If you would like to study map and compass a little more and learn how to navigate using more elaborate techniques, such as using handles, taking triangulation, or navigating in open terrain without the use of landmarks, I recommend you buy one of the books that are available on the subject.

I started many years ago with the classic “Be Expert with Map & Compass” by Bjorn Kjellstrom, which I recommend, but there are many other books that you can get from places like REI.
Using Map and Compass by Don Geary
The Outward Bound Map and Compass handbook by Glenn Randall
Wilderness Navigation by Bob and Mike Burns

I hope this little post can help someone interested in navigating the woods by map and compass. I feel that is a great need to go back to the basics to supplement and complement navigation with GPS, that after all, being electronic and depending on batteries can fail us when most needed.

All the best
Black Bear
 
Great info there! I'm glad to see that people still use the compass.

I learned first to navigate with a compass and map. I'm a forest ranger, and I still depend on my compass more than a GPS. I guess i'm a bit old fashioned, since I use an old Suunto graduated in quadrants.
 
I took Forestry in College, and learned map reading and compass use the very first year there. I do have a GPS now, but that comapss reading while carrying a map is so imbedded in my mind, I really don't need the GPS to navigate.
When I started flying, I was miles ahead of the game due to knowing navigation. Navigation is now like second nature. I constantly know where I am at all times, and what direction I'm headed.
Even though I may have the GPS with me, my Silva and map are my basic tools for getting around in the woods.

Martyn
 
I grew up in Ohio and learned to use a compass here, where the true north and magnetic north are not that far apart. However, about 12 years ago I moved to Maine and realised just how different things could be.

I do not own a gps. Neither do I own an electric can opener. Maybe I'm a luddite at heart?

When we moved back from Maine my friend drove one of the u-haul trucks. He was an army helicopter pilot and didn't go anywhere without his GPS. He was also the only one of the three drivers who got lost.

I like gadgets as much as the next guy, but I hesitate to use technology just for it's own sake, there must be a clear advantage before I shell out money. Of course I am a guy who made his living working on furniture but didn't own a jointer or table saw.
 
Great info there! I'm glad to see that people still use the compass.
I agree! Its amazing how many dont have a clue.

Rather than one being better than the other, I think they all three were made to be used together, and work well together.

The one compass you dont show, is the one type I personally think is the best, the USGI lensatic compass. It allows for more precise navigation.


One method that is very helpful, and also very good for young scouts to learn, is a basic traverse method that only requires you to keep track of time and azimuth. Its especially helpful if you want to get back to where you started, and will bring you in right on the money and tell you almost to the minute when you will get there. This little book sums it up real well and has other good info in it.

7b9eb220dca09e4c1dd17010.L.jpg


http://www.amazon.com/Green-Berets-...9787605?ie=UTF8&s=books&qid=1188827841&sr=1-4
 
Last edited:
Black Bear: Good summary of basic compass theory and navigation. I have not yet made the plunge to a GPS and still use a compass. Many people get the magnetic declination adjustment wrong and adjust in the opposite direction which can make things really OFF from True North.

Frankly, if I am not generally aware of my directions (N-S etc.) I get mixed up driving as I do a lot of instinctive driving from a direction perspective. (You know.... take a left here; this feels about right. This should take me in the general direction and area I want to be in.) This happens in cities mostly where the streets follow things like rivers rather than being oriented in a common quadrant system. I still prefer the old 4-quadrant compasses too. This type of compass embeds in your mind that there are 90 degrees per quadrant and keeps you always thinking in terms of North, South, East, and West. For serious stuff, I always take along my big Brunton pocket transit.

Was playing with my Leupold Yosemite bincoculars that you discussed and purchased in one of your last major threads. Really like them. These bincoculars I use with my perscription glasses ON more rather than taking them off.
 
Black Bear, great info; thanks very much. I too love compasses, and have 3 or 4 of them plus a GPS, but I don't know how to use them nearly as well as you.

I've been looking for a compass watch for a couple months now. I have owned two of those Timex Expedition compass watches, but having a plastic face, they get all scratched up in the woods, and then I can't read them anymore. So now I'm looking for a one that has a good mineral glass crystal on it, but all the ones I find are very expensive, in the $150 to $300 range - cannot find just a BASIC one in the $75-$150 range. I don't need 400-lap timers, waterproof to 500 meters, an altimeter, barometer, & thermometer. Just a basic watch & compass with a good crystal.

The watches like the Expedition do adjust for declination. Did you guys know that magnetic north is a moving spot on the globe? It's been slowly traveling west-northwest for many decades now, due to some sort of movement of the center of gravity of the nickel and other metal inside the earth's core, IIRC.
 
Hi FirstFreedom,
Sorry I can't recommend any watch/compass in your price range, the one I use doesn't work on cloudy days.

solarclock.jpg


Cheers
Black Bear
 
FF, I've been using a Casio Triple Sensor Protrek now for years and I absolutely love it. It is a tad pricey and has bells & whistles you aren't interested in, but it falls within the upper limits of what you want to pay.

However, don't be too fast to write off the altimeter. If you're using your compass with standard 7.5' USGS topos, knowing your elevation can help you to better fix your location. Think of it as triangulating in 3-D. The downside to these altimeters is that they're based on barometric pressure, so you must reset to a known altitude when you start your trek each day, and rapidly moving weather fronts can throw you off.

I have owned two of those Timex Expedition compass watches, but having a plastic face, they get all scratched up in the woods, and then I can't read them anymore.
There may be an answer to that. Try working the surface of the face with plain ol' automotive polishing compound. If the scratches are deep, you may have to go with automotive rubbing compound. I've used these on badly scratched plastic sunglasses, and while it takes time & effort, it does work.
 
FF,
Capt.Charlie is right, if the scratches are too deep; you can erase them with fine emeril paper, then use the automotive polishing compound.
As a watchmaker I have been polishing watch crystals for 40 years, of course we use a high speed rotating cloth wheel and special compound in the polishing machine.

And he is also right in navigating by altimeter, it was done before GPS.
Map, compass and altimeter will pin point your location, in a topo map, as the lines are marked with the elevation and spaced mostly about 20 feet in 7.5 minutes maps.
You take a bearing with your compass of a feature you can see, the reverse line of that bearing will locate you along that line on the map, your altimeter will tell you in which contour line you are, (altitude) where that contour line cross the bearing, there is where you are on the map.

Cheers
Black Bear
 
Last edited:
MAP COMPASS AND GPS
USING THE UTM GRID

A GPS is a great navigation tool. Among others things it can tell where you are on hearth which was the main concern for earlier navigators of the Spanish and Portuguese navies, until reliable navigation tools such as the sextant were invented.

Land navigation and exploration was also the province of the sextant; it was used in the jungles with an artificial horizon (a separate glass case containing mercury), and the star to drop down was the sun, as the readings were taken during the day as tree canopy made night reading almost impossible.
Today a small gadget called GPS can do the same for us in only a few minutes. The tool can give us our position on a map using Latitude and Longitude, UTM, military grid, or user grid.

It can do this during the day or night, with clouds or storm, best of all the GPS can fit even in a small pocket, the new units are more accurate than ever and can pin point your position with an accuracy of a few feet.
This position can be plot in a topographic map if you have a latitude/longitude ruler or even eyeballed, if the map is provided with a UTM grid or military grid.

Most new topographic maps now are provided with an UTM grid (Universal transverse Mercator) which is based on the metric system. In this system the latitude is measured in meters north or south of the Equator, and the longitude from meters from the center of a zone, of course the names change and the longitude is called Eastings and the latitude Northings.


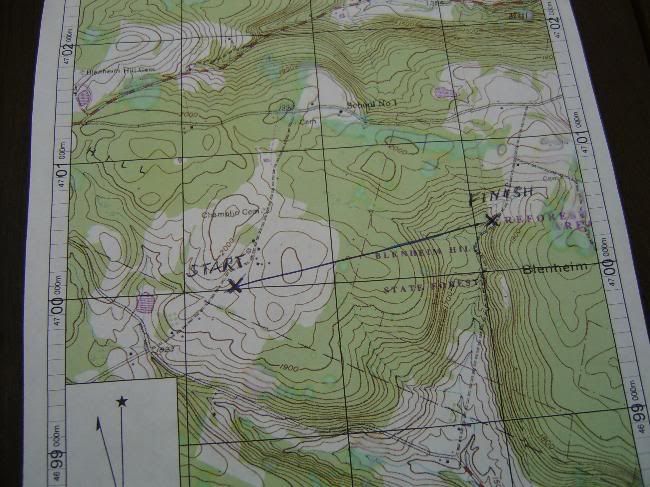
hillbleh.jpg


In our map you can see an X named start and another X named finish. The place marked finish is where we left the quads on the side of the trail to climb up to Blenheim Hill early that morning. The purpose was to check the creek for trout and scout the area adjacent to the top of the hill.
The reading on the GPS for the place where we left the quads, was 4.700.200 meters North (you use the margin of the map scale) and 541,100 meters East from zone 18 (you use the scale in the top of the map). The first two numbers are the Zone and do not count as meters.

As we had spent two days using the GPS on others locations the gadget was getting very low on battery juice, so we decided to navigate by compass and save the batteries to take readings of the position of interesting places only.
By the end of the day and very tired we found ourselves near the unimproved road that lead to the road next to the cemetery. A reading of our position with the GPS using the UTM system indicated that we were 4,700.000 meters north of the Equator and 539,400 meters east of the zone 18, (see how easy is to count meters in the 1,000 squares with the tick’s marks in the margin of the map counting for 100 meters each).

Tracing a line from start to finish and measuring the degrees with the compass (used as a protractor and disregarding the magnetic needle) gave us a direction to go 80 degrees and 1700 meters for distance, (but the GPS already told us that).

The trek was on okay -terrain slopping downhill and we had to be careful with our footing only in the last 350 meters downhill to the quads.
The other option was to take the road going to the one near the cemetery (1300 meters) walk on that road passing by the ruins of the School until the next trail left (1900 meters) and walk uphill about 1,000 meter to the quads, a total of 4,200 meters.
In a heavy forest with no landmarks and not elevation to take triangulations readings with a compass, it is impossible to know where you are, the GPS can give you your exact position day or night and you can plot that position in the map using the Universal Transverse Mercator grid.

You can do that also with the Longitude and Latitude, but you have to prepare your map (with a different grid) and have a latitude and longitude ruler to measure your position. As GPS’s are easily adjusted for the UTM grid, it is the most convenient and easiest to use of all the grids.

In this explanation we have used the three tools to complement each other, the map, GPS and compass, and demonstrated that finding a road at the end of the day, it is not the shortest route for traveling to your destination; it also demonstrated that you don’t have to be glued to your GPS (as I see many people in the woods doing) to get your money worth out of the gadget.
Best wishes

Black Bear
 
AREA, LINE AND POINT POSITION

In my previous post I marked my point position and the point position of the quads on the map with the help of the GPS and the UTM grid on the map.
That pin point of location is called point position, and should be the goal of every traveler in the wilderness to know about his point position; after all you could be lying down with a broken leg unable to move and in need of rescue.
Line position is when you know that you are on a feature on the map but cannot pin point your exact location, let’s say you know you are somewhere along the river, road, ridge, trail or compass bearing, but you don’t know exactly where.

Area position is when you know you are in a general area on the map; your goal should be to know at all times where you are on the map, and if you can tell your point position the better, you never know when you may need to summons help (over your cell phone or radio) and need to tell them exactly where you are.

Now we are going to try to mark our point position with the help of our compass and map alone, no GPS this time to help us out.
To accomplish this you need a map with an UTM grid. Since 1989 all new maps are printed with the UTM grid. If your map doesn’t have it you can trace it by the ticks’ marks on the edges of map using a yard stick and a pencil.

For compass and map work I recommend you spend a few dollars more and buy one with the adjustable declination scale, I use the Suunto M-5SK (smoke killer) but there are others in the market that have this convenient feature.
That way, when you are taking or plotting readings from the compass the values will be in geographic North and you will not have to be doing mathematics factoring the declination on your calculations.

Also forget about using lensatic or prismatic compasses, its readings are in magnetic and don’t have a base plate that can be used as a protractor like in the Silva system. To use lensatic and prismatic compasses with maps you will also need to carry a protractor to measure the angles and convert the magnetic readings to true North by adding or subtracting the declination, something that you don’t want to do when you are under pressure or confused by cold or stress.

The Silva system is a compass, protractor, measuring device, ruler, straight- edge and even (as in the case of the M-5SK and others) a magnifying glass.
If you rather use the compass that you already have, and it is a base plate compass or one with transparent base, you can mark your declination with a piece of white label like the one in this picture.

whitedeclimark.jpg


Just remember to place the compass magnetic needle in top of that mark to compensate for the declination.

It will be good if before entering the woods you can count with a base line; the base line could be the road where you left your car, a river, a power line or any other feature that is marked on the map and goes for a long way, that way you always have the option of trying to reach your base line if you are running out of daylight.

USE HANDRAILS IF YOU CAN

A handrail is a feature that is marked on the map. A trail, river, or other geographic feature that goes in the direction you want to go. When you are in a handrail, you are in a line of position. If you know you are on the trail or next to the creek, to find your point position you just need another feature that is on the map from where you can take a compass back bearing in the field.

Let’s say you see a hill in the distance that is also marked on the map. Take a back bearing with your compass to that hill, you know how to do that, you point the compass direction of travel arrow to the hill and rotate the capsule until the SOUTH END of the magnetic needle is “boxed” in the declination arrow.

Yes, for a back bearing use the SOUTH end of the magnetic needle, not the NORTH end.
Read the degrees at the junction of the bezel and line of travel arrow, and plot that in your map.

HOW TO PLOT

Let’s say that the back bearing you took to the hill is 80 degrees, don’t move the compass capsule to change that reading, place the long edge of the base plate of the compass on the hill that is on the map, and the direction of travel arrow toward your position (the river in this case), make sure the NORTH on the compass is toward the top of the map and then rotate the entire compass (not the capsule) until the North lines scribed in the base plate are parallel with the NORTH lines on the grid of the map.
For map work, always disregard the magnetic needle, you are using your compass as a protractor and measuring angles.

A line traced at the edge of the compass from the hill toward the river, will cross the river at the exact point where you are located, this is your point position. And now you can even read the coordinates of that position from the UTM grid, and tell any rescue party the UTM values of where you are.

TRIANGULATION
This you will have to do when you know only that you are in a general area of your map, your area position.

To get your point position you need two features that are shown in the map from where you can take back bearing in the field. Let’s say you are lucky and you see two hills that are also in the map and at more or less right angles. Take a back bearing on one and plot it in the map, now you are in a line of position, you are somewhere along that line. Take a back bearing on the other hill and plot it in the map, where the two lines cross, there is your point position.
Triangulation works even better when you use three features to take back bearings.

AREA POSITION

If you are in a featureless area with no hills, radio towers, power lines or other help for your triangulation, at least you should have been smart enough to look at your map often and noticed the changes in the topography.
You must know if you passed the hills that are in your map and how long ago, you must know if you are in a flat area and nearing an elevation change in the terrain or if the terrain starts to slope downhill. Based on these clues you will have an idea of what your area position is. With luck the chopper will look for you only in a reduced area of one kilometer based on the coordinates from the UTM grid that you will transmit over the phone or radio.


POINT POSITION AGAIN

Let’s give here one example of point position using a real map, and a figured scenario so you understand how important point position is even if you are not interested in marking your tree stand on the map.

Let’s say I am exploring the top of B-----g Ridge in the Adirondacks, this is a ridge that encompasses many miles and even knowing I was there, I didn’t know where I was exactly.
To the West I can see the peak of S--d Pont Mountain, one of the tallest in the area.

spomt.jpg


Presently, I spotted in the forest floor something flashing in the sunshine and in picking that up; I held in my hands a pair of prescription eye glasses.
In further looking around I discovered a human skeleton dressed in the remains of orange hunting clothes. A rusty rifle near by confirmed my assessment that the unfortunate bones belonged to a hunter.

Looking at the back of his jacket remains I found a license tag protected by a transparent license holder, as the tags are made of weather and tear resistant material they have survived quite well the estimate three or four years of exposure to the elements.

spprotractor.jpg


In my pack I had some orange surveyor tape and I marked the area with it, then I took out my compass and took a back bearing to the top of S--d Pond Mountain, the back bearing is taken with the SOUTH part of the needle because you want the bearing FROM the mountain to your position. You can also take a direct bearing but then when plotting it in the map the direction of travel arrow should be pointing to the MOUNTAIN instead of from the Mountain to your position.

I like to do the back bearing, because if I were using a regular protractor the numbers to my position will be the back bearing numbers.

The back bearing indicates a 95 degrees direction from the top of the mountain, so I placed the compass with one long edge on the peak of the Mountain, and the direction of travel arrow toward the B----g Ridge, making sure that the NORTH part of the compass points toward the NORTH part of the map.

I rotated the whole compass by the base plate (I don’t touch the capsule or change the setting in the bezel) until the lines inscribed in the base of the capsule are parallel to the North lines on the map.
Now the edge of the base-plate is passing over my exact position on the Ridge. I traced a pen line to connect the two points, and placed an X in the map to mark my discovery.

As I had to be back in New York City next morning for a court hearing, it is no way I was going to be bringing a party here to the top of the ridge, or getting further involved in this matter, so late that afternoon on my way back to New York I dropped an envelope in the police headquarters with a note of explanation, the marked map and the hunting tags of the corpse.
By the UTM grid they can get the exact location in Easterns and Northings and transfer that to a GPS equipped chopper and effectuate the recovery as well, or better, that if I were there to direct them.

Best regards
Black Bear
 
COMPASS DIP


This will be of interest only to the people that travel to locations around the world, and are in need of using a compass to get their bearings.
I first encountered compass dip, many years ago, in a trip to Bariloche, Argentina. I was there to fly-fish for trout in the Nahuel Huapi Lake and climb the Cerros Tronador, Catedral and Lopez.
I took my regular base plate compass, which I had used extensively in North America, and I found there that the needle was sticking to the card providing false readings.
I was baffled until my guide explained that most climbers from the states had compasses that stick and that I needed a compass with the needle balanced for the area. In my compass, the pull from the forces of the magnetic north made the south end of the needle dip and stick to the card.
I found later that when compasses are made, they are balanced for the zone that they are going to be sold, and that the manufacturers have indentified 5 zones of dip.

MAP OF THE FIVE ZONES


dipchart.jpg


Compasses sold in North America are adjusted for the zone one, and where I was in Argentina was considered zone four. Compasses sold over there by the sporting good stores where adjusted for that zone.
If you have opportunity to travel to Australia, you will be in zone five and the dip of the needle will be even more pronounced.

ENTER THE GLOBAL NEEDLE

Suunto has come out with a couple of traveler’s compasses with a global needle. Brunton has at least one in their line and maybe other manufacturers are doing the same.
This is a needle that is optimized to be use in all places (that is why they are called Global compasses). Brunton is making the 8096 AR (a racing compass) with the global needle, and it makes sense as the runners don’t have to stop and level the compass perfectly to take readings as the global needle can work with even a 20 degree tilt.

Climbers can benefit from a global needle as they have more latitude to take a reading from a peak that is too close, as sometimes bearings have to be taken using the imaginary center line of a mountain instead of a peak when using the regular compasses, as the tilt upward will ground the regular needle. With the global needle the chances that you can still use the peak for your target are increased if the angle is less than 20 degrees.

So we should welcome the development of the Global needle and hope that more choices will be made available in the different models of compasses.
All the best
Black Bear
 
SILVA RANGER 515 CL COMPASS

A mirror sighting compass that I use when I want the field reading to be as accurate as possible. The mirror can be tilted 45 degrees to observe the needle for proper positioning on the gate at the same time that a bearing is taken with the sight.

With scales of 1:24,000, 1:25,000, and 1:50,000 , the Silva Ranger 515 CL sighting compass makes plotting easy no matter which type of topographic map you're using.

Other versatile compass features include a 0-360 degree bezel with 2 degree increments, clinometer, 1/20-inch scale, millimeter rules, silicone feet for map gripping, adjustable declination, sighting mirror with vee notch, and lanyard with adjustable slider.

Dimensions: 4" x 2-1/2"
Overall Weight: 2.3 oz.

silva.jpg


Price of the compass is about $60 USD it is one of the top notch compasses for map work.

Suunto also have a similar model, and Silva an others also have smaller mirror compasses without declination scale or clinometers

mirrorcomp.jpg


Best
Black Bear
 
Back
Top