case hardening questions

buggley

New member
i just started case hadening and i cant get the colors i want. i get lots of redish brown and grey and black splotching but i cant get yellows or blues.
i heard that cynide in the charcoal makes more blue, so i used some old wool from a sock butit didnt seem to make a diference. am i getting to much cynide inthere? i also used a table spoon of scotts fertalizer for extra nitrates but i dont know if that would work either. i try to use 2 parts leather and bone for one part wood but i am not sure if i should change that up either. but i just cant get the colors i want. do i need less wood charcoal? is it a posibilty that the metal isnt getting hot enough? has any one else tried this? i am having a hard time learning this on my own lol
 
It could be a temperature issue. Temperature needs to be well controlled for consistent results. When you draw back hardened steel, the higher the temperature the darker the oxides formed, but that's in air. In case hardening the carbon sources tend to consume oxygen, which is why you don't get scale. Obviously they don't consume all the oxygen or the steel would stay white, like it does with Kasenit. I guess I would hesitate to use oxidizers, like fertilizers, just because of the potential to get a vigorous combustion with the carbon source. I've never tried it, but nitrates and nitrites are normally used in molten salt bluing (hot bluing).

The carbon sources, like the kind of charcoal, can be critical, as other chemicals in them, like the phosphorous in bone or the cyanide in fruit pits, can promote or detract from colors. I recommend you read through this description for a fairly detailed approach.
 
Can't get blue ? That's the most common color so something is wrong with your method. Color case hardening is difficult to learn ,with many variables .
 
what i got was like a rust or brick red. i have seen hues of red but not this kind of solid red pattern. when i quenched it i put the water to it thinking it was still hot. it took me 3 trys before i come to my sense and checked it to see if it was warm. i was going to use fruit pits but fruit is pricey so i used an old wool sock to get the cyanide. cyanide absorbs oxygen. that is how it kills you. if it gets in you it robs your cells of oxygen. if you burn wool it creates cyanide gass but it bonds with the air so quickly that you would have to burn alot and have your face right over it before it can harm you.
i know it will be alot of trial and error but there is a cause and effect for every thing. why did it turn red?? i preped and cleaned all the partd the night before, could it be trace amounts of surface rust that reacted some how? it looks like rust. i hate not haveing some one here to show me whats going on lol.
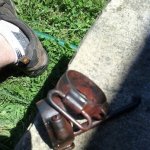
this is what i got
 

Attachments

  • my first color.jpg
    my first color.jpg
    50.6 KB · Views: 53
i ran another tes batch and i got similar results with more blue. is it a chance that the coal is causeing the red colors?
 
Buggley,

Your red really does look like rust in the photo. You'd need to hold the pieces up to light and an acute angle so the light glances off so you can see the smoothness of the surface. If it isn't as glossy in the red areas as in the rest, you may have actual rust, though I'm not sure from what. One test would be to boil the parts in distilled water for 15 minutes to see if it darkens (this has to be done without oil present, so you need to water quench, then boil right away). It is difficult to form red rust at high temperatures in air, but red color staining is perfectly possible and shows up in color case hardening, though it is usually not that orange, assuming the color rendition of the photo is coming through accurately. You haven't detailed your process, so it's hard to guess any further where the issue might be.

One thing that did occur to me is it could have been present in old parts but covered up so it didn't show until heated. The lack of oxygen could then stop it from turning blue. Did you put the parts in Evaporust or some other oxide remover before final cleaning?

BTW, cyanide does not poison you by tying up oxygen directly. Instead, it stops cellular uptake of oxygen and release of carbon dioxide by preventing the cytochrome c oxidase enzyme from operating properly in the mitochondria of the cells. So, technically, you do die from of lack of oxygen, but not because there wasn't plenty of oxygen available; your cells just couldn't use it when cyanide ions were present. Anyway, there isn't any of that enzyme in your steel.


Scorch,

Actually, burning wool does release some cyanide. Same for silk and a number of synthetic compounds. There's mention of it, here.
 
i used some birchwood and case rust and blue remover but after that i washed them with some dawn dish soap and warm water a few times to get off what ever residue might be left. after getting washed they were dried in a towel then set out over night. the rust may have been a tiny tiny film of surface rust that came over night. but the second batch had the same red coloring but with alot of bule mixed with it. i am wonderign if it has anything to do with the raw coal i am using or just poor cleaning
 
Using raw coal for this process is new to me. I would be concerned the wrong grade of coal might have too much sulphur or oil in it. Charcoal from bone and coconut husk and hardwood are more commonly used, and they've had moisture, oils and whatnot burned out of them.

You can make your own charcoal from dinner plate bones by heating it in closed pipe that has a vent hole for steam and air expansion. You can break up charcoal grill brickettes for hardwood charcoal, though you want to be aware the shapes of the carbon sources can affect the coloring pattern, so you might want to sift out dust. Or you might want to get some hardwood plane shavings or other scrap shapes make charcoal with them, for example. Some fellows tie shoelace size strips of leather around the work to get a stripe pattern, so you don't necessarily have to have all pre-charred carbon sources.

I forget what acid is in the Birchwood Casey remover. Probably phosphoric, which shouldn't be bad, but some used to use hydrochloric. Some acids can activate the surface and make it more prone to rusting. I used to find that would happen with some cold blues that had nitric acid in them, too. The cure I discovered was to have a strongly alkaline cleaner to apply immediately after the exposure to the acid was complete. It penetrated and neutralized the acid. I used Formula 409, but you can take a quart of water and dissolve a couple of tablespoons of baking soda in it, then add a short squirt of the Dawn to help it wet faster. As soon as you've done a quick rough rinse off of the remover, drop the part in the baking soda solution for a couple of minutes and shake it around in the stuff to get it throughout the nooks and crannies.

While the parts are still in the baking soda, start a clean pot of distilled water (grocery store gallon jug of distilled (not mineral) water is just fine) to boiling on the stove. Wearing rubber gloves so you can't contaminate the parts with your skin oils, rinse the soapy baking soda solution off very thoroughly in running water. Then hang the parts on pieces of wire and suspend them in the boiling distilled water for at least 5 minutes. This does two things. One is that it converts any microscopic red rust that has formed into blue/black magnetite. That is how conversion of red rust in rust bluing is done. Second, it gets the part hot, so when you pull it out of the water and shake the excess water off, its surface dries almost immediately. Doing so in the presence of heat and water vapor causes a thin layer of blue oxide to form. It can be so thin you can't see it with the naked eye, but it's there. That thin layer of blue actually protects the steel from forming red rust for a little while (hours to days, depending on your atmospheric conditions). Distilled water won't leave water spots that could affect your final work; also some tap water has minerals in it that prevent it from converting red rust to blue (I found this out the hard way).

Be careful not to touch the metal with bare hands or greasy gloves. Use tongs if you have to, or wear very clean rubber surface gloves. Hang the parts from the wire rather than let them touch any paper product, as those often have acid traces in them. I keep a roll of stainless MIG welding wire just for this purpose. Cheap, easy to clip to a length and it won't contaminate anything. It is, however, springy. You can use the softer stainless wire that comes in a roll at Lowe's instead, if you want to. Iron wire is technically OK. Just be aware you normally have to degrease it before using it.

That should give you time to pack it up charcoal and start the color case hardening process. If you can't get to it right away, store the parts and their hanging wires in a jar submerged in virgin naphtha or virgin mineral spirits. When you are ready to work again, pull them out and let them hang until dry then pack them in the carbon sources and run the hardening process. I would avoid touching the part with your bare finger during any of this.

Nick
 
thanks for the advice i will give it a try and check to make sure i am not over looking every thing. those are the little tricks that would take ages to learn by my self.
 
I've given up using water with metal. After polishing etc., I clean thoroughly with Brake Kleen and wear those surgeon gloves. Any quenching is done with oil.

If hot tanking, I rinse with safety solvent. After rinse, I use Brake Kleen again to pull off any solvent residue left from the safety solvent and then let soak in hot oil.
 
The picture looks like the parts are not polished too well. You need a mirror finish to get a good splash of colors. I used junk leather, bone charcoal, tried walnuts, peanuts, peach pits and all kinds of weird stuff. I almost talked someone out of an urn of ashes he had in the closet. I got good blues, purples, tans and colors like that. I disagree with the article. I think with out use of cyanide the really bright yellows and golds just will not happen. When I was a kid there was an old gunsmith near us and he did small parts and shotgun receivers with cyanide. I mean REAL cyanide. It is extremely dangerous to work with and I passed on that stuff, but his colors were really bright. Try polishing better, be clean, and try some forced air. In the bottom of your quench tank, stick an air hose in with a fitting that has a bunch of small holes to release the air in small bubbles. Have a catch basket above the hose (Wire screening) to catch the crucible and parts. It really does make a difference. It seems to break up and vary the size of the color splotches. I picked that up from the old gunsmith also.
 
Gunplummer,

Interesting about the air bubble effect. Must be doing a sort of selective application of oxygen to the hot surface. New one on me. Thanks for the info.


Sc928porsche,

Keep in mind he is color case hardening, so he needs the water for the color to come out right. Also, he will be pouring red hot charcoal embers into the quench which could set even a flame resistant quench oil on fire. You can watch how the spilled carbon flames up on contact with air in first twenty seconds of this video.
 
Unclenick, Absolutely.

Controlled oxygen. You can get different effects
by playing with the amount of "Fizz"

•Air pump with air stones and valve used in aquariums.
•Much deeper quench tank than used in video.
•Thin layer of sweet oil on surface of water.


Sorry, Sweet Oil is olive oil that has gone bad or rancid.
 
Last edited by a moderator:
In other words, oil that doesn't taste so sweet. ;)

(Hope you don't mind I merged your posts to condense space.)

I had a friend building flintlock actions who used to quench in a 55 gal. drum full of water. He had a full skin chamois he used to cut strips from for the stripe effects. I don't recall if he had an air pump running or not. Too long ago.
 
:D
My GrandPa said that Horse Hide was the best, For Holsters and Case coloring.
Always thought he was pulling my leg.
But yes, wrap it up tight with leather strips. The addition of some blood-mill
along with bone-mill works really well too.
 
Back
Top